Add database support for Spring Boot project
In this part of the tutorial, you'll add and configure a database to your project using Java Database Connectivity (JDBC). In JVM applications, you use JDBC to interact with databases. For convenience, the Spring Framework provides the JdbcTemplate class that simplifies the use of JDBC and helps to avoid common errors.
Add database support
The common practice in Spring Framework-based applications is to implement the database access logic within the so-called service layer – this is where business logic lives. In Spring, you should mark classes with the @Service annotation to imply that the class belongs to the service layer of the application. In this application, you will create the MessageService class for this purpose.
In the same package, create the MessageService.kt file and the MessageService class as follows:
- Constructor argument and dependency injection – (private val db: JdbcTemplate)
A class in Kotlin has a primary constructor. It can also have one or more secondary constructors. The primary constructor is a part of the class header, and it goes after the class name and optional type parameters. In our case, the constructor is
(val db: JdbcTemplate).val db: JdbcTemplateis the constructor's argument:@Service class MessageService(private val db: JdbcTemplate)- Trailing lambda and SAM conversion
The
findMessages()function calls thequery()function of theJdbcTemplateclass. Thequery()function takes two arguments: an SQL query as a String instance, and a callback that will map one object per row:db.query("...", RowMapper { ... } )The
RowMapperinterface declares only one method, so it is possible to implement it via lambda expression by omitting the name of the interface. The Kotlin compiler knows the interface that the lambda expression needs to be converted to because you use it as a parameter for the function call. This is known as SAM conversion in Kotlin:db.query("...", { ... } )After the SAM conversion, the query function ends up with two arguments: a String at the first position, and a lambda expression at the last position. According to the Kotlin convention, if the last parameter of a function is a function, then a lambda expression passed as the corresponding argument can be placed outside the parentheses. Such syntax is also known as trailing lambda:
db.query("...") { ... }- Underscore for unused lambda argument
For a lambda with multiple parameters, you can use the underscore
_character to replace the names of the parameters you don't use.Hence, the final syntax for the query function call looks like this:
db.query("select * from messages") { response, _ -> Message(response.getString("id"), response.getString("text")) }
Update the MessageController class
Update MessageController.kt to use the new MessageService class:
- @PostMapping annotation
The method responsible for handling HTTP POST requests needs to be annotated with
@PostMappingannotation. To be able to convert the JSON sent as HTTP Body content into an object, you need to use the@RequestBodyannotation for the method argument. Thanks to having the Jackson library in the classpath of the application, the conversion happens automatically.- ResponseEntity
ResponseEntityrepresents the whole HTTP response: status code, headers, and body.Using the
created()method you configure the response status code (201) and set the location header indicating the context path for the created resource.
Update the MessageService class
The id for Message class was declared as a nullable String:
It would not be correct to store the null as an id value in the database though: you need to handle this situation gracefully.
Update your code of the MessageService.kt file to generate a new value when the id is null while storing the messages in the database:
- Elvis operator – ?:
The code
message.id ?: UUID.randomUUID().toString()uses the Elvis operator (if-not-null-else shorthand)?:. If the expression to the left of?:is notnull, the Elvis operator returns it; otherwise, it returns the expression to the right. Note that the expression on the right-hand side is evaluated only if the left-hand side isnull.
The application code is ready to work with the database. It is now required to configure the data source.
Configure the database
Configure the database in the application:
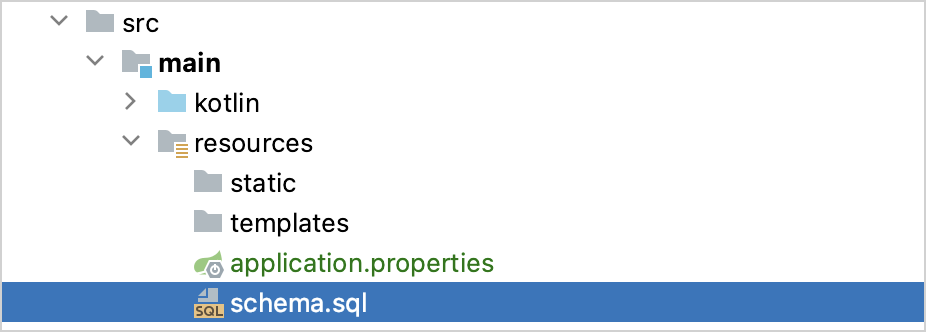
Create the
schema.sqlfile in thesrc/main/resourcesdirectory. It will store the database object definitions:
Update the
src/main/resources/schema.sqlfile with the following code:-- schema.sql CREATE TABLE IF NOT EXISTS messages ( id VARCHAR(60) PRIMARY KEY, text VARCHAR NOT NULL );It creates the
messagestable with two columns:idandtext. The table structure matches the structure of theMessageclass.Open the
application.propertiesfile located in thesrc/main/resourcesfolder and add the following application properties:spring.application.name=demo spring.datasource.driver-class-name=org.h2.Driver spring.datasource.url=jdbc:h2:file:./data/testdb spring.datasource.username=name spring.datasource.password=password spring.sql.init.schema-locations=classpath:schema.sql spring.sql.init.mode=alwaysThese settings enable the database for the Spring Boot application.
See the full list of common application properties in the Spring documentation.
Add messages to database via HTTP request
You should use an HTTP client to work with previously created endpoints. In IntelliJ IDEA, use the embedded HTTP client:
Run the application. Once the application is up and running, you can execute POST requests to store messages in the database.
Create the
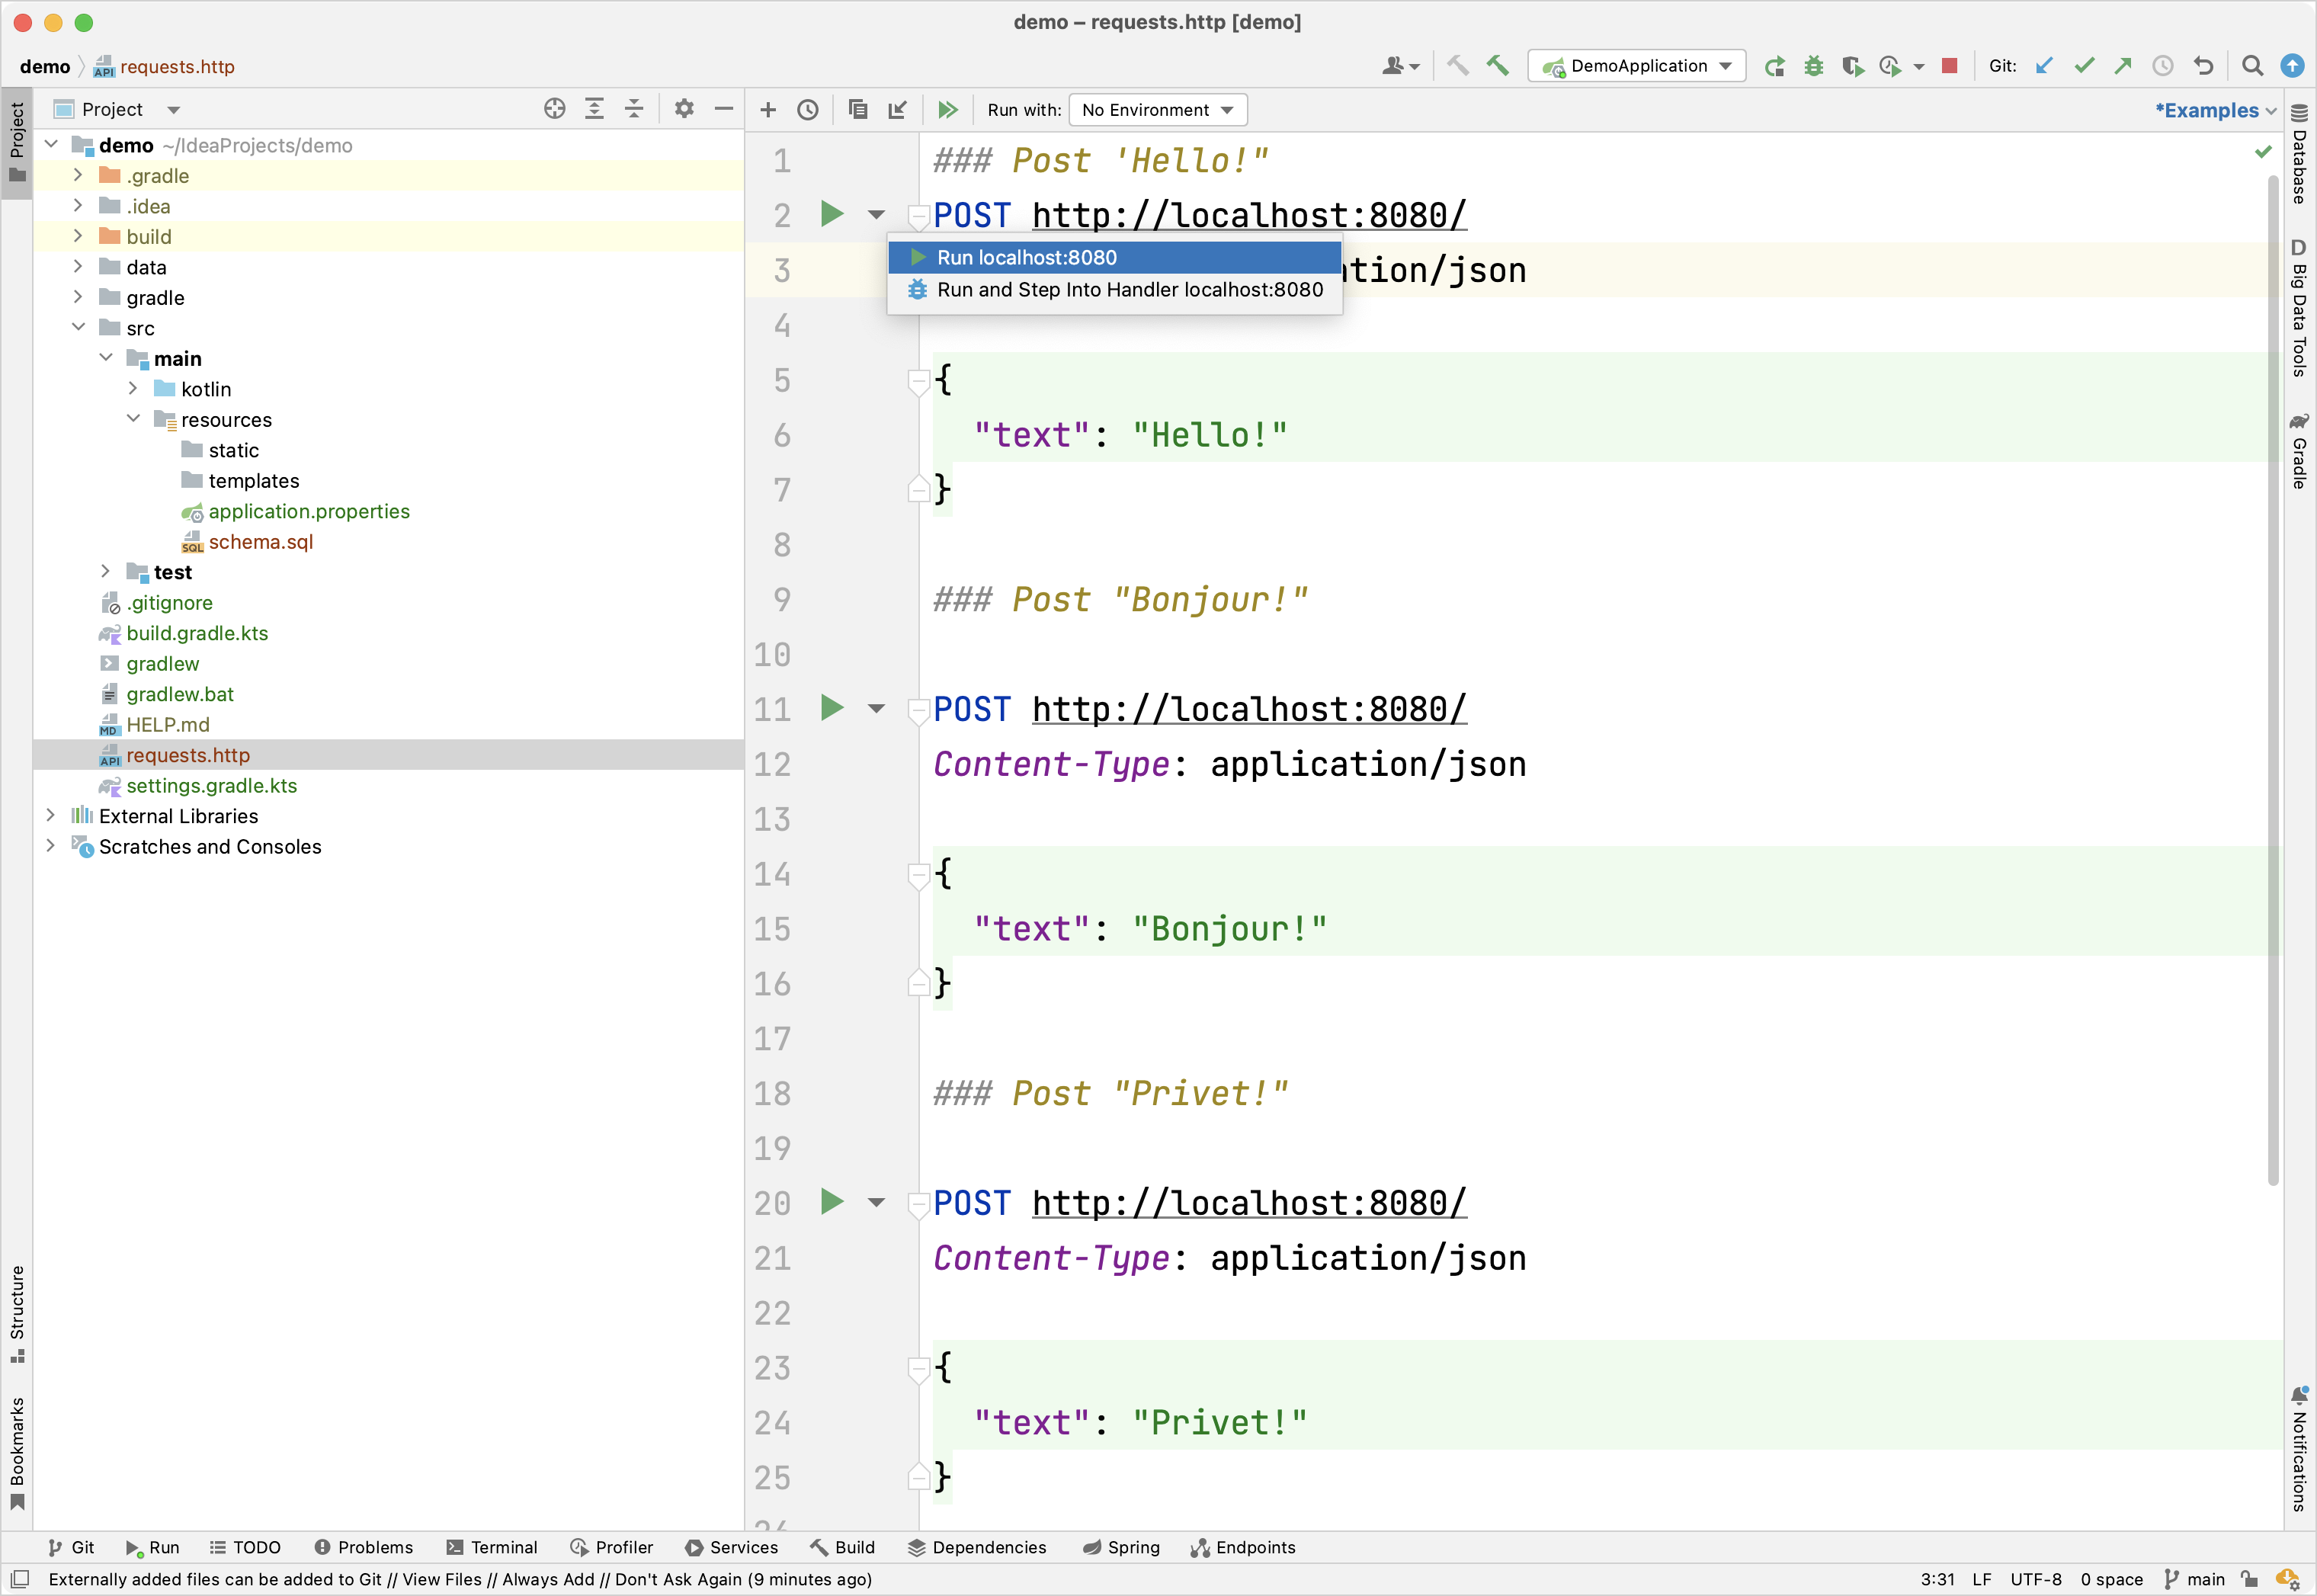
requests.httpfile in the project root folder and add the following HTTP requests:### Post "Hello!" POST http://localhost:8080/ Content-Type: application/json { "text": "Hello!" } ### Post "Bonjour!" POST http://localhost:8080/ Content-Type: application/json { "text": "Bonjour!" } ### Post "Privet!" POST http://localhost:8080/ Content-Type: application/json { "text": "Privet!" } ### Get all the messages GET http://localhost:8080/Execute all POST requests. Use the green Run icon in the gutter next to the request declaration. These requests write the text messages to the database:

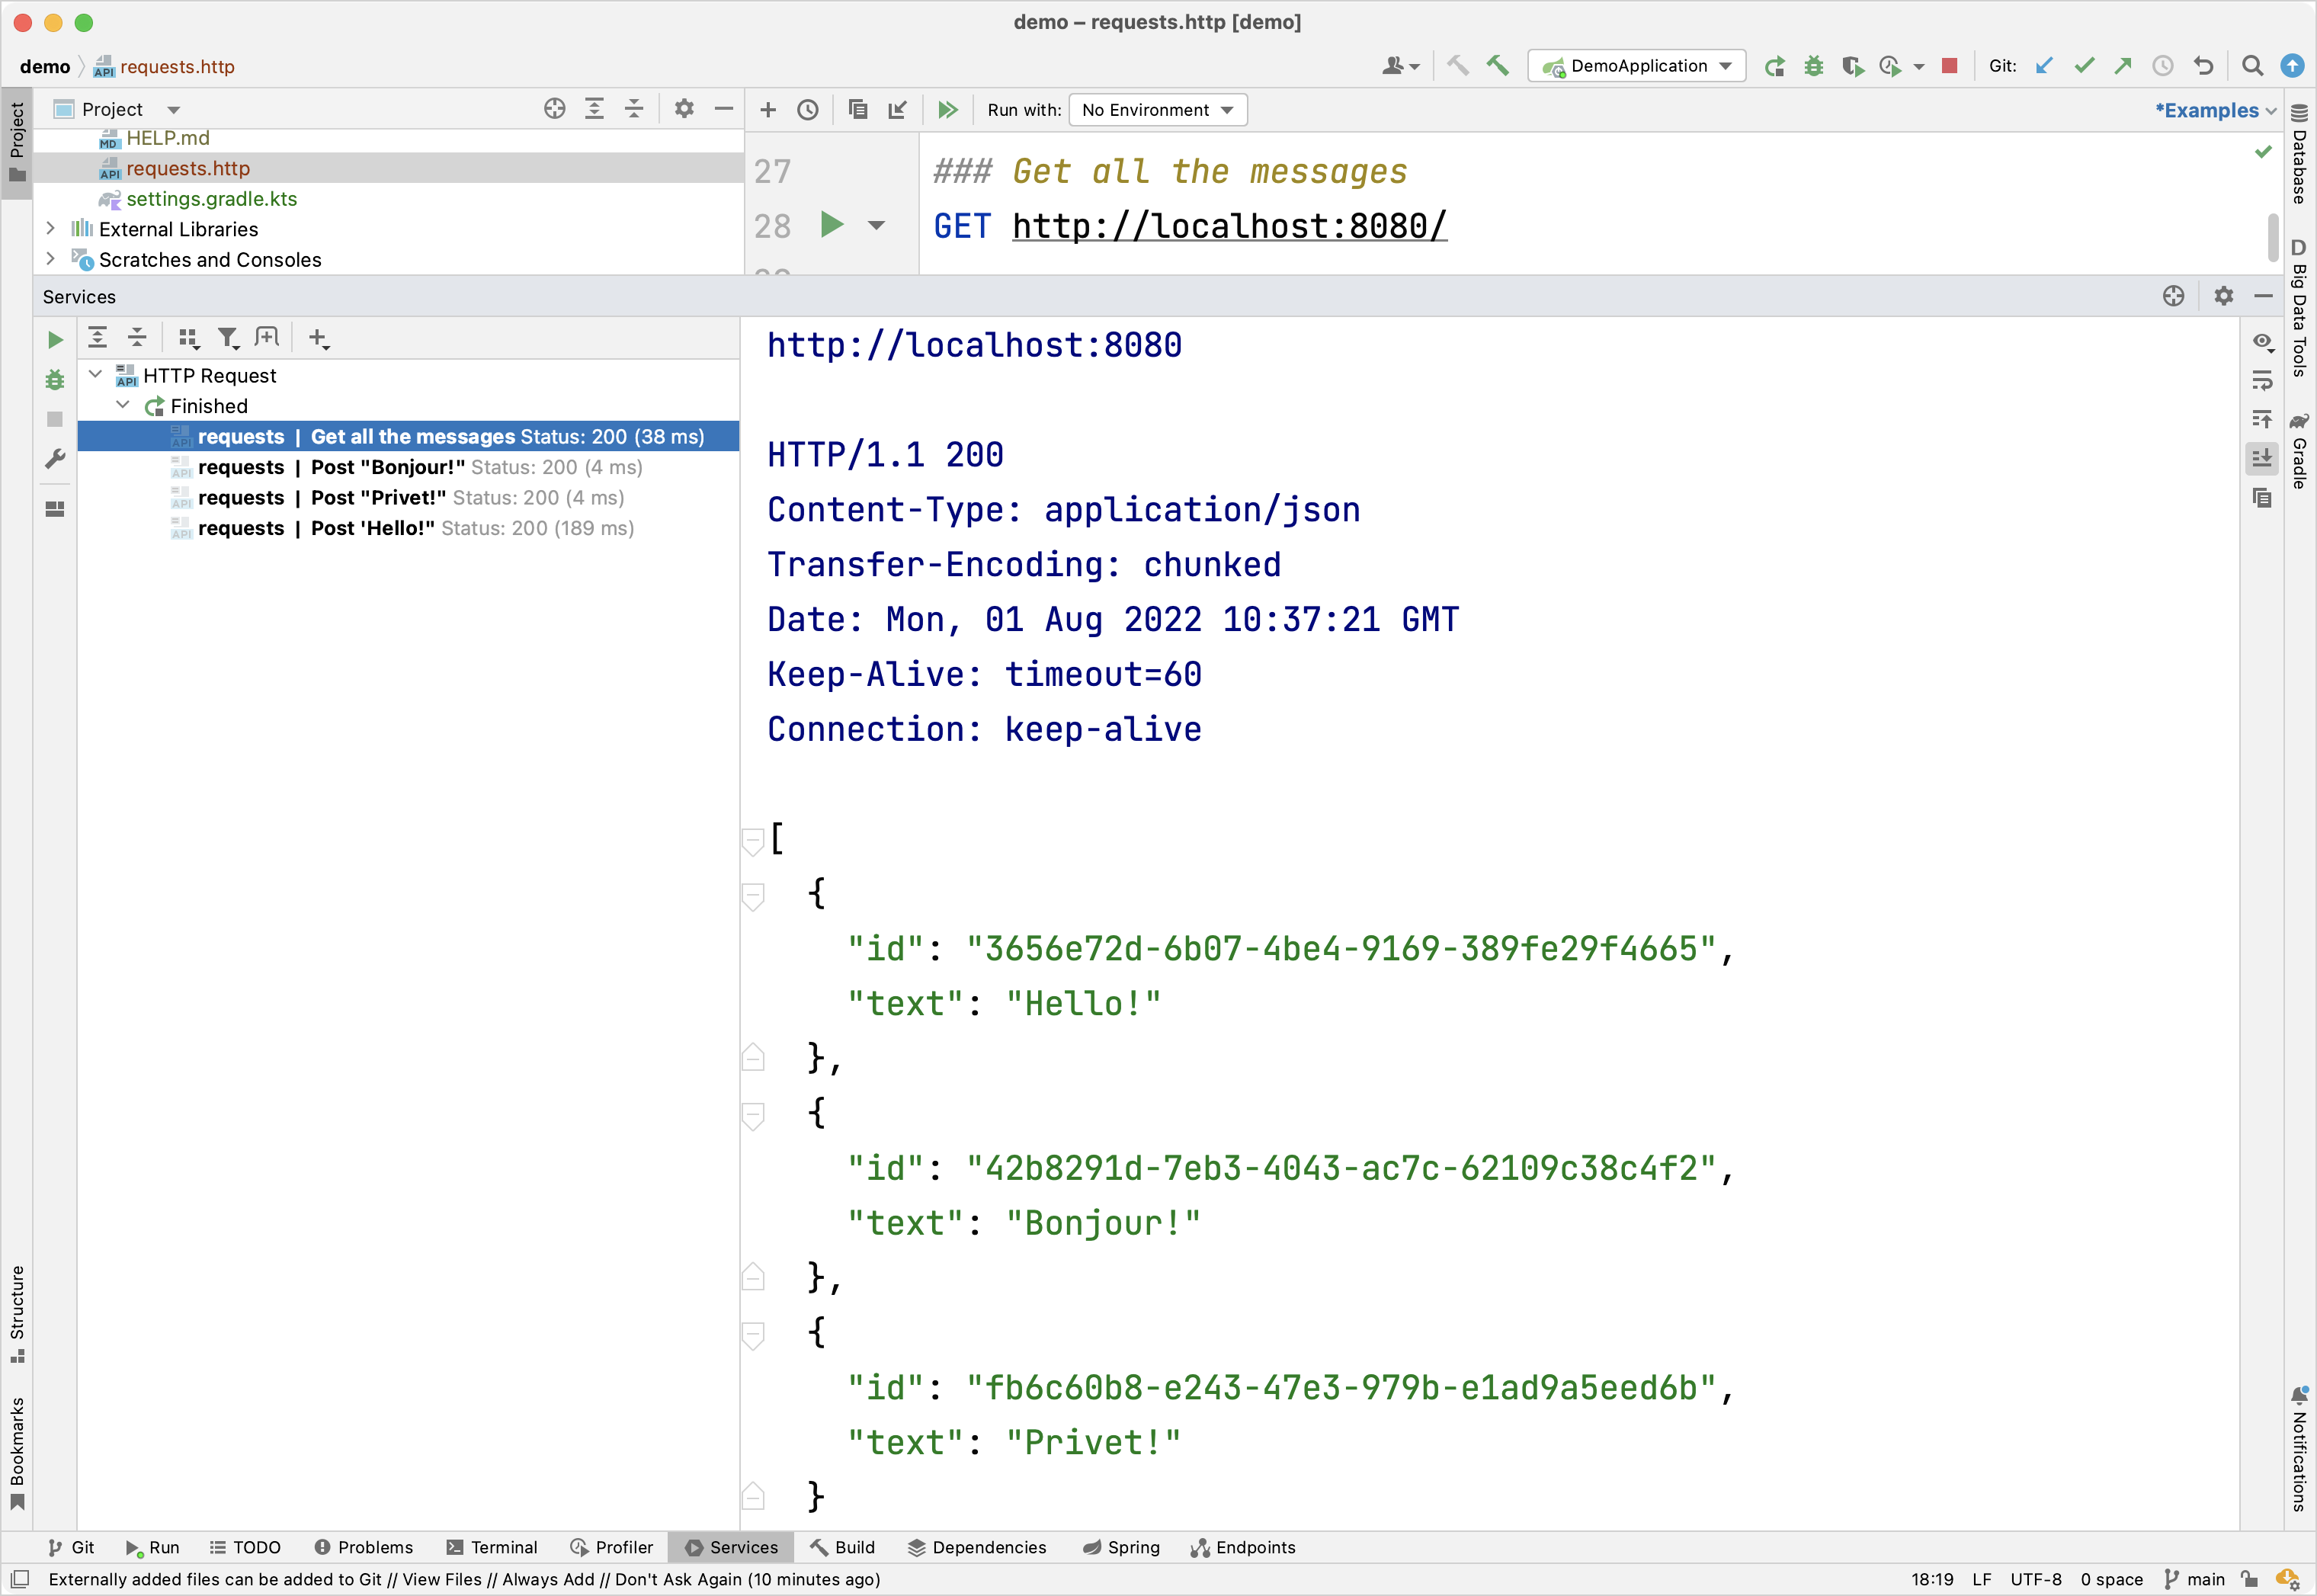
Execute the GET request and see the result in the Run tool window:

Alternative way to execute requests
You can also use any other HTTP client or the cURL command-line tool. For example, run the following commands in the terminal to get the same result:
Retrieve messages by id
Extend the functionality of the application to retrieve the individual messages by id.
In the
MessageServiceclass, add the new functionfindMessageById(id: String)to retrieve the individual messages by id:// MessageService.kt package com.example.demo import org.springframework.stereotype.Service import org.springframework.jdbc.core.JdbcTemplate import org.springframework.jdbc.core.query import java.util.* @Service class MessageService(private val db: JdbcTemplate) { fun findMessages(): List<Message> = db.query("select * from messages") { response, _ -> Message(response.getString("id"), response.getString("text")) } fun findMessageById(id: String): Message? = db.query("select * from messages where id = ?", id) { response, _ -> Message(response.getString("id"), response.getString("text")) }.singleOrNull() fun save(message: Message): Message { val id = message.id ?: UUID.randomUUID().toString() // Generate new id if it is null db.update( "insert into messages values ( ?, ? )", id, message.text ) return message.copy(id = id) // Return a copy of the message with the new id } }- vararg argument position in the parameter list
The
query()function takes three arguments:SQL query string that requires a parameter to run
id, which is a parameter of type StringRowMapperinstance, which implemented by a lambda expression
The second parameter for the
query()function is declared as a variable argument (vararg). In Kotlin, the position of the variable arguments parameter is not required to be the last in the parameters list.- singleOrNull() function
The
singleOrNull()function returns a single element, ornullif the array is empty or has more than one element with the same value.
Add the new
index(...)function with theidparameter to theMessageControllerclass:// MessageController.kt package com.example.demo import org.springframework.http.ResponseEntity import org.springframework.web.bind.annotation.GetMapping import org.springframework.web.bind.annotation.PathVariable import org.springframework.web.bind.annotation.PostMapping import org.springframework.web.bind.annotation.RequestBody import org.springframework.web.bind.annotation.RequestMapping import org.springframework.web.bind.annotation.RestController import java.net.URI @RestController @RequestMapping("/") class MessageController(private val service: MessageService) { @GetMapping fun listMessages() = ResponseEntity.ok(service.findMessages()) @PostMapping fun post(@RequestBody message: Message): ResponseEntity<Message> { val savedMessage = service.save(message) return ResponseEntity.created(URI("/${savedMessage.id}")).body(savedMessage) } @GetMapping("/{id}") fun getMessage(@PathVariable id: String): ResponseEntity<Message> = service.findMessageById(id).toResponseEntity() private fun Message?.toResponseEntity(): ResponseEntity<Message> = // If the message is null (not found), set response code to 404 this?.let { ResponseEntity.ok(it) } ?: ResponseEntity.notFound().build() }- Retrieving a value from the context path
The message
idis retrieved from the context path by the Spring Framework as you annotated the new function by@GetMapping("/{id}"). By annotating the function argument with@PathVariable, you tell the framework to use the retrieved value as a function argument. The new function makes a call toMessageServiceto retrieve the individual message by its id.- Extension function with nullable receiver
Extensions can be defined with a nullable receiver type. If the receiver is
null, thenthisis alsonull. So when defining an extension with a nullable receiver type, it is recommended performing athis == nullcheck inside the function body.You can also use the null-safe invocation operator (
?.) to perform the null check as in thetoResponseEntity()function above:this?.let { ResponseEntity.ok(it) }- ResponseEntity
ResponseEntityrepresents the HTTP response, including the status code, headers, and body. It is a generic wrapper that allows you to send customized HTTP responses back to the client with more control over the content.
Here is a complete code of the application:
Run the application
The Spring application is ready to run:
Run the application again.
Open the
requests.httpfile and add the new GET request:### Get the message by its id GET http://localhost:8080/idExecute the GET request to retrieve all the messages from the database.
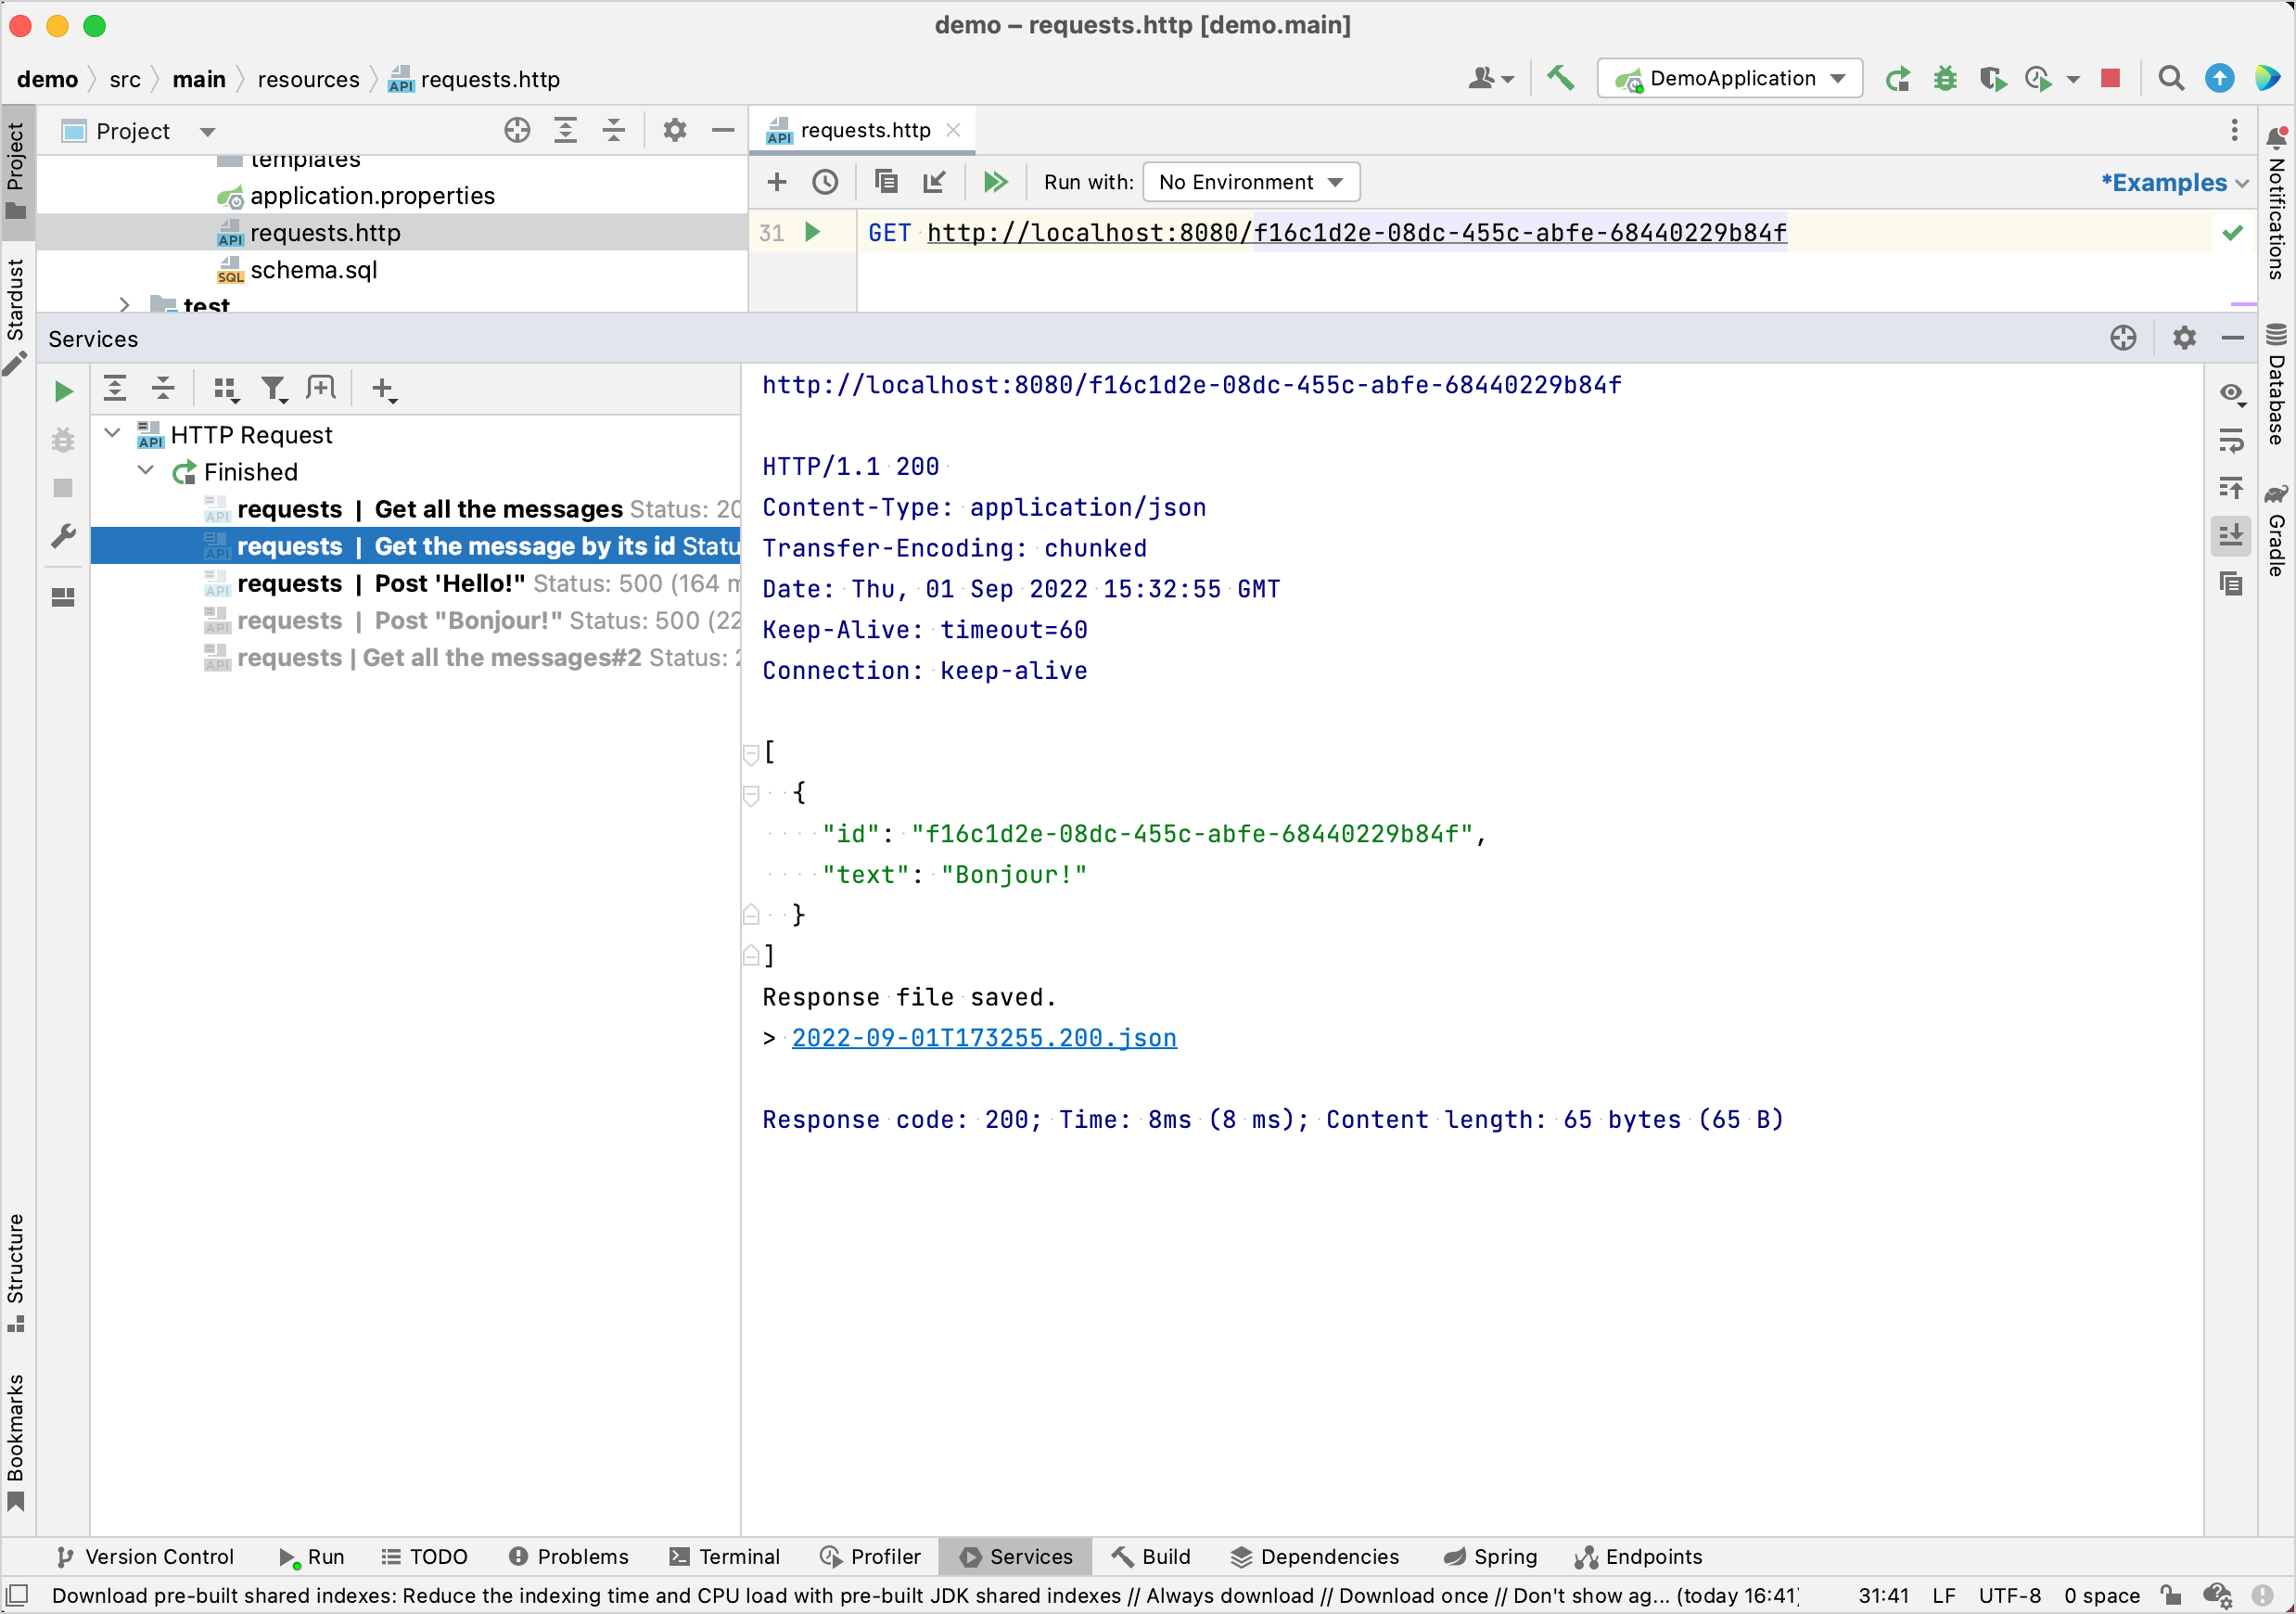
In the Run tool window, copy one of the ids and add it to the request, like this:
### Get the message by its id GET http://localhost:8080/f910aa7e-11ee-4215-93ed-1aeeac822707Execute the GET request and see the result in the Run tool window:

Next step
The final step shows you how to use a more popular connection to the database using Spring Data.