Add a data class to Spring Boot project
In this part of the tutorial, you'll add some more functionality to the application and discover more Kotlin language features, such as data classes. It requires changing the MessageController class to respond with a JSON document containing a collection of serialized objects.
Update your application
In the same package, next to the
DemoApplication.ktfile, create aMessage.ktfile.In the
Message.ktfile, create a data class with two properties:idandtext:// Message.kt package com.example.demo data class Message(val id: String?, val text: String)Messageclass will be used for data transfer: a list of serializedMessageobjects will make up the JSON document that the controller is going to respond to the browser request.- Data classes – data class Message
The main purpose of data classes in Kotlin is to hold data. Such classes are marked with the
datakeyword, and some standard functionality and some utility functions are often mechanically derivable from the class structure.In this example, you declared
Messageas a data class as its main purpose is to store the data.- val and var properties
Properties in Kotlin classes can be declared either as:
mutable, using the
varkeywordread-only, using the
valkeyword
The
Messageclass declares two properties usingvalkeyword, theidandtext. The compiler will automatically generate the getters for both of these properties. It will not be possible to reassign the values of these properties after an instance of theMessageclass is created.- Nullable types – String?
Kotlin provides built-in support for nullable types. In Kotlin, the type system distinguishes between references that can hold
null(nullable references) and those that cannot (non-nullable references).
For example, a regular variable of typeStringcannot holdnull. To allow nulls, you can declare a variable as a nullable string by writingString?.The
idproperty of theMessageclass is declared as a nullable type this time. Hence, it is possible to create an instance ofMessageclass by passingnullas a value forid:Message(null, "Hello!")
In the
MessageController.ktfile, instead of theindex()function, create thelistMessages()function returning a list ofMessageobjects:// MessageController.kt package com.example.demo import org.springframework.web.bind.annotation.GetMapping import org.springframework.web.bind.annotation.RequestMapping import org.springframework.web.bind.annotation.RestController @RestController @RequestMapping("/") class MessageController { @GetMapping fun listMessages() = listOf( Message("1", "Hello!"), Message("2", "Bonjour!"), Message("3", "Privet!"), ) }- Collections – listOf()
The Kotlin Standard Library provides implementations for basic collection types: sets, lists, and maps.
Each collection type can be read-only or mutable:A read-only collection comes with operations for accessing collection elements.
A mutable collection comes also with write operations for adding, removing, and updating its elements.
The corresponding factory functions are also provided by the Kotlin Standard Library to create instances of such collections.
In this tutorial, you use the
listOf()function to create a list ofMessageobjects. This is the factory function to create a read-only list of objects: you can't add or remove elements from the list.
If it is required to perform write operations on the list, call themutableListOf()function to create a mutable list instance.- Trailing comma
A trailing comma is a comma symbol after the last item of a series of elements:
Message("3", "Privet!"),This is a convenient feature of Kotlin syntax and is entirely optional – your code will still work without them.
In the example above, creating a list of
Messageobjects includes the trailing comma after the lastlistOf()function argument.
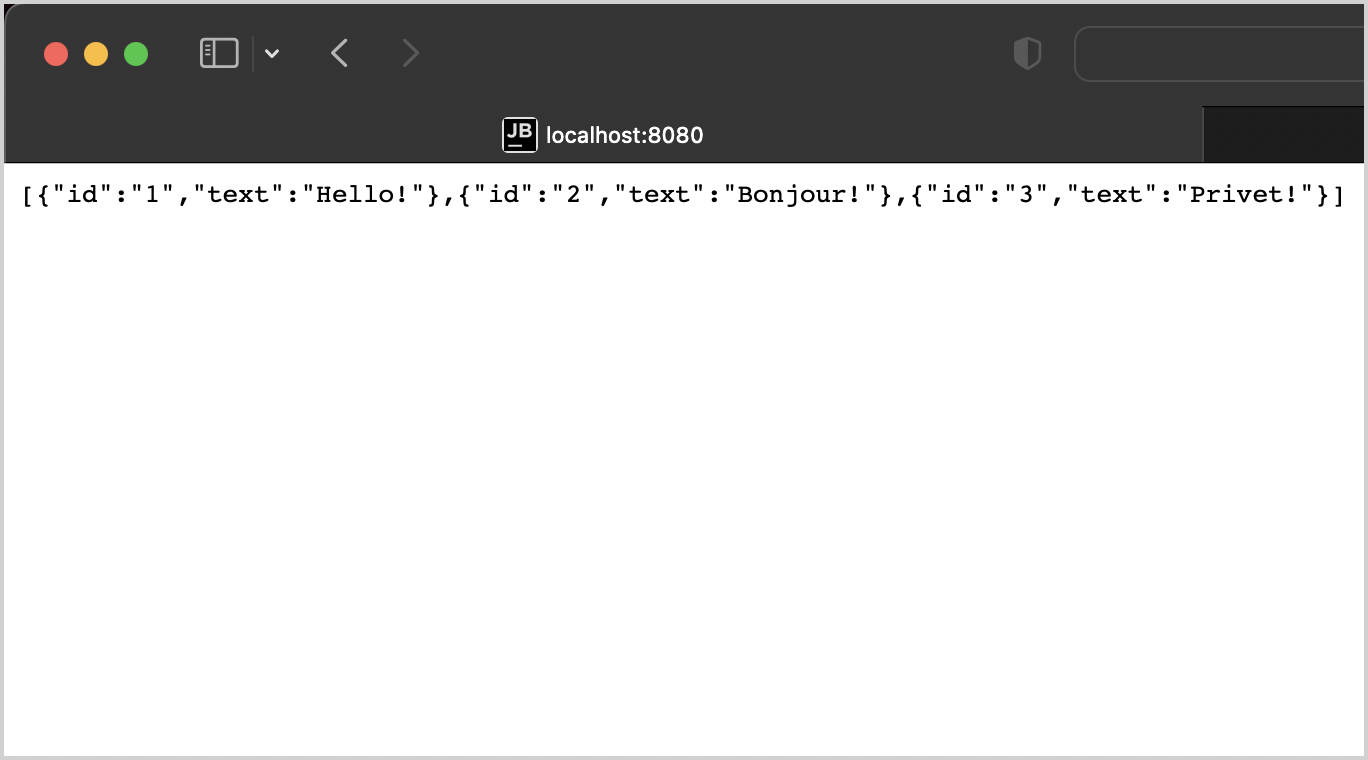
The response from MessageController will now be a JSON document containing a collection of Message objects.
Here is a complete code of the DemoApplication.kt, MessageController.kt, and Message.kt files:
Run the application
The Spring application is ready to run:
Run the application again.
Once the application starts, open the following URL:
http://localhost:8080You will see a page with a collection of messages in JSON format:

Next step
In the next part of the tutorial, you'll add and configure a database to your project and make HTTP requests.