Fully shared code: Time zone picker app
This tutorial focuses on sharing as much code between platforms as possible: the UI is implemented in common code using Compose Multiplatform, and the functionality is based on multiplatform libraries. For an example of sharing only the logic and keeping the UI native, see Native UI: Shared logic for REST API requests.
You'll create an application where users can select a country to see the time in the capital city of that country. The app will load and display images in a dropdown menu and use a typical Compose layout with events, styles, themes, and modifiers.
To get from a wizard-generated project to the final result, you will:
Add the multiplatform library dependency for time calculation
Put the app together:
The tutorial helps create a demo application for all supported platforms simultaneously, since code is shared almost entirely. But for the same reason you can freely pick and choose only platforms you are interested in.
Create a project
With the IDE and the Kotlin Multiplatform IDE plugin installed, create a new Compose Multiplatform project:
In IntelliJ IDEA, select File | New | Project.
In the panel on the left, select Kotlin Multiplatform.
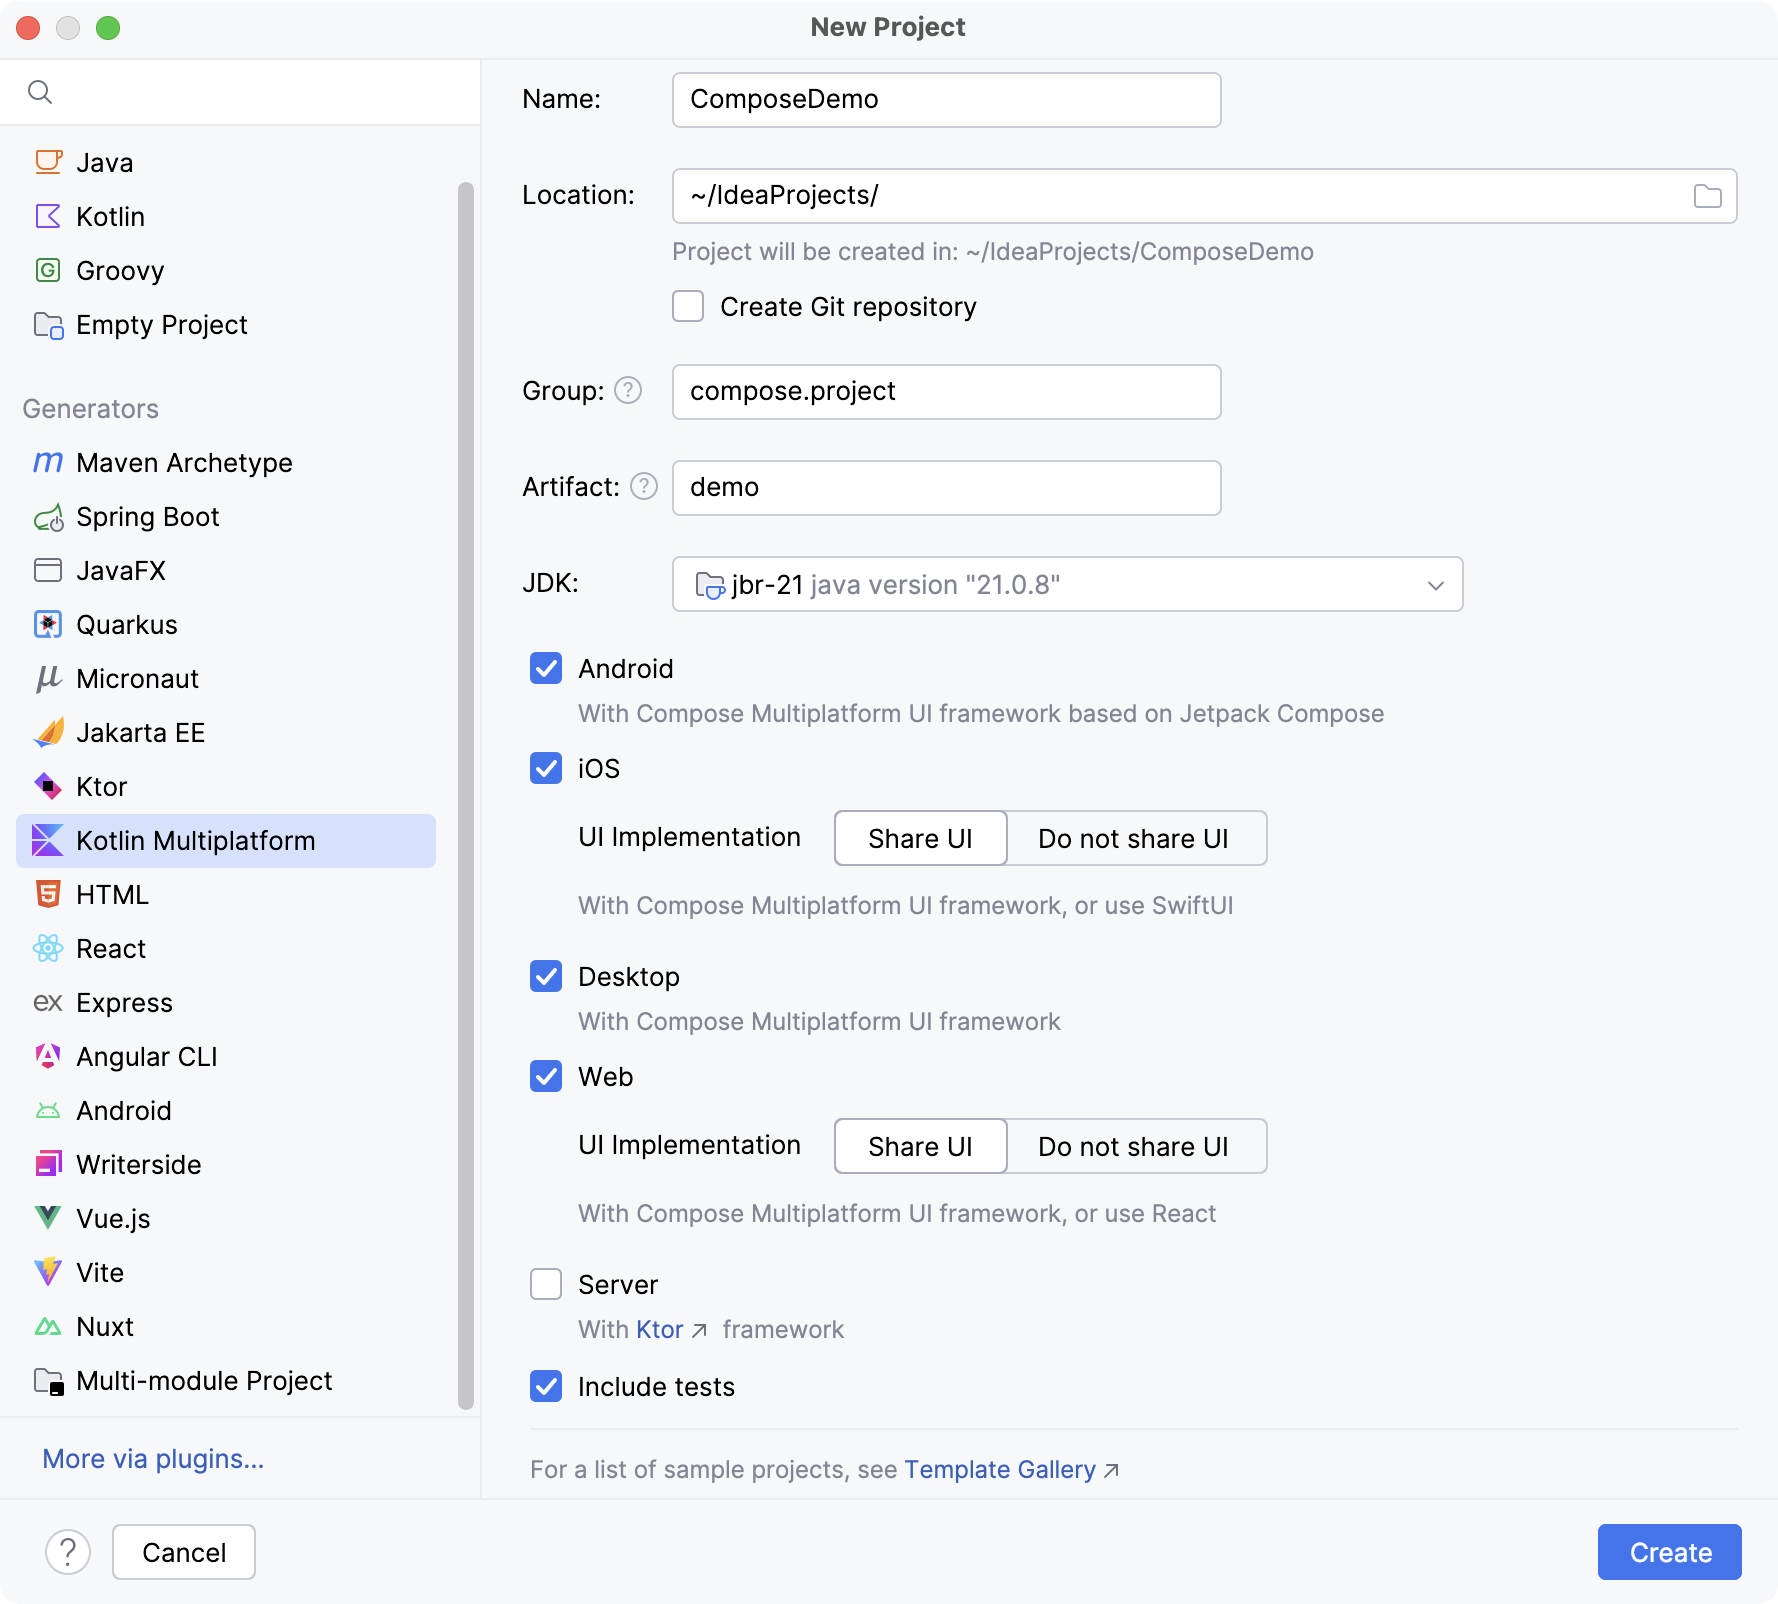
Specify the following fields in the New Project window:
Name: ComposeDemo
Project ID (used as the package name): compose.project.demo
Select the Android, iOS, Desktop, and Web targets. Make sure that the Share UI option is selected for iOS and web.
Once you've specified all the fields and targets, click Create.
The first import takes a couple of minutes. After it's done, make sure that all preflight checks have completed successfully (View | Tool Windows | Project Environment Preflight Checks).
Implement the basic layout
The generated Compose Multiplatform project is organized in platform-specific app modules and a shared UI module. Each application module defines an entry point that calls the shared App() composable.
In this tutorial, all functional changes in the common UI code are seamlessly propagated across the apps, but you will see a couple of changes required to make the platform setup work.
To get started, implement the basic layout in the common App() composable:
In
shared/src/commonMain/kotlin, open thecompose.project.demo/App.ktfile and replace theApp()composable with the new implementation:// @Composable marks a composable function: // a function that emits UI elements in Compose @Composable @Preview fun App() { MaterialTheme { var timeAtLocation by remember { mutableStateOf("No location selected") } // Declares the UI as a column that holds // a text label above a button Column( // Basic layout improvements that make sure that the Column() // fills all available space without overlapping the system bars modifier = Modifier .safeContentPadding() .fillMaxSize(), ) { // Declares a Text() that observes the timeAtLocation state Text(timeAtLocation) // Declares a Button() that also observes the timeAtLocation state // but shows a hardcoded time for now Button(onClick = { timeAtLocation = "13:30" }) { Text("Show Time At Location") } } } }Run the application on Android and iOS:
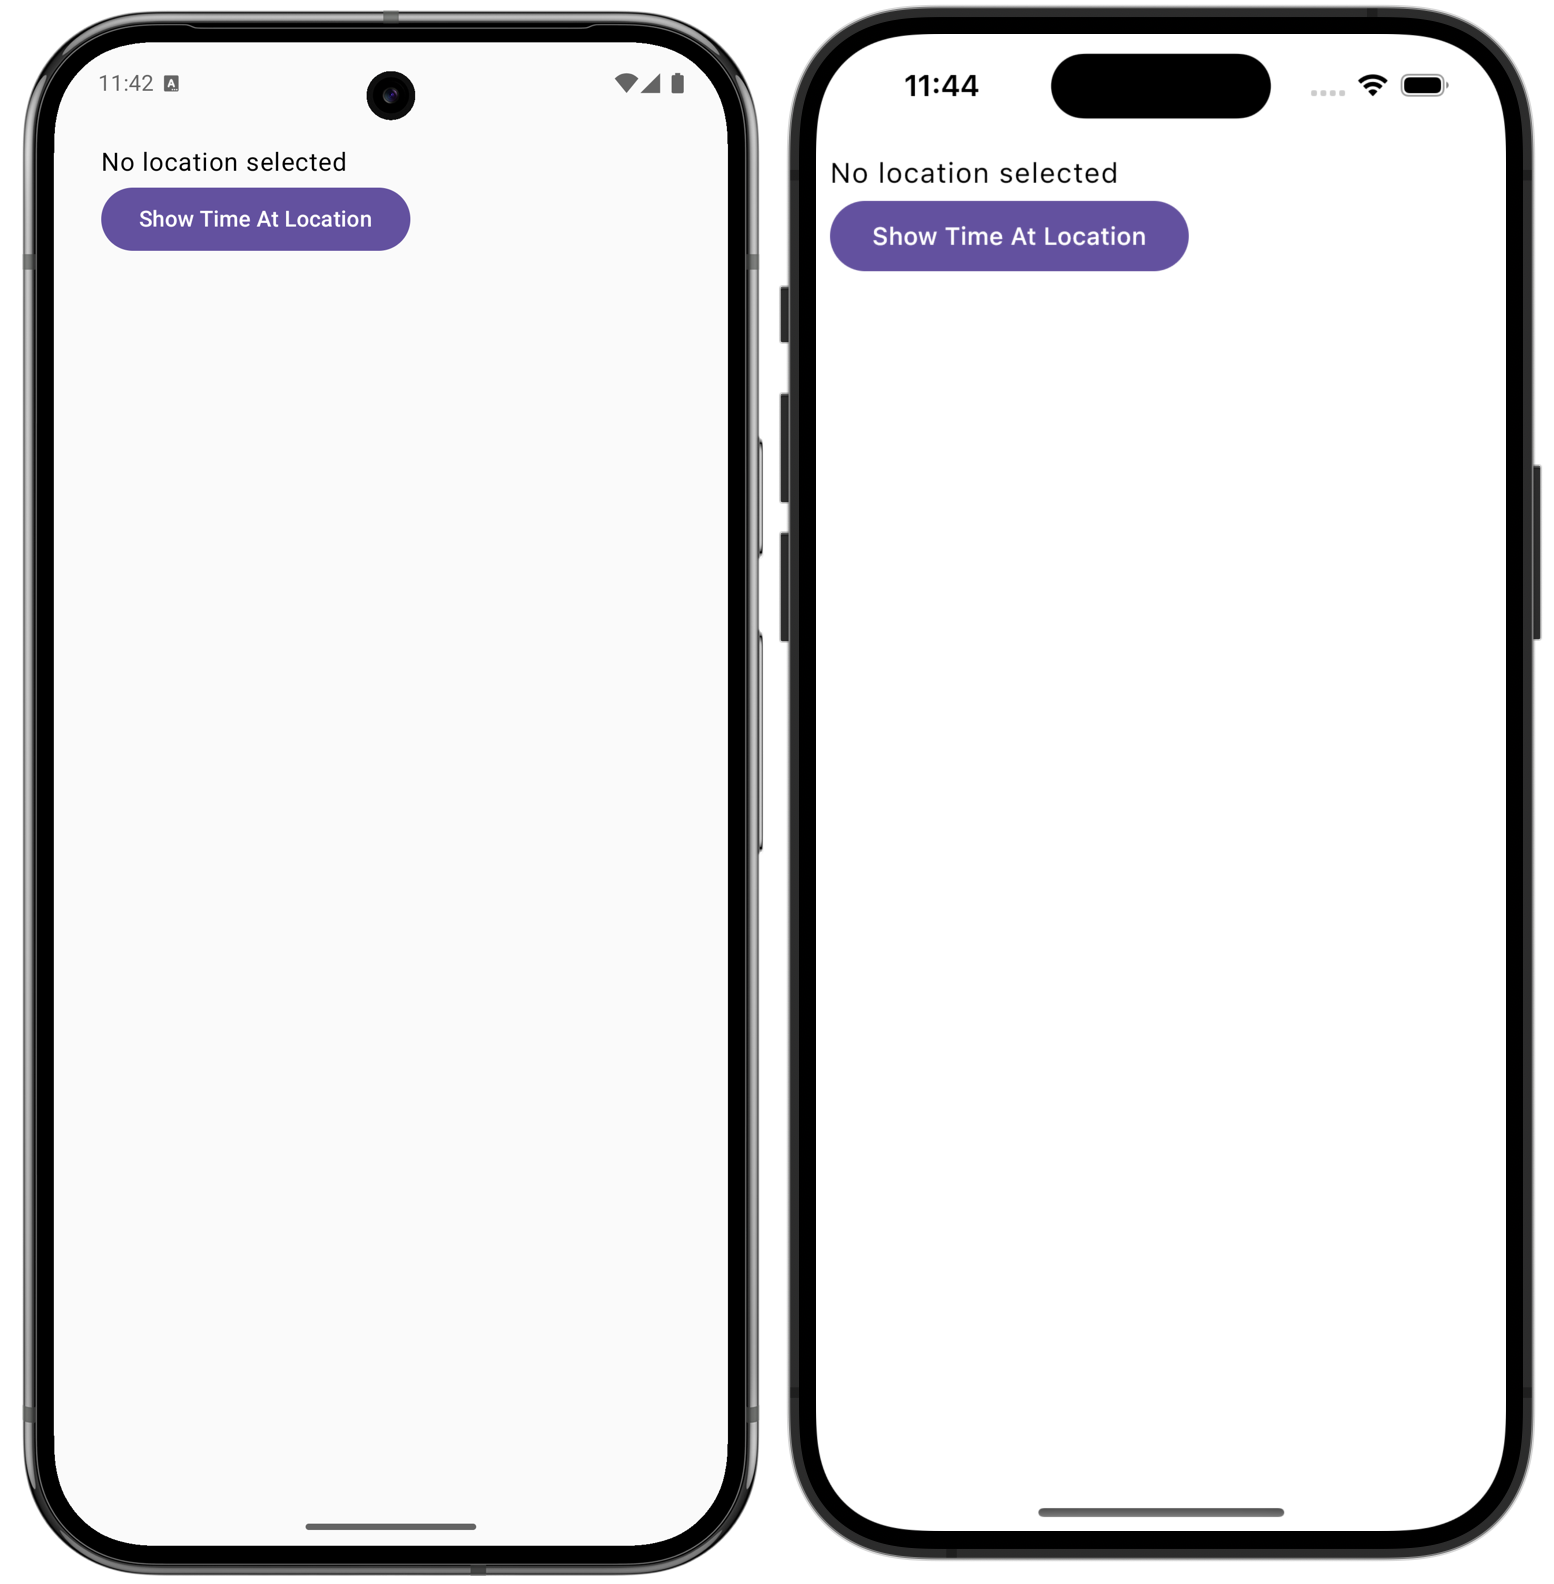
When you run your application and click the button, the app displays the hardcoded time — 13:30.
Run the application on the desktop using Compose Hot Reload by starting the desktopApp [hot] 🔥 run configuration. The app works, but the window looks mismatched with the UI:
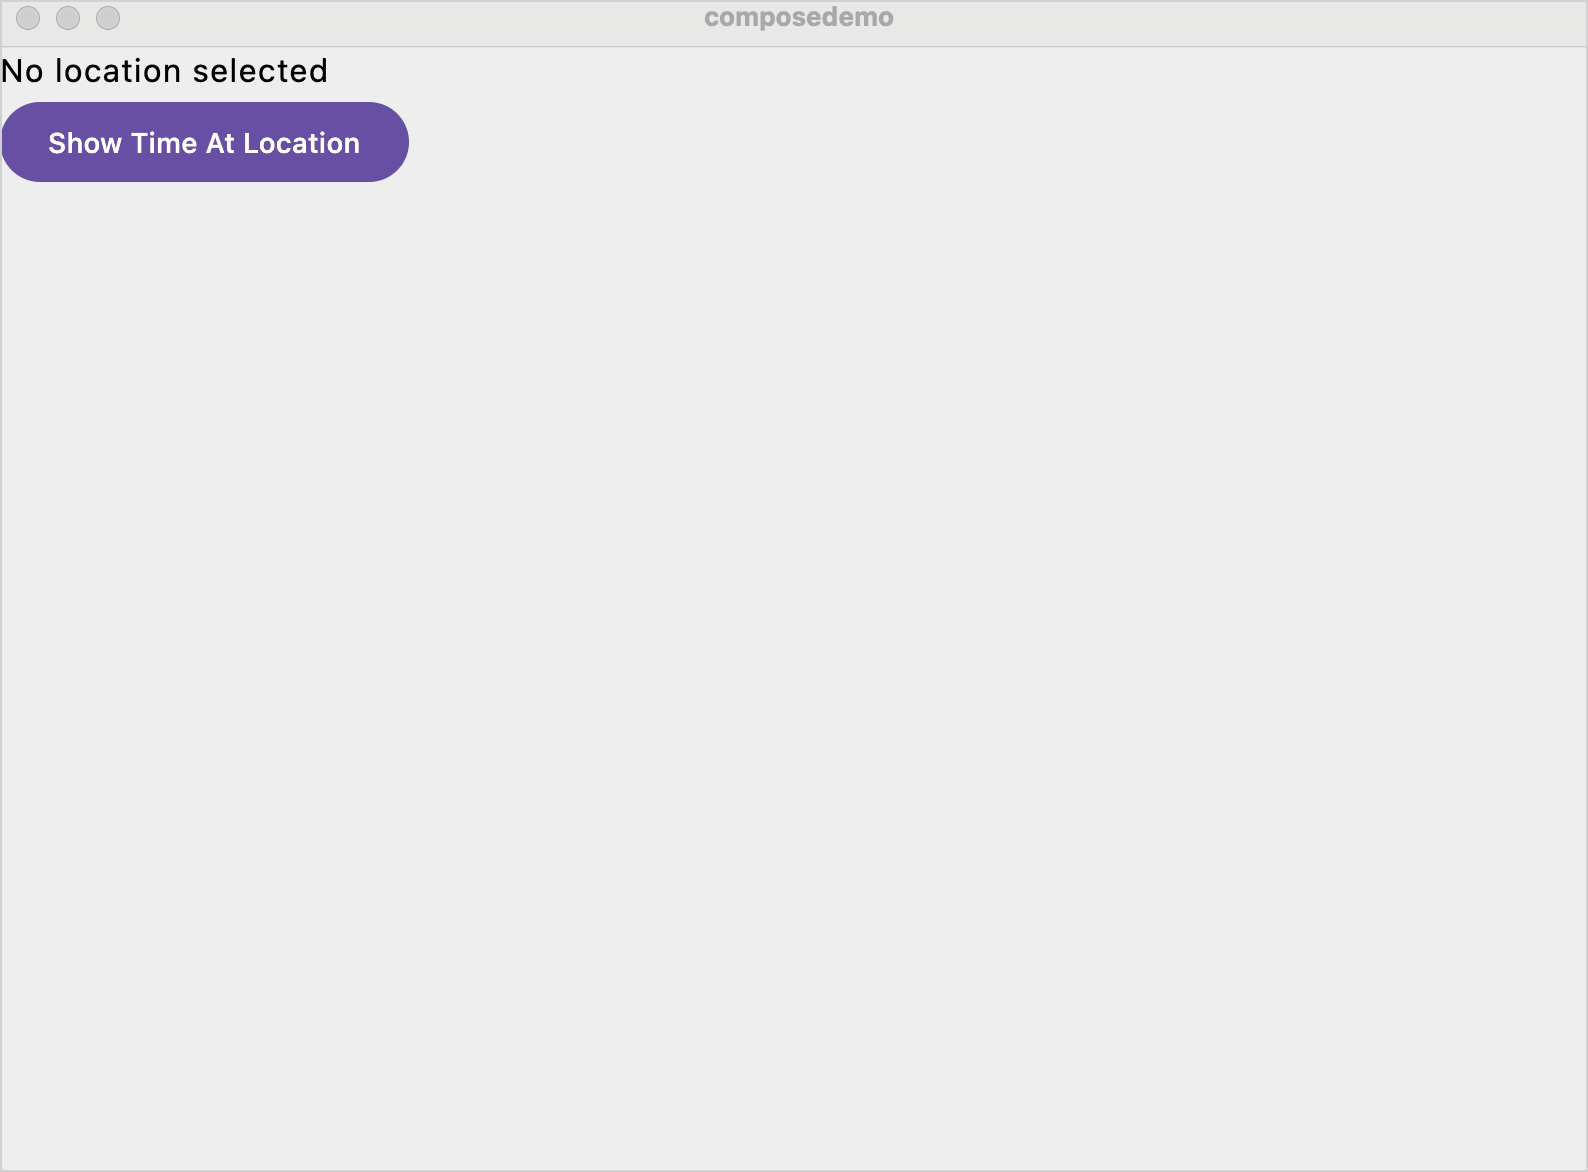
Thanks to Compose Hot Reload, you can fix this without a full restart.
Use Compose Hot Reload to quickly iterate on the UI
You can fix the desktop UI and verify the fix without restarting the app:
Update the
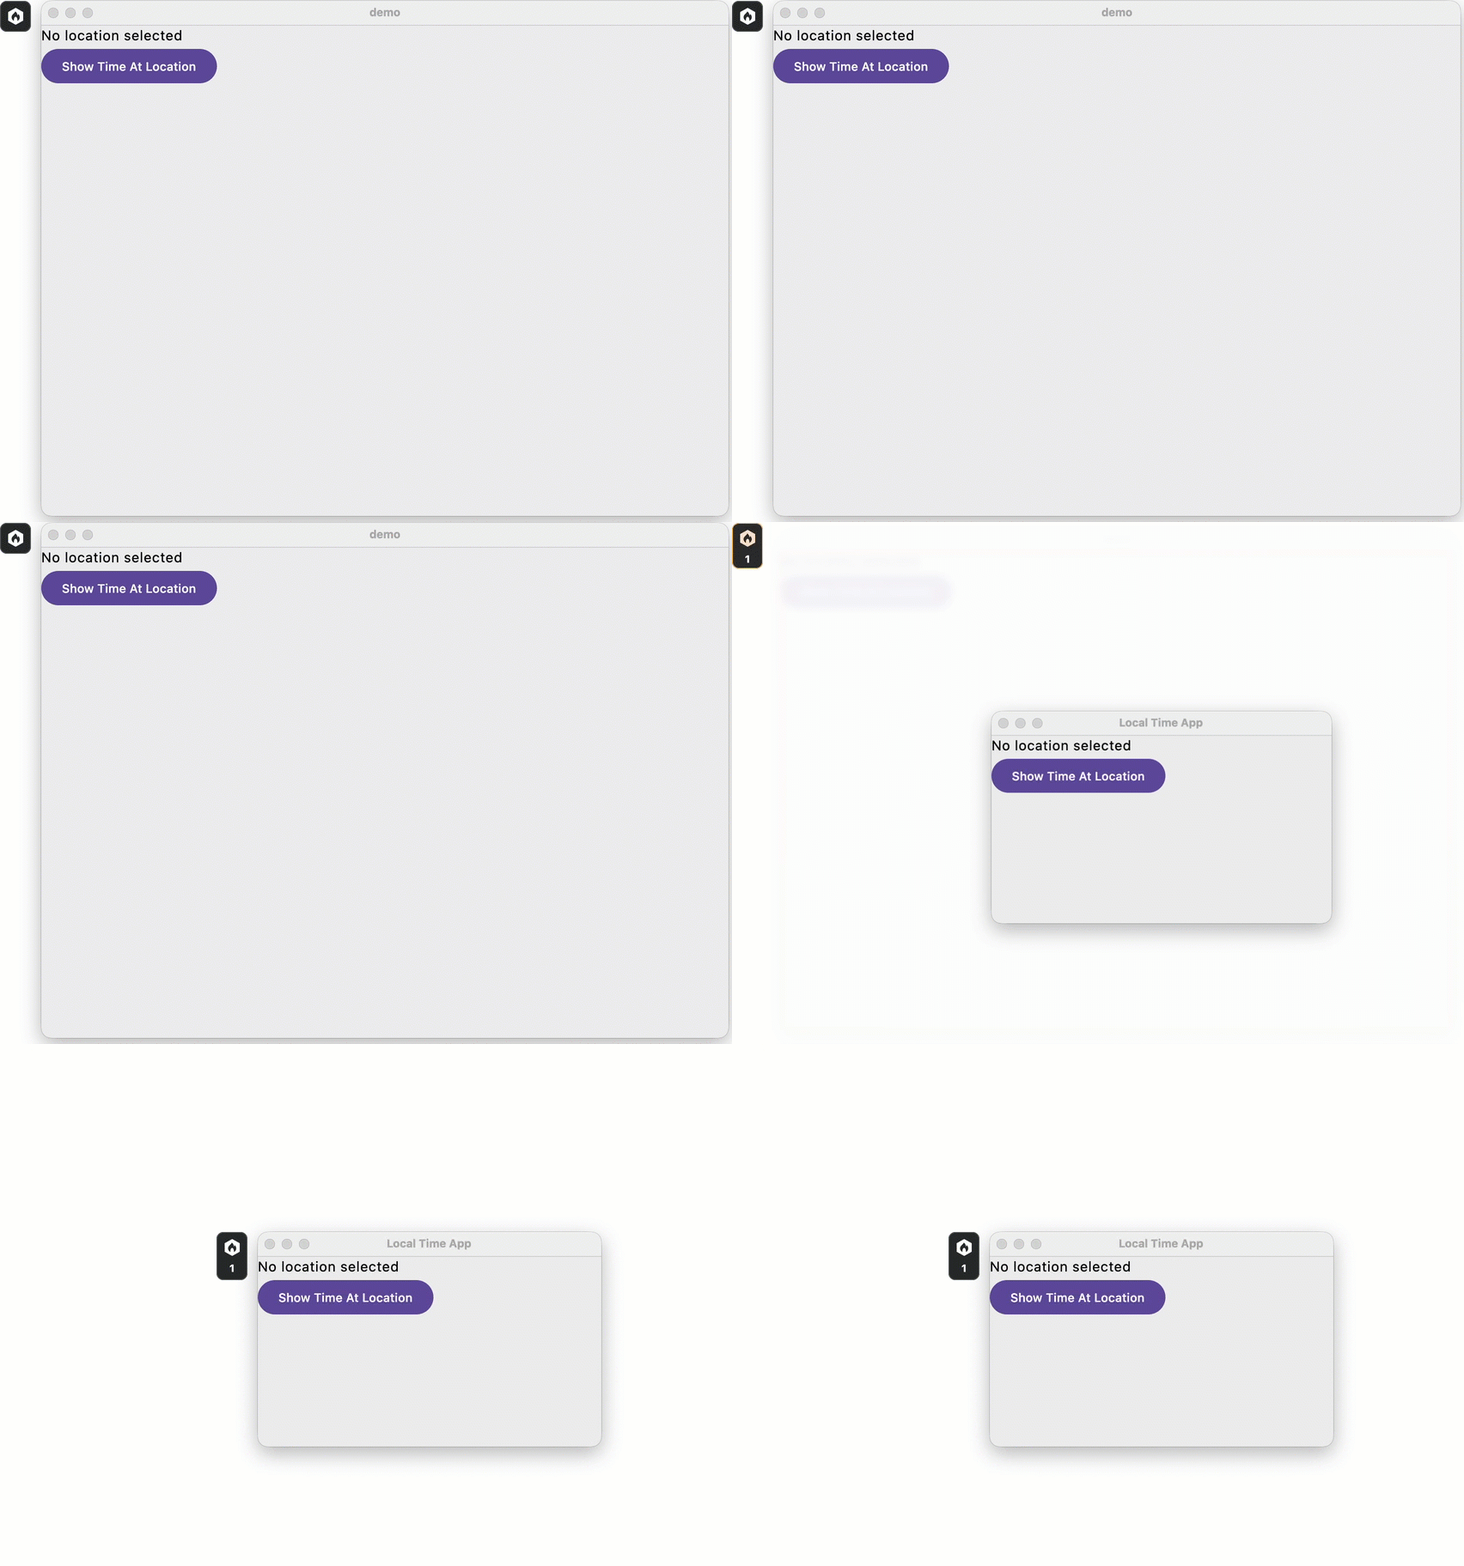
main.ktfile under thedesktopApp/src/directory as follows:fun main() = application { // Sets the initial size and position // of the window on screen val state = rememberWindowState( size = DpSize(400.dp, 350.dp), position = WindowPosition(300.dp, 300.dp) ) // Sets the title of the application window // and uses the window state initialized above Window( title = "Local Time App", onCloseRequest = ::exitApplication, state = state, // Makes sure that the window is always on top // to make debugging and UI iteration easier alwaysOnTop = true ) { App() } }Follow the IDE's suggestions to import the missing symbols. Pick the
androidx.compose.ui.windowversion for therememberWindowState()function.To see the app automatically update, save the modified files (⌘ S/Ctrl+S). The window should adjust:
Add the kotlinx-datetime dependency
To work with time zones and time calculation, you'll use the kotlin.time classes together with the multiplatform kotlinx-datetime library.
While kotlin.time is always available as part of the standard library, kotlinx-datetime needs to be configured as an explicit dependency. It is a multiplatform library, and you'll use it only in common code. Therefore, you have to specify the dependency only once, with additional configuration needed only for web.
Follow the instructions from the library's repository:
Open the
gradle/libs.versions.tomlfile and add thekotlinx-datetimedependency to the version catalog:[versions] kotlinx-datetime = "0.8.0" [libraries] kotlinx-datetime = { module = "org.jetbrains.kotlinx:kotlinx-datetime", version.ref = "kotlinx-datetime" }Open the
shared/build.gradle.ktsfile and add a reference to the version catalog entry in thecommonMainsource set configuration:kotlin { // ... sourceSets { commonMain.dependencies { // ... implementation(libs.kotlinx.datetime) } } }Press double Shift, then find and execute the Sync Project with Gradle Files command.
Now you can use kotlinx-datetime APIs in your common code. For the web target, you need to work around the limitations of time zone support in JavaScript and Wasm/JS as described in the section below.
Add the kotlinx-datetime dependency for the web app
For the web target, time zone support also requires the js-joda npm package:
Add a reference to the package in the
webApp/build.gradle.ktsfile:kotlin { // ... sourceSets { // ... webMain.dependencies { implementation(npm("@js-joda/timezone", "2.25.2")) } } }Adding the dependency to the
webMainsource set makes the library available to both thewasmJsandjstargets.Press double Shift, then find and execute the Sync Project with Gradle Files command.
In the Terminal tool window, run the following command to update the
yarn.lockfile with the latest dependency versions:./gradlew kotlinUpgradeYarnLock kotlinWasmUpgradeYarnLockIn the
webApp/src/webMain/kotlin/.../main.ktfile, use the@JsModuleannotation to import thejs-jodanpm package. Replace themain()function with the following code:import kotlin.js.ExperimentalWasmJsInterop import kotlin.js.JsModule @OptIn(ExperimentalWasmJsInterop::class) @JsModule("@js-joda/timezone") external object JsJodaTimeZoneModule private val jsJodaTz = JsJodaTimeZoneModule @OptIn(ExperimentalComposeUiApi::class) fun main() { ComposeViewport { App() } }
Support user input
For simplicity, you won't implement complex logic for specifying and validating time zones. The app will offer several countries to choose from and display the time in the selected country's capital:
In
shared/src/commonMain/kotlin, open thecompose.project.demo/App.ktfile and add a data class to hold country information above theApp()composable:// Simplified representation of time zones for this example data class Country(val name: String, val zone: TimeZone) // Hard-codes the list of supported countries // with specific associated time zones fun defaultCountries() = listOf( Country("Japan", TimeZone.of("Asia/Tokyo")), Country("France", TimeZone.of("Europe/Paris")), Country("Mexico", TimeZone.of("America/Mexico_City")), Country("Indonesia", TimeZone.of("Asia/Jakarta")), Country("Egypt", TimeZone.of("Africa/Cairo")), )In the same
App.ktfile, add acurrentTimeAt()function that calculates local time for a given time zone. To display the time asHH:MM:SS, the function describes the format with thekotlinx-datetimeformat builder, which pads each component with zeros to two digits:// Takes a TimeZone parameter to calculate time fun currentTimeAt(location: String, zone: TimeZone): String { // Describes the time format: hours, minutes, and seconds, // each zero-padded to two digits and separated by colons val timeFormat = LocalTime.Format { hour() char(':') minute() char(':') second() } val time = Clock.System.now() val localTime = time.toLocalDateTime(zone).time return "The time in $location is ${localTime.format(timeFormat)}" }Update the
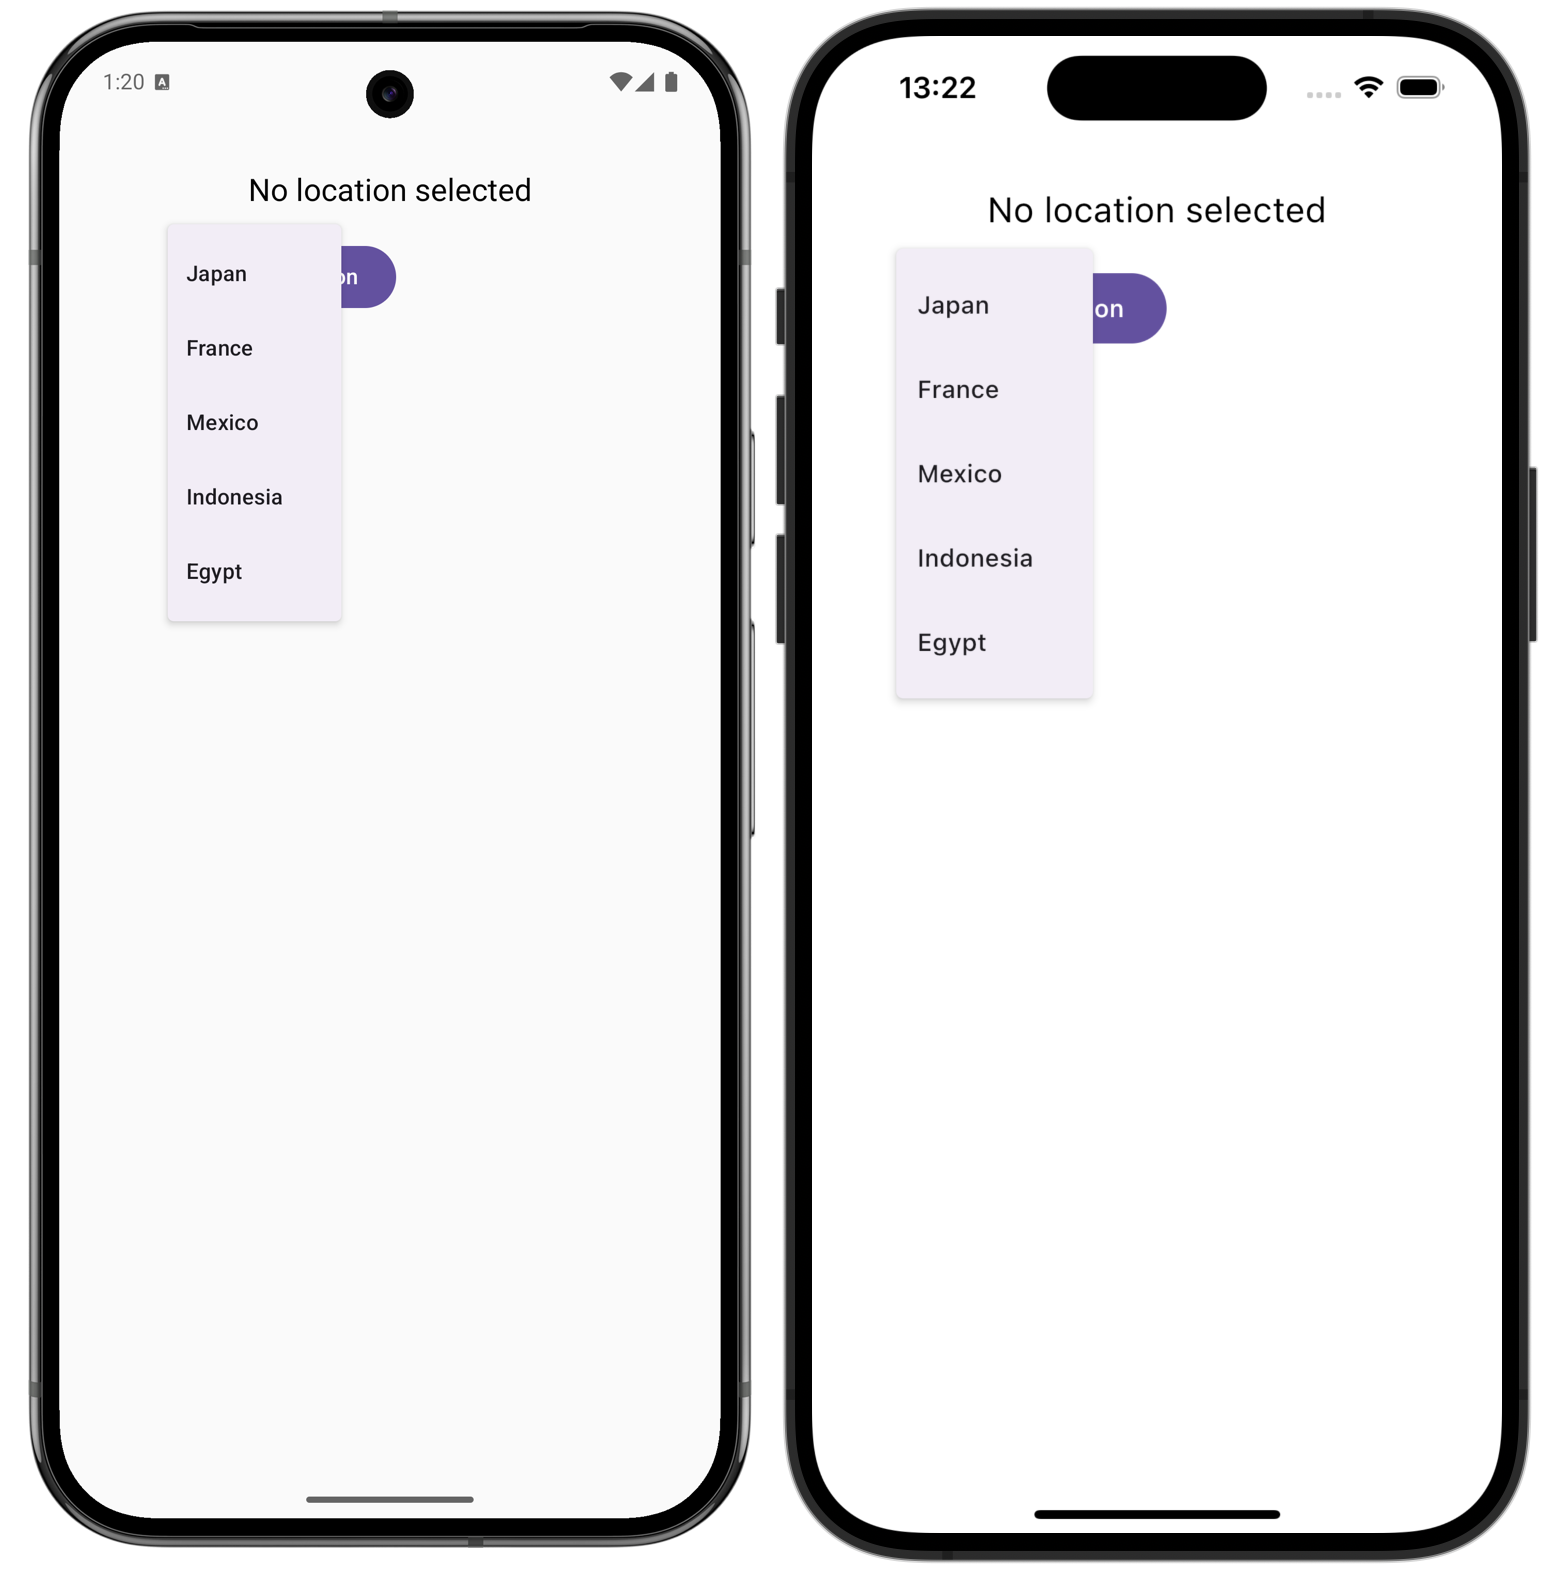
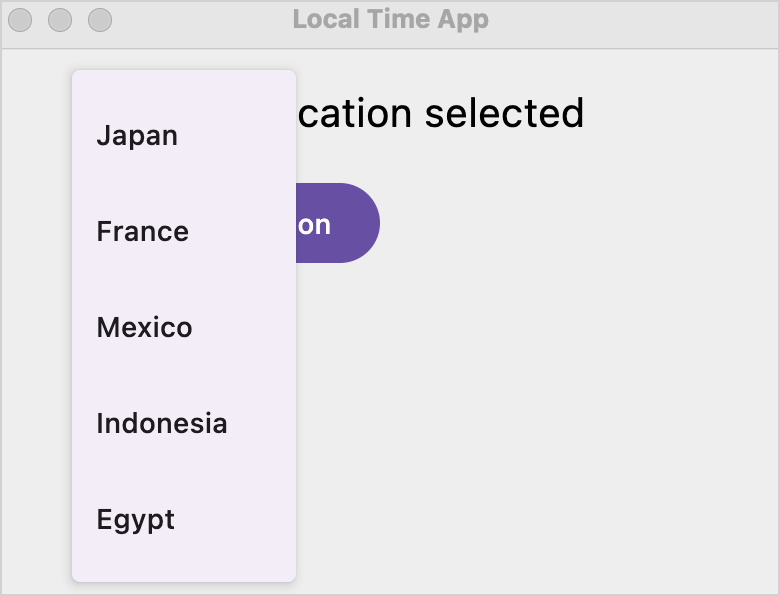
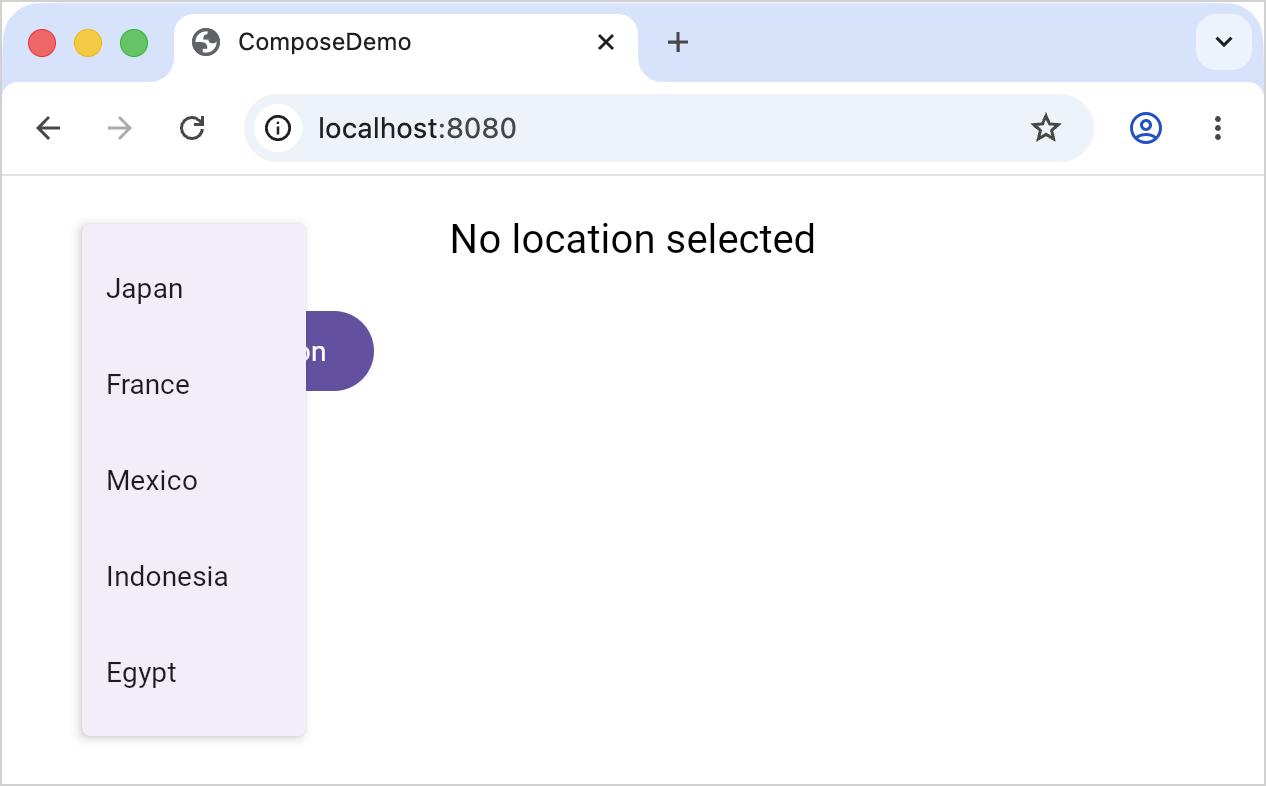
App()composable to use the added functionality: Present the list of countries as a dropdown and calculate time instead of hardcoding it. Replace the entireApp()function with the following:// Now requires a list of countries to display in the dropdown menu @Composable @Preview fun App(countries: List<Country> = defaultCountries()) { MaterialTheme { var showCountries by remember { mutableStateOf(false) } var timeAtLocation by remember { mutableStateOf("No location selected") } // Composables receive .padding() modifiers to add some space // between controls and around them Column( modifier = Modifier .padding(20.dp) .safeContentPadding() .fillMaxSize(), ) { Text( timeAtLocation, style = TextStyle(fontSize = 20.sp), textAlign = TextAlign.Center, modifier = Modifier.fillMaxWidth().align(Alignment.CenterHorizontally), ) Row(modifier = Modifier.padding(start = 20.dp, top = 10.dp)) { DropdownMenu( // Uses a remembered value to control // the visibility of the dropdown menu expanded = showCountries, onDismissRequest = { showCountries = false } ) { // Creates a dropdown menu item for each country countries.forEach { (name, zone) -> DropdownMenuItem( text = { Text(name) }, onClick = { timeAtLocation = currentTimeAt(name, zone) showCountries = false } ) } } } Button(modifier = Modifier.padding(start = 20.dp, top = 10.dp), onClick = { showCountries = !showCountries }) { Text("Select Location") } } } }Follow the IDE's suggestions to import the missing symbols:
When importing
Row(), pick the@Composableversion.When importing
Clock, pick the version from thekotlin.timepackage.
Run the application to see the redesigned version:
Introduce images
To better present different countries, add flag images next to country names in the dropdown.
To do that, place images in the correct directory, then add code to load and display them:
Download flag images from Flag CDN to match the list of countries you have already created. In this case, these are Japan, France, Mexico, Indonesia, and Egypt.
Move the images to the
shared/src/commonMain/composeResources/drawabledirectory so that the same flags are available on all platforms: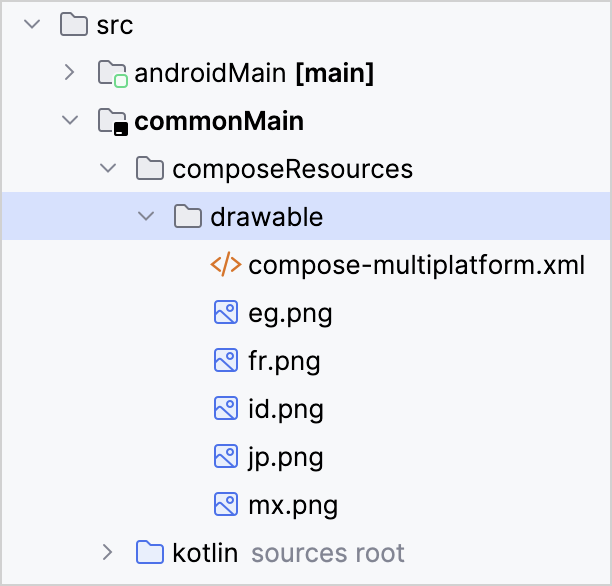
Make sure the image names are exactly as shown above: Compose Multiplatform generates accessors based on file names.
Update the UI code to use the images. Replace the entire code in the
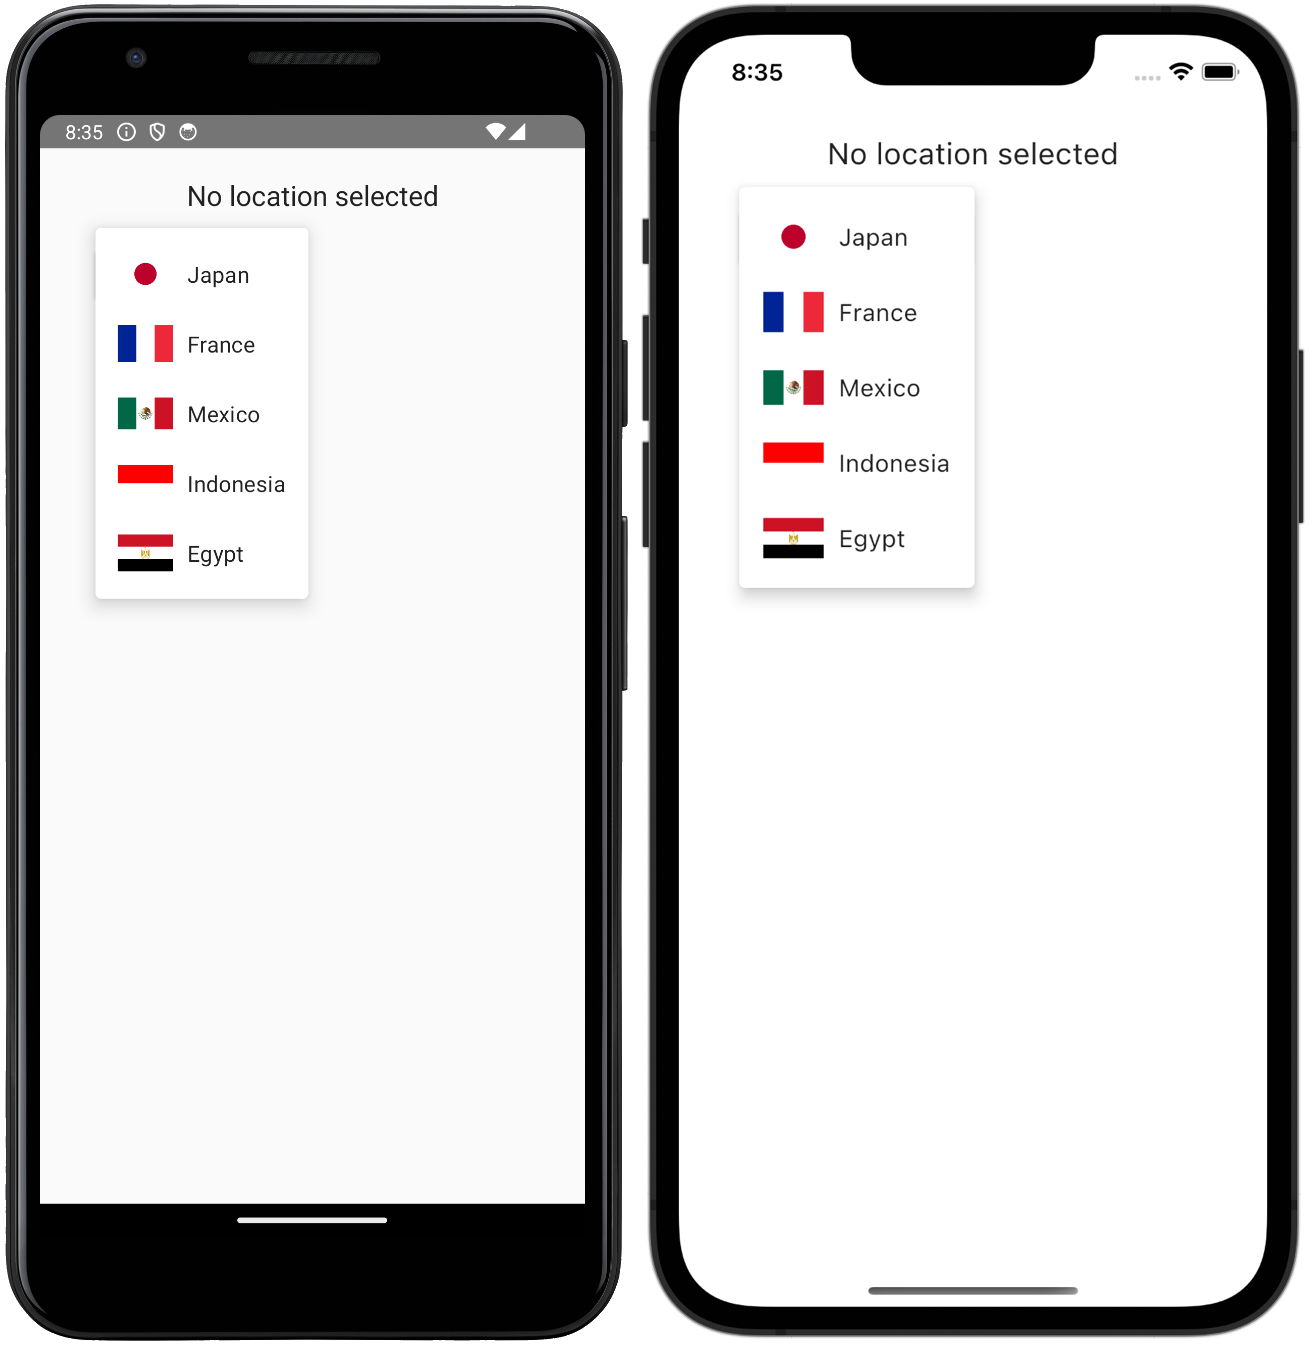
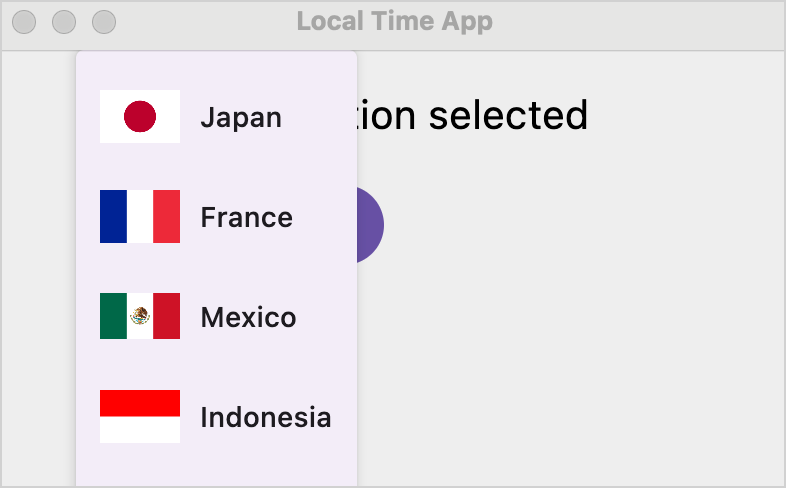
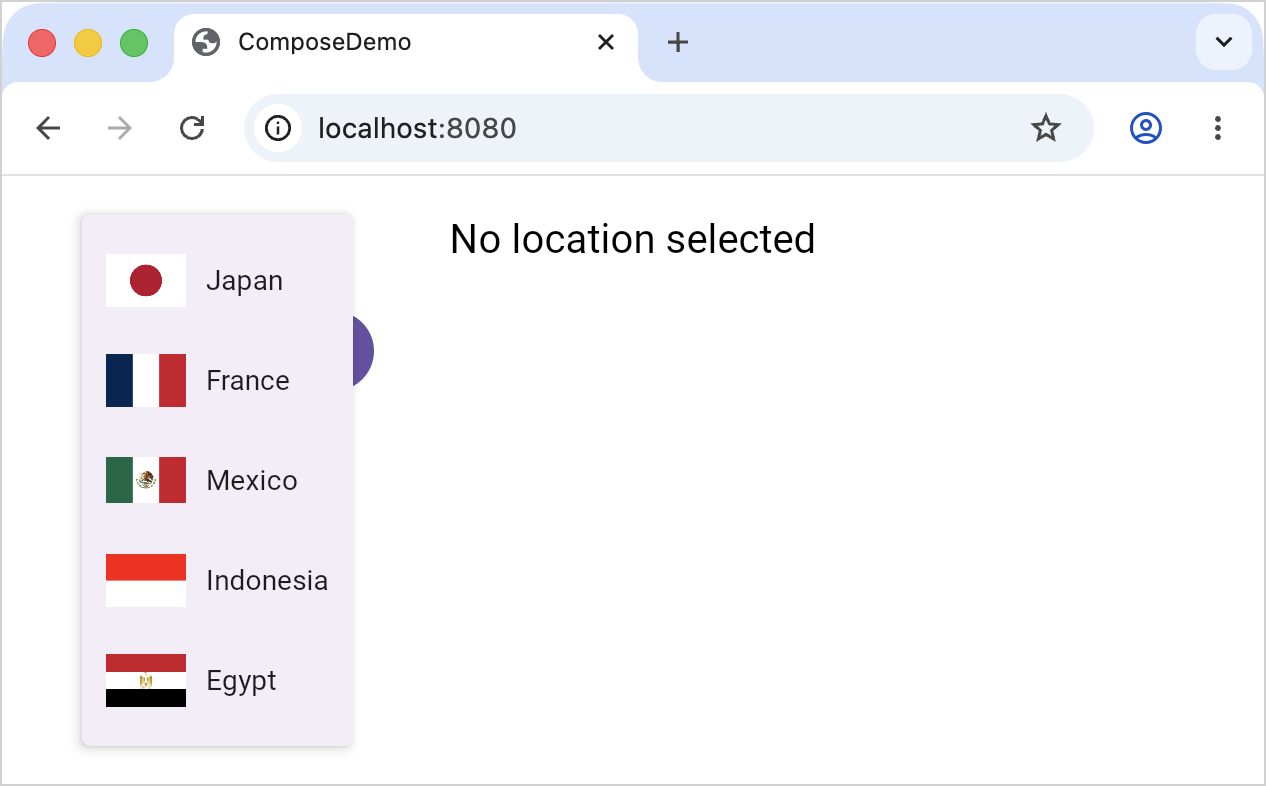
commonMain/kotlin/.../App.ktfile with the following:package compose.project.demo import androidx.compose.foundation.Image import androidx.compose.foundation.layout.Column import androidx.compose.foundation.layout.Row import androidx.compose.foundation.layout.fillMaxSize import androidx.compose.foundation.layout.fillMaxWidth import androidx.compose.foundation.layout.padding import androidx.compose.foundation.layout.safeContentPadding import androidx.compose.foundation.layout.size import androidx.compose.material3.Button import androidx.compose.material3.DropdownMenu import androidx.compose.material3.DropdownMenuItem import androidx.compose.material3.MaterialTheme import androidx.compose.material3.Text import androidx.compose.runtime.* import androidx.compose.ui.Alignment import androidx.compose.ui.Modifier import androidx.compose.ui.text.TextStyle import androidx.compose.ui.text.style.TextAlign import androidx.compose.ui.tooling.preview.Preview import androidx.compose.ui.unit.dp import androidx.compose.ui.unit.sp import kotlinx.datetime.LocalTime import kotlinx.datetime.TimeZone import kotlinx.datetime.format import kotlinx.datetime.format.char import kotlinx.datetime.toLocalDateTime import kotlin.time.Clock import composedemo.shared.generated.resources.Res import composedemo.shared.generated.resources.eg import composedemo.shared.generated.resources.fr import composedemo.shared.generated.resources.id import composedemo.shared.generated.resources.jp import composedemo.shared.generated.resources.mx import org.jetbrains.compose.resources.DrawableResource import org.jetbrains.compose.resources.painterResource // The type now also holds a reference to the flag image data class Country(val name: String, val zone: TimeZone, val image: DrawableResource) fun currentTimeAt(location: String, zone: TimeZone): String { val timeFormat = LocalTime.Format { hour() char(':') minute() char(':') second() } val time = Clock.System.now() val localTime = time.toLocalDateTime(zone).time return "The time in $location is ${localTime.format(timeFormat)}" } // Initializes the list with imported Compose Multiplatform resources // and returns it fun defaultCountries() = listOf( Country("Japan", TimeZone.of("Asia/Tokyo"), Res.drawable.jp), Country("France", TimeZone.of("Europe/Paris"), Res.drawable.fr), Country("Mexico", TimeZone.of("America/Mexico_City"), Res.drawable.mx), Country("Indonesia", TimeZone.of("Asia/Jakarta"), Res.drawable.id), Country("Egypt", TimeZone.of("Africa/Cairo"), Res.drawable.eg) ) @Composable @Preview fun App(countries: List<Country> = defaultCountries()) { MaterialTheme { var showCountries by remember { mutableStateOf(false) } var timeAtLocation by remember { mutableStateOf("No location selected") } Column( modifier = Modifier .padding(20.dp) .safeContentPadding() .fillMaxSize(), ) { Text( timeAtLocation, style = TextStyle(fontSize = 20.sp), textAlign = TextAlign.Center, modifier = Modifier.fillMaxWidth().align(Alignment.CenterHorizontally), ) Row(modifier = Modifier.padding(start = 20.dp, top = 10.dp)) { DropdownMenu( expanded = showCountries, onDismissRequest = { showCountries = false } ) { countries.forEach { (name, zone, image) -> // Each country is displayed in a 'DropdownMenuItem' // as a flag ('Image()') and a name ('Text()') DropdownMenuItem( text = { Row(verticalAlignment = Alignment.CenterVertically) { Image( // 'painterResource()' supplies the Painter object // required by 'Image()' painterResource(image), modifier = Modifier.size(50.dp).padding(end = 10.dp), contentDescription = "$name flag" ) Text(name) } }, onClick = { timeAtLocation = currentTimeAt(name, zone) showCountries = false } ) } } } Button(modifier = Modifier.padding(start = 20.dp, top = 10.dp), onClick = { showCountries = !showCountries }) { Text("Select Location") } } } }Run the application to see the new behavior:





What's next
This tutorial covers the basic building blocks of a multiplatform project. To dive deeper into specifics:
Kotlin Multiplatform
See an alternative tutorial, where the application UI is native and only business logic is shared.
Read in depth about mechanisms for sharing code available with Kotlin Multiplatform.
Learn about the principles behind the structure of a Kotlin Multiplatform project.
For more information on how to manage multiplatform dependencies, see Adding dependencies on multiplatform libraries.
Compose Multiplatform
Learn about the fundamentals of Compose layouts and working with Compose modifiers.
Learn about the possibilities and challenges of multiplatform resources in Compose.
Tutorials for more advanced projects
Look through the curated list of sample multiplatform projects.
Join the community:
 Kotlin Slack: Get help and participate in discussions about KMP and Compose Multiplatform. Request an invitation and join the #multiplatform and #compose channels.
 Compose Multiplatform GitHub: Star the repository and contribute.
 Stack Overflow: Subscribe to the "kotlin-multiplatform" tag.
 Kotlin YouTube channel: Subscribe and watch videos about Kotlin Multiplatform.