Build and run a Kotlin Multiplatform application
Kotlin Multiplatform (KMP) uses Gradle as its build system. The KMP IDE plugin for IntelliJ IDEA and Android Studio provides further support, automatically creating tailored run configurations, handling Compose Hot Reload integration, and so on.
Build and run KMP applications
To build your KMP apps, you only need Gradle and Java. However, IntelliJ IDEA and Android Studio provide a lot of quality-of-life features for KMP development, from managing the environment to writing build scripts and multiplatform code.
You can run the application on any supported platform using the same IDE:
The Android app runs on available Android Virtual Devices.
The iOS app runs on an iOS simulator available in the Device Hub (you need a macOS machine with Xcode to be able to run apps on Apple targets).
The desktop app runs on the system JVM.
The web app runs in the default browser.
The run configurations provided by the KMP IDE plugin are more efficient than the general Gradle build task: They only trigger builds for the corresponding targets, while the default Gradle build task always builds debug and release versions of all targets.
Run your application on Android Emulator
The default run configuration automatically suggests the list of available Android virtual devices. If there are none, or you'd like to simulate a different device, you can configure one using the Android Device Manager (in IntelliJ IDEA, View | Tool Window | Device Manager, or following the Android Studio guide).
The device will be available to the run configuration as soon as it is created.
In the list of run configurations, select androidApp.
Choose your Android virtual device and then click Run:

Your IDE runs the app, starting the selected virtual device if it is powered down.
Run on a real Android device
To make a hardware Android device available to KMP run configurations, configure it and connect it to your machine.
When it's set up correctly, it will show up in the list of available devices along with the virtual devices.
Run your application on iOS Simulator
If you haven't launched Xcode as part of the initial setup, do that before running the iOS app. Install the iOS platform support: In Xcode, check Xcode | Settings | Components to make sure at least one iOS simulator is installed.
In your Kotlin Multiplatform IDE, select the iOS entry in the list of run configurations and select a simulated device from the list next to it, then click Run:

Run on a real iOS device
You can run your multiplatform application on a real iOS device. Before you start, you'll need to set the Team ID associated with your Apple ID.
Set your Team ID
To set a new Team ID for your project for the first time, open the project in Xcode (File | Open Project in Xcode):
In the Project navigator on the left-hand side, select iosApp.
Select iosApp under Targets and switch to the Signing & Capabilities tab.
In the Team list, select your team.
If you haven't set up your team yet, use the Add an Account option in the Team list and follow the instructions in Xcode.
Make sure that the Bundle Identifier is unique and a Signing Certificate is successfully assigned.
After you set up a team in Xcode, you can set or change the team in IntelliJ IDEA:
Edit the run configuration for iosApp:
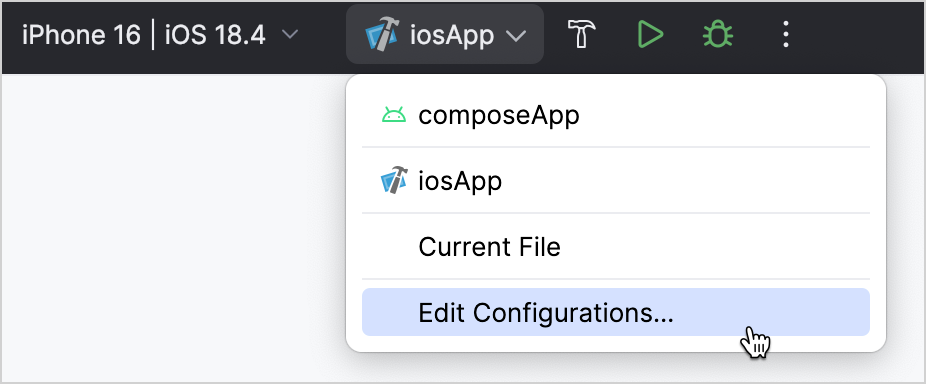
Switch to the Options tab and make the necessary changes in the Development team dropdown, then click OK.
Run the app
Connect your iPhone with a cable. If you already have the device registered in Xcode, IntelliJ IDEA should show it in the list of run configurations. Run the corresponding iosApp configuration.
If you haven't registered your iPhone in Xcode yet, follow Apple recommendations. In short, you should:
Connect your iPhone with a cable.
On your iPhone, enable the developer mode in Settings | Privacy & Security.
In Xcode, go to the top menu and choose Window | Devices and Simulators.
If your iPhone is not shown as connected, click the plus sign at the bottom left and select it.
Follow the on-screen instructions to complete the pairing process.
Once you've registered your iPhone in Xcode, it will become available in the list of available devices in IntelliJ IDEA when you select the iosApp run configuration.
Run your application on desktop
Select desktopApp [hot] 🔥 in the list of run configurations and click Run:

By default, the app starts with Compose Hot Reload running. This allows reloading the UI almost instantly when you manually save the file with the changes.
Run your web application
The default options for web targets are:
webApp[js]: Runs your Kotlin/JS application.
webApp[wasmJs]: Runs your Kotlin/Wasm application.
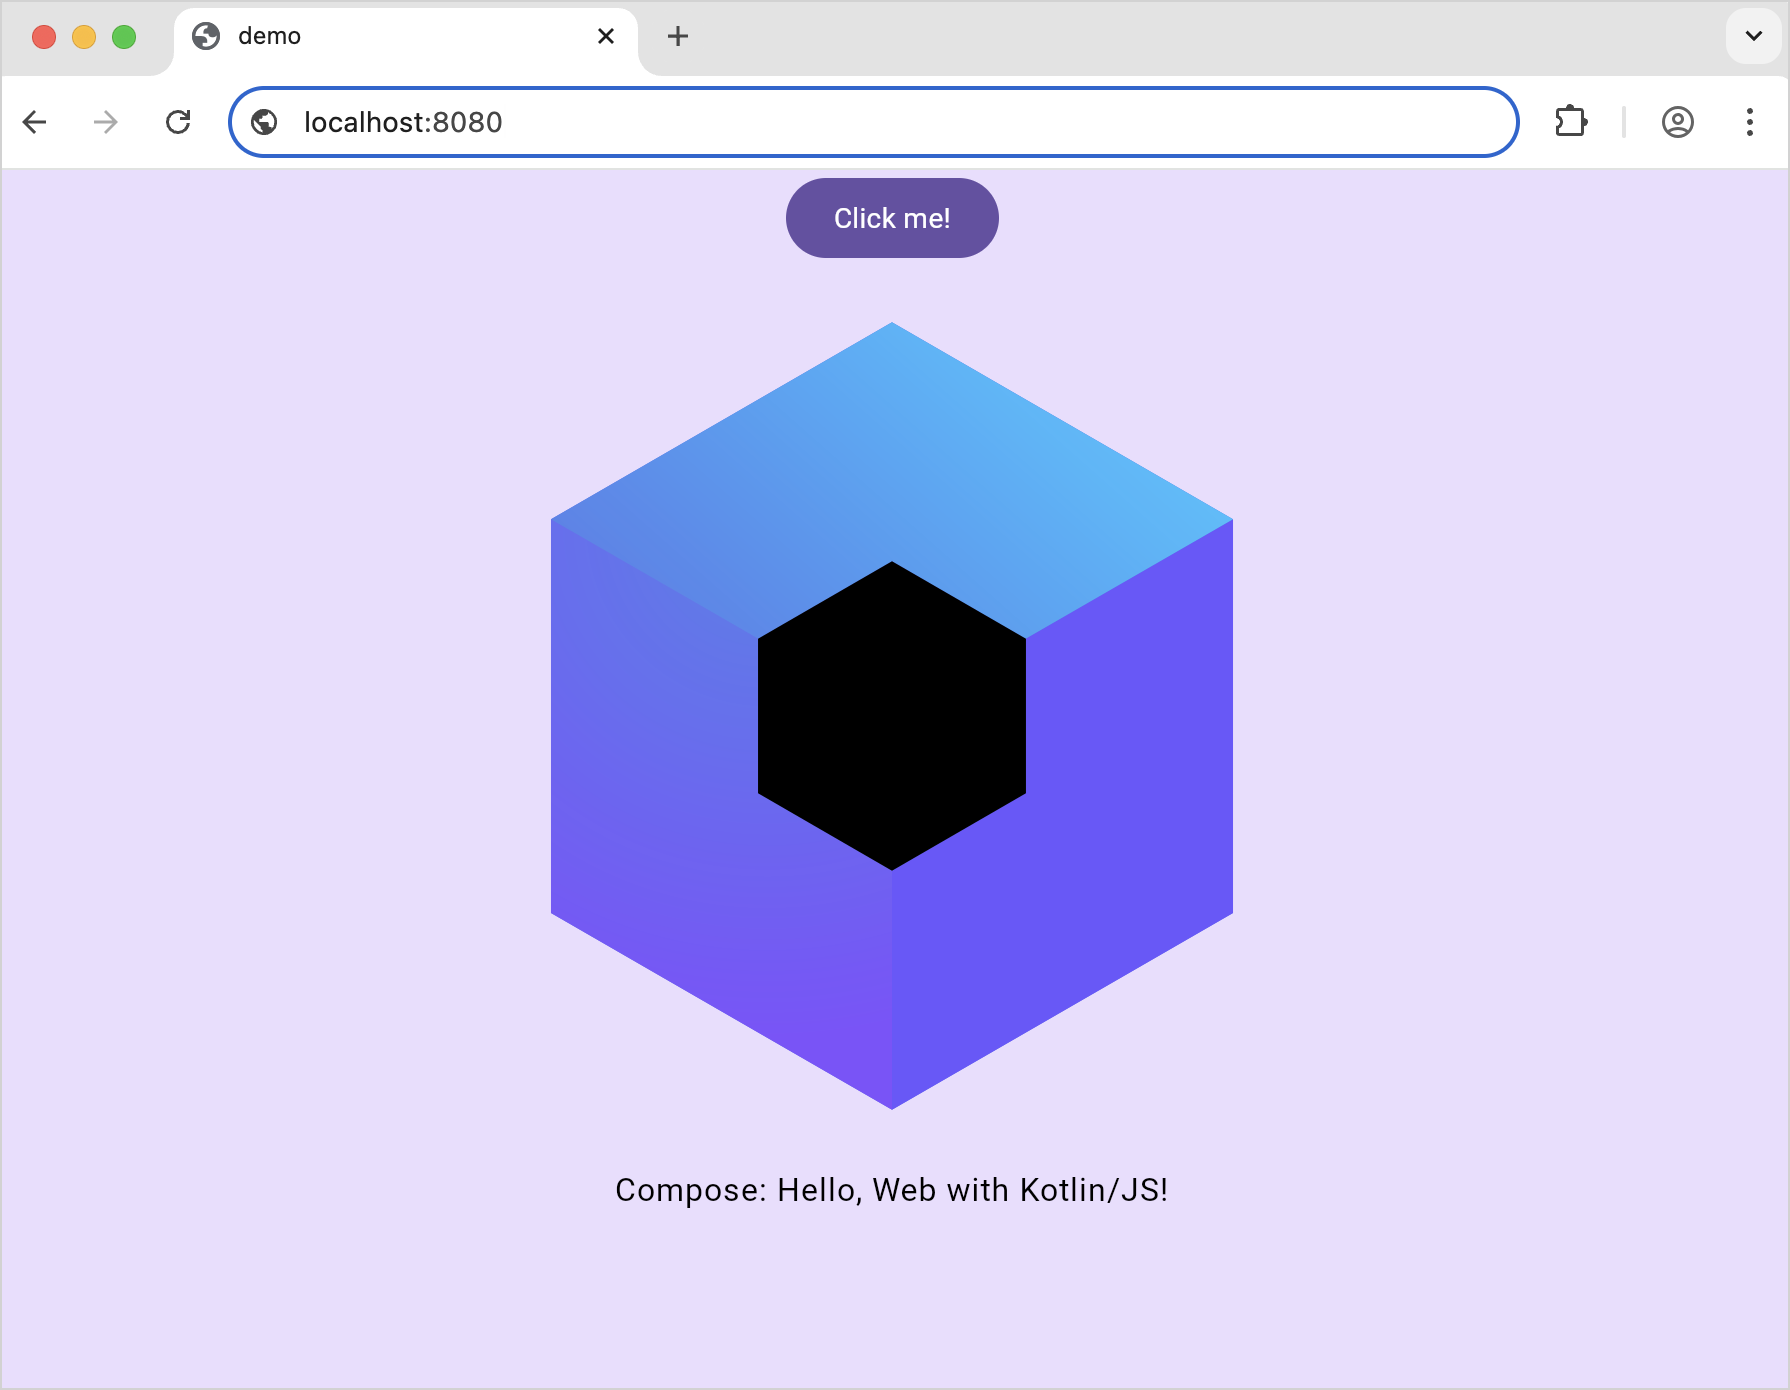
The web application opens automatically in your default browser and is available by default at http://localhost:8080/.
Compatibility mode for web targets
You can enable compatibility mode for your web application to ensure it works on all browsers out of the box. In this mode, modern browsers use the Wasm version, while older ones fall back to the JS version. This mode is achieved through cross-compilation for both the js and wasmJs targets.
To enable compatibility mode for your web application:
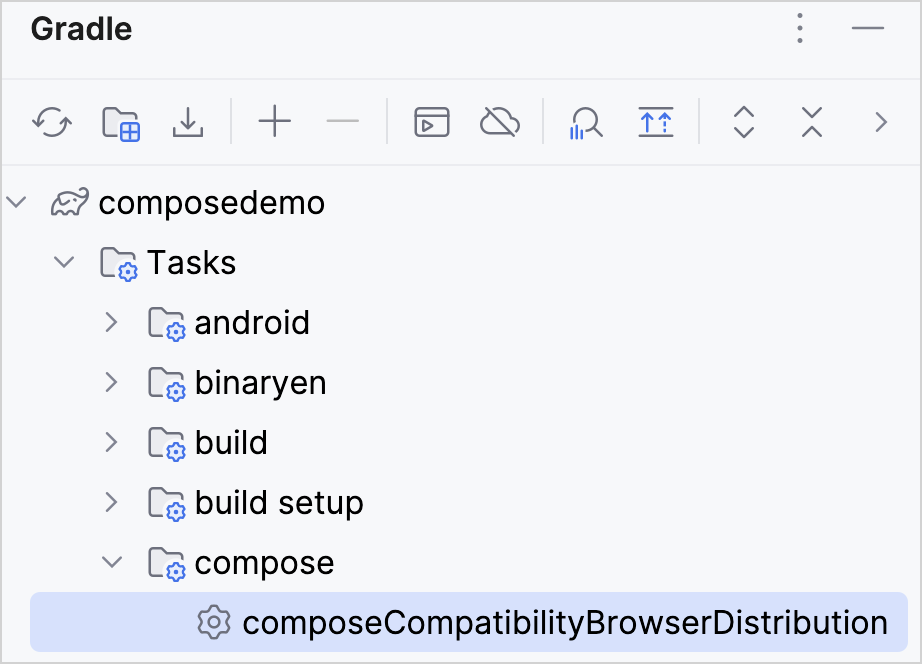
Open the Gradle tool window by selecting View | Tool Windows | Gradle.
In ComposeDemo | Tasks | compose, select and run the composeCompatibilityBrowserDistribution task.
Alternatively, you can run the following command in the terminal from the root project directory:
./gradlew composeCompatibilityBrowserDistribution
Once the Gradle task completes, compatible artifacts are generated in the web application module directory, for example, webApp/build/dist/composeWebCompatibility/productionExecutable. You can use these artifacts to publish your application for both the js and wasmJs targets.