Run tests in Kotlin/JS
The Kotlin Multiplatform Gradle plugin lets you run tests through a variety of test runners that can be specified via the Gradle configuration.
The general workflow for running tests in Kotlin/JS is to add test dependencies, configure the test task in the build file, add tests, and run them.
For browser testing, you can choose between:
The Karma test runner.
The new DSL for browser testing.
Add test dependencies
When you create a multiplatform project, you can add test dependencies to all the source sets, including the JavaScript target, by using a single dependency in commonTest:
Configure browsers
You can run tests in Kotlin/JS against specific browsers. To do so, adjust the settings in the browser {} configuration block of the Gradle build file.
By default, the plugin uses Headless Chrome to run browser tests. No browsers are bundled with the Kotlin Multiplatform Gradle plugin by default. To enable additional browsers, use the testTask {} block for Karma and the test {} block for the new DSL for browser testing. See all available options here:
With Karma, you need to install all necessary browsers on your target system (locally or in CI).
For more information on Karma functionality, see Set up a Kotlin/JS project.
With the new DSL for browser testing, the Kotlin Multiplatform Gradle plugin installs the necessary browsers on the first run by using the playwright install command. Playwright then manages the location of these browsers and doesn't use locally installed browsers.
For additional settings available in the new DSL for browser testing, see Advanced configuration.
Add a test
To check that tests are executed properly, create a file src/jsTest/kotlin/AppTest.kt with the following content:
Run tests
To run the tests in the browser, execute the jsBrowserTest task or use the gutter icons in IntelliJ IDEA to execute all or individual tests:
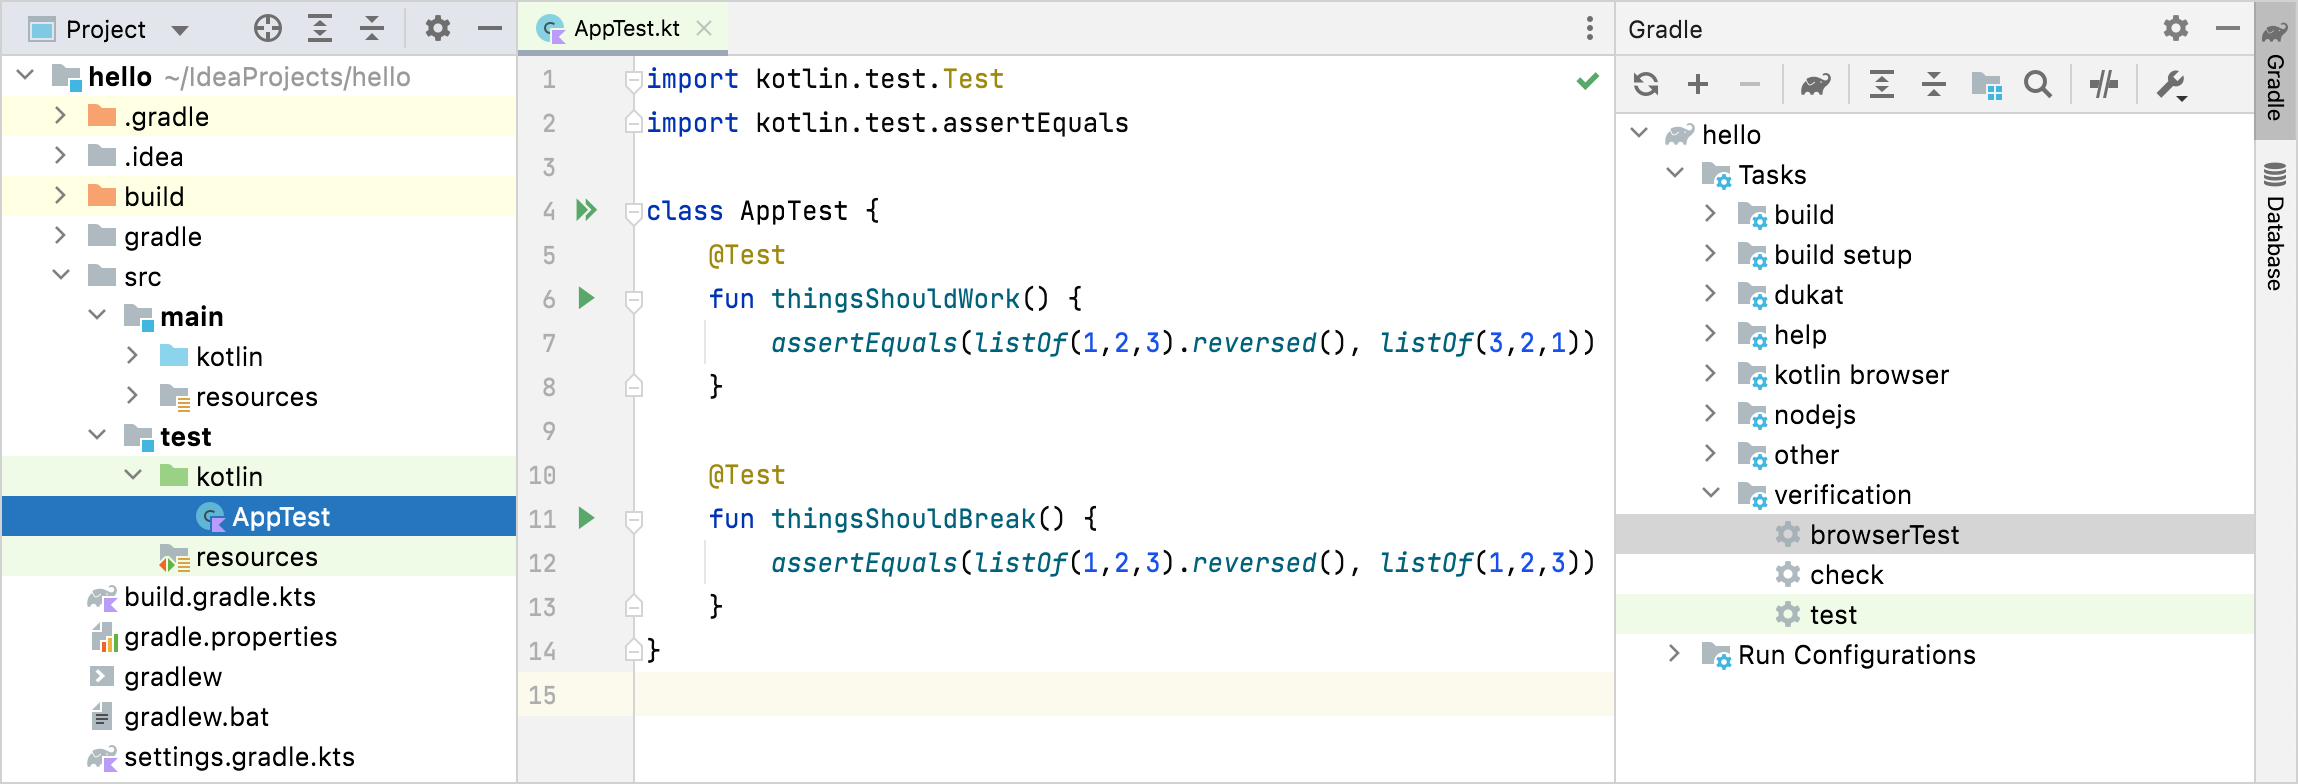
Alternatively, if you want to run the tests in the command line, use the Gradle wrapper:
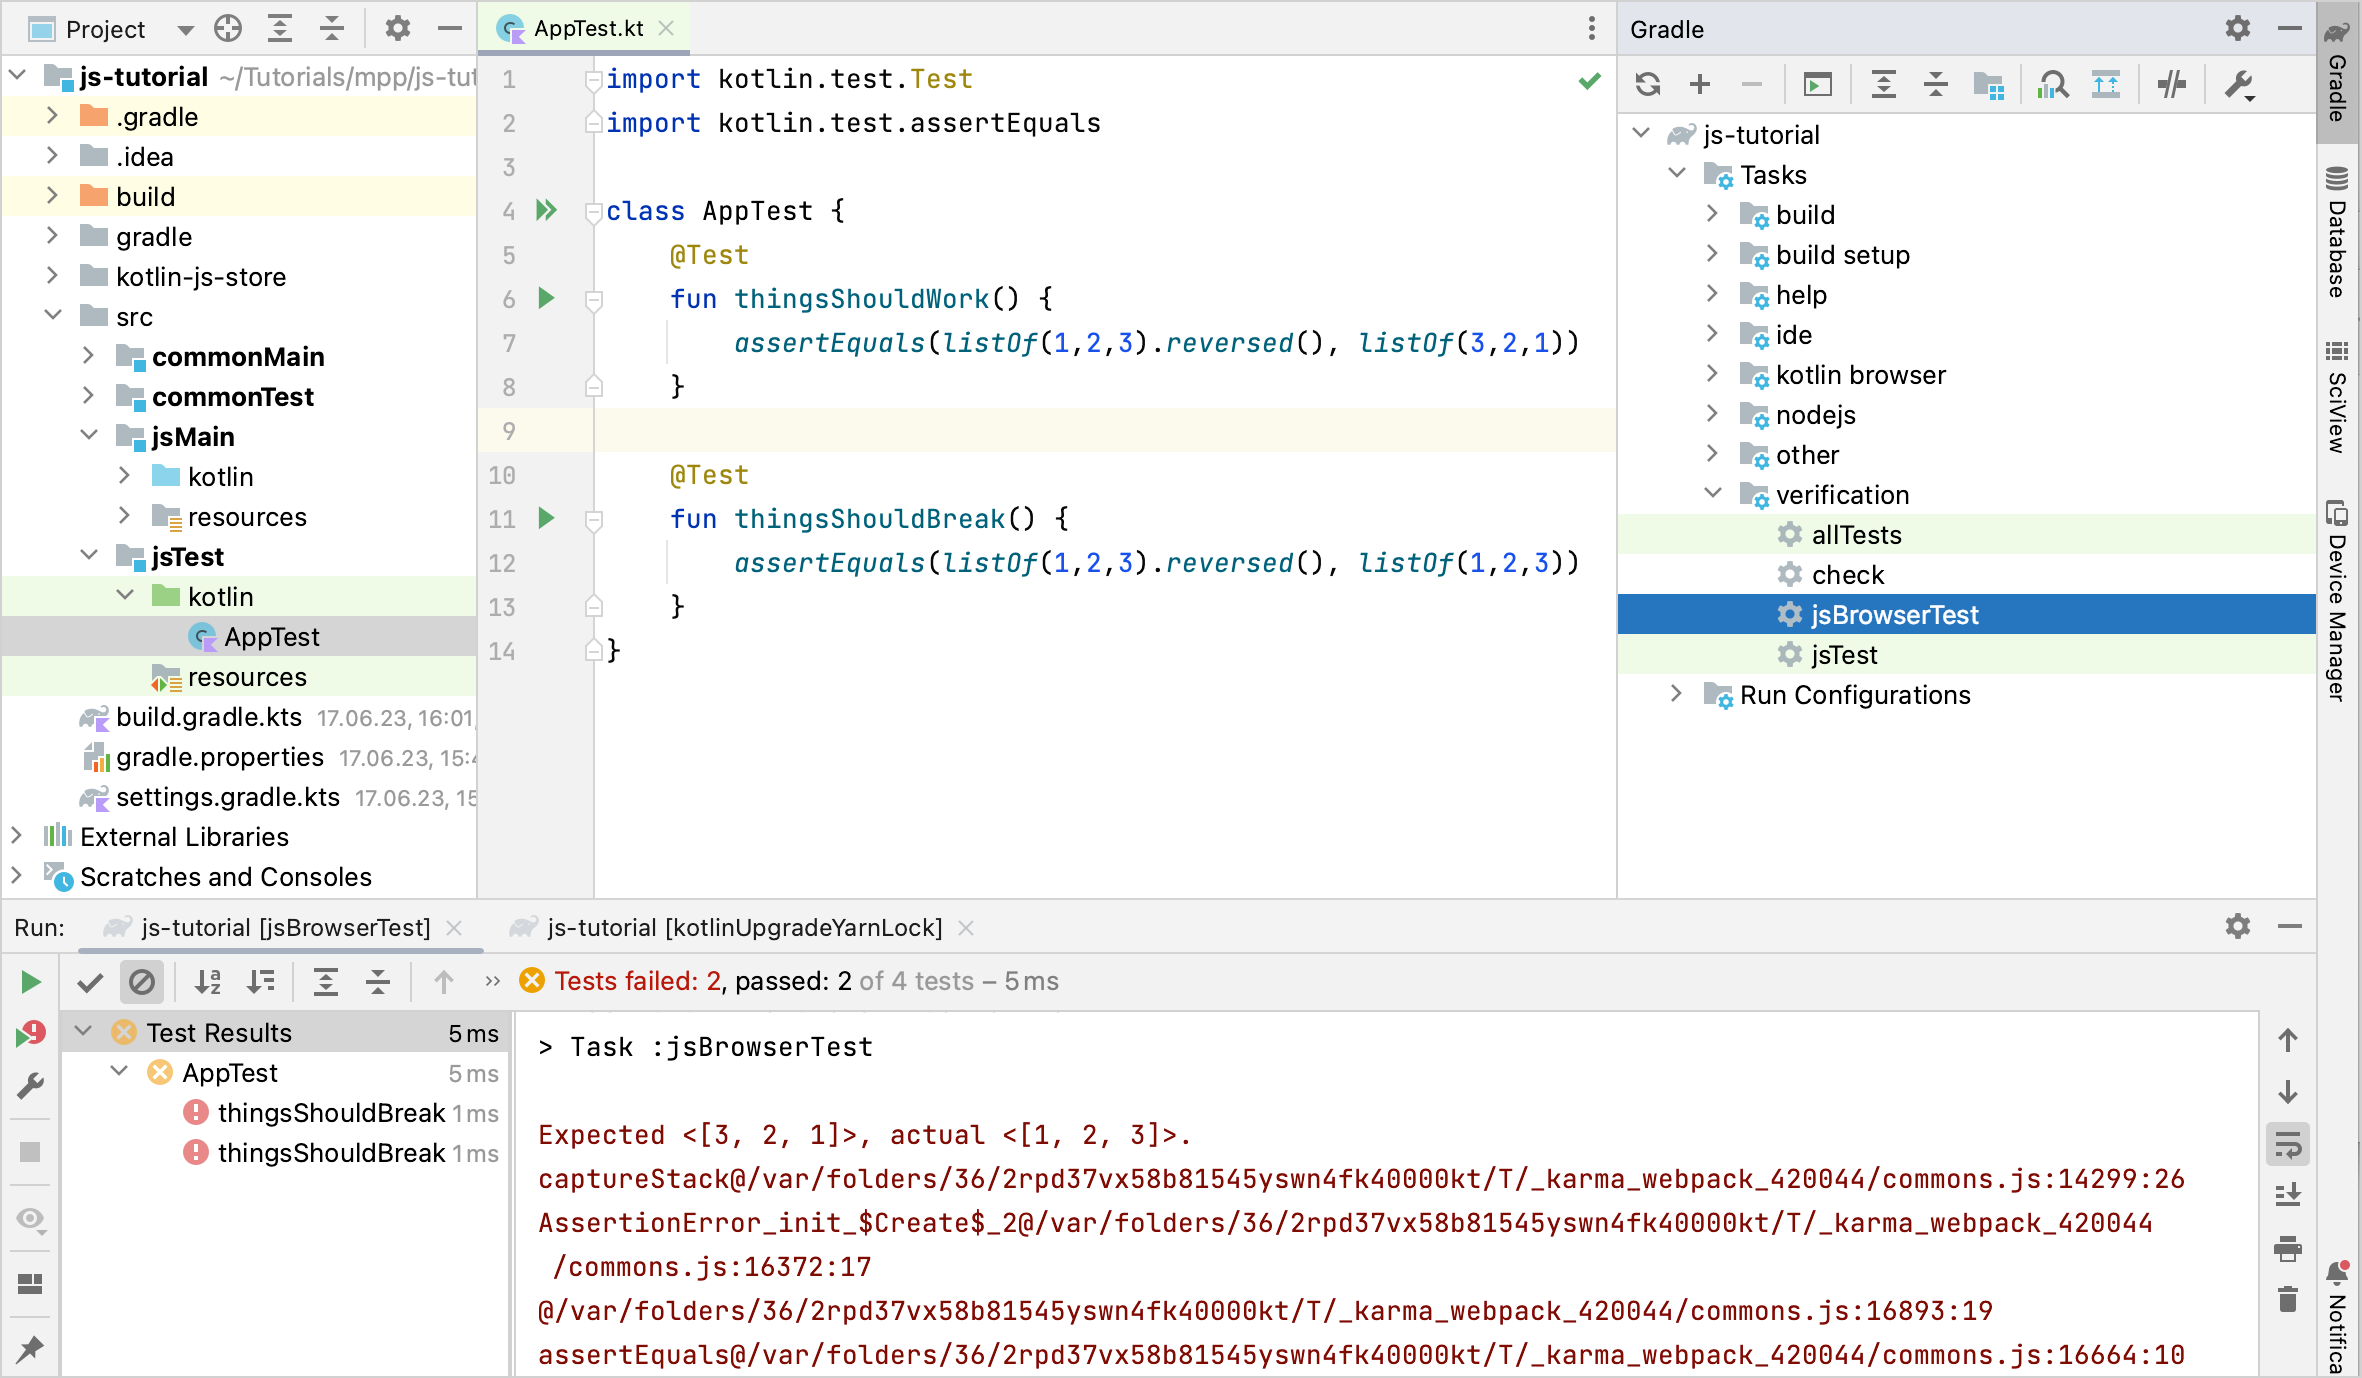
After running tests in IntelliJ IDEA, the Run tool window shows the test results. You can click failed tests to see their stack trace and navigate to the corresponding test implementation by double-clicking it.
After each test run, regardless of how you executed the test, you can find a properly formatted test report from Gradle in build/reports/tests/jsBrowserTest/index.html. Open this file in a browser to see another overview of the test results:
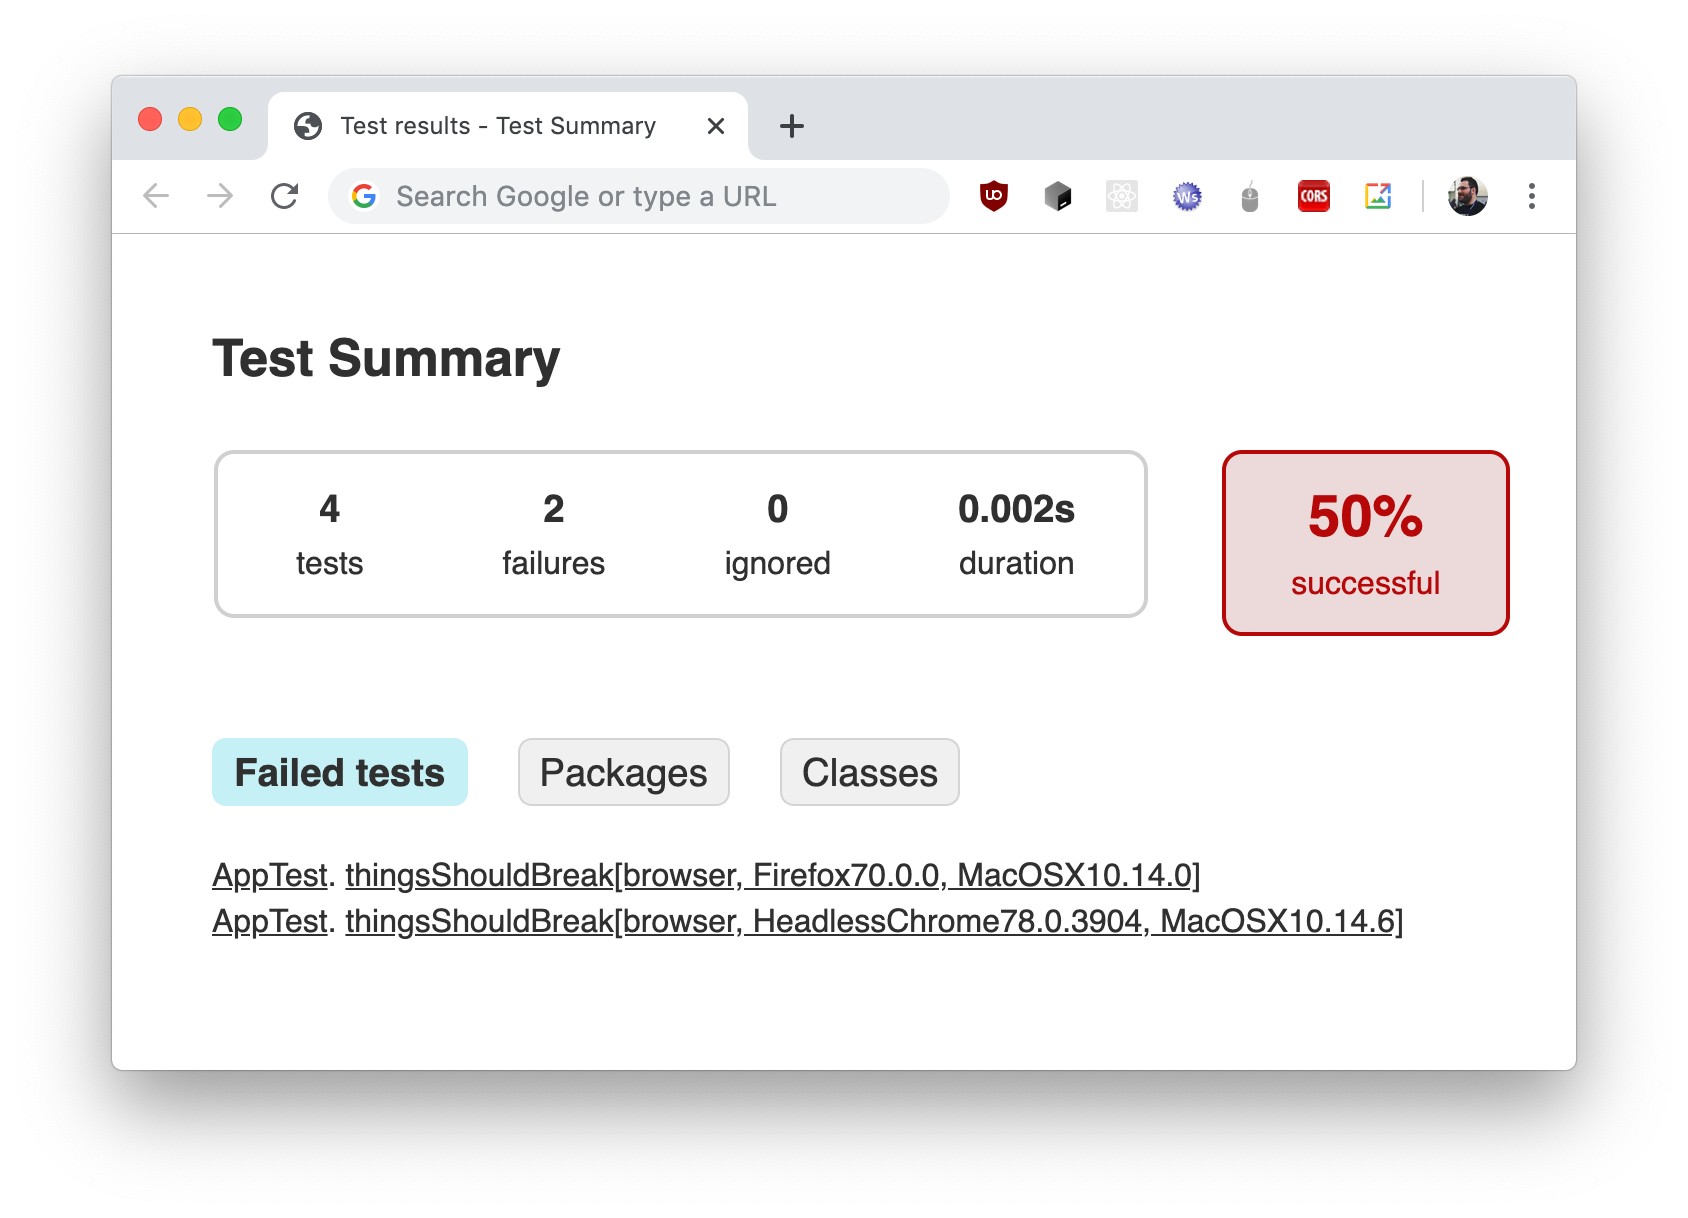
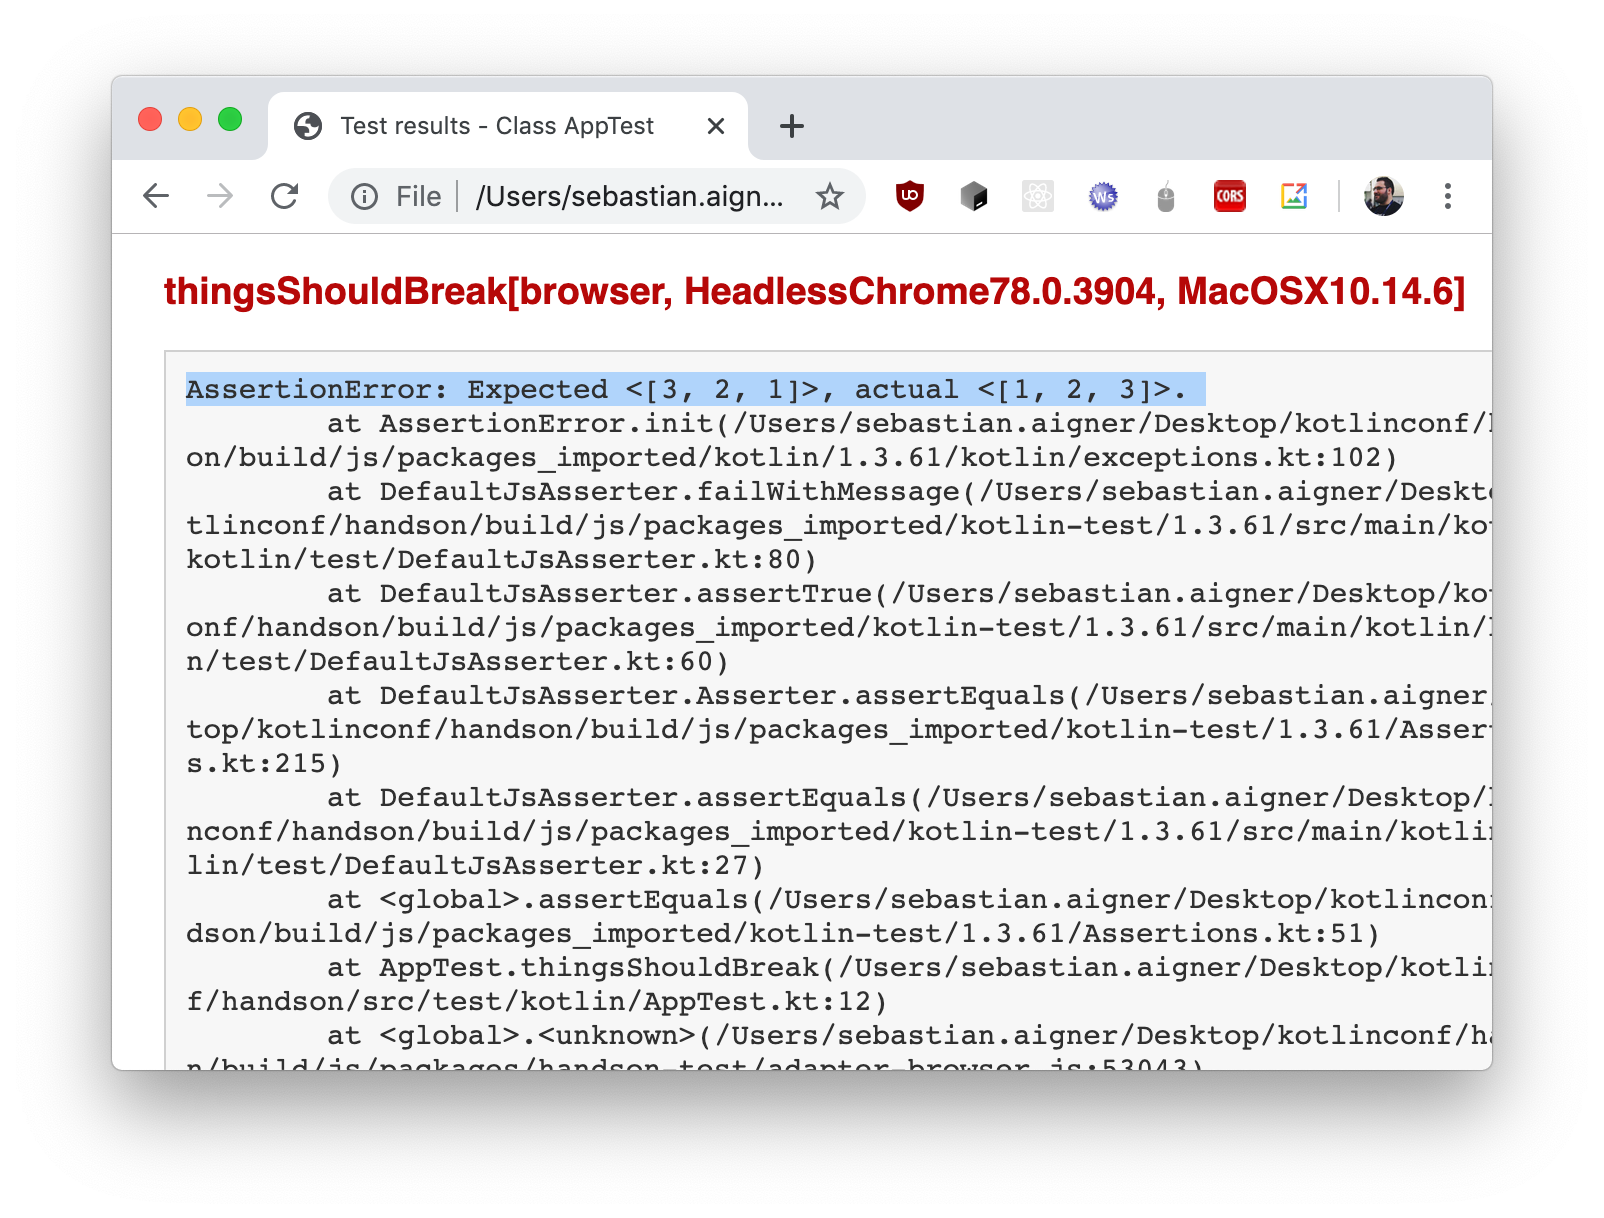
If you're using the set of example tests shown in the snippet above, one test passes, and one test fails, resulting in a 50% success rate. To get more information about individual test cases, use the provided links:
Advanced configuration
The new DSL for browser testing is designed to be minimalistic and tool-agnostic. The current implementation includes:
Playwright acts as a browser driver and distribution manager that supports the Chromium, Firefox, and WebKit (Safari) browser engines.
Mocha acts as a test runner.
webpack acts as a bundler (will be replaced with Vite in future releases).
The DSL exposes timeouts, headless mode, and per-runner options as Gradle properties, so you can share defaults between runners, override them for a specific browser, and compute values lazily with providers:
You can set the options for all test runners directly in the test {} block. To override these common options for a particular runner, use a custom name for it and provide different values inside a runner block. In this example, Chromium and WebKit (Safari) browsers use timeouts of 10 and 35 seconds, respectively, while Firefox uses the common timeout of 30 seconds.
Each runner is registered under its own name, so the test report tells you which browser a particular result comes from.
Configuration for plugin authors
If you write a Gradle plugin on top of the Kotlin Multiplatform Gradle plugin, the new DSL for browser testing also gives you access to the browser runners and to the location of the generated test bundle.
Kotlin generates the test bundle for running browser tests using the default test runner page. You can replace it by pointing to a different location in the testsLocation property:
Your custom test bundler can include your own development server, bundler, or test runner. The defaultTestsLocationProvider property gives you access to the default location, so you can build on top of it instead of implementing everything from scratch.
Each test location exposes the directory with the generated test bundle (bundleLocation), the name of the test page (testHtmlFileName), and the URL that the browser opens (url) through the KotlinJsTestsLocation interface.
With access to these APIs, you can:
Customize the URL that the browser opens. Each browser runner has its own test location, so you can override it either for all runners in the
test {}block or for a particular runner.Override the bundle location itself, for example, to add extra files to the bundle.
Post-process the generated test bundle. Register your own task and modify the files there before the browser opens them, for example, to inject your own configuration into
test.html.
Keep the following limitations in mind when you build plugins using these APIs:
Configuring
subtarget.testenables the new test pipeline and disables Karma. There is currently no reliable way to detect which pipeline the user has chosen.There is no reliable way to configure a specific browser runner lazily, so the configuration has to happen in
afterEvaluate. Consider asking your users to set the test location explicitly or exposing decorating functions such asmyPluginChromium()instead.
Leave feedback
The new DSL for browser testing is in active development. New features, for example debugging, are planned for the next Kotlin releases.
We would appreciate your feedback in YouTrack or in the #javascript Slack channel.