Get started with Kotlin/Native
In this tutorial, you'll learn how to create a Kotlin/Native application. Choose the tool that works best for you and create your app using:
The IDE. Here, you can clone the project template from a version control system and use it in IntelliJ IDEA.
The Gradle build system. To better understand how things work under the hood, create build files for your project manually.
The command line tool. You can use the Kotlin/Native compiler, which is shipped as a part of the standard Kotlin distribution, and create the app directly in the command line tool.
Console compilation may seem easy and straightforward, but it doesn't scale well for larger projects with hundreds of files and libraries. For such projects, we recommend using an IDE or a build system.
With Kotlin/Native, you can compile for different targets, including Linux, macOS, and Windows. While cross-platform compilation is possible, which means using one platform to compile for a different one, in this tutorial, you'll be targeting the same platform you're compiling on.
In IDE
In this section, you'll learn how to use IntelliJ IDEA to create a Kotlin/Native application. You can use both the Community Edition and the Ultimate Edition.
Create the project
Download and install the latest version of IntelliJ IDEA.
Clone the project template by selecting File | New | Project from Version Control in IntelliJ IDEA and using this URL:
https://github.com/Kotlin/kmp-native-wizardOpen the
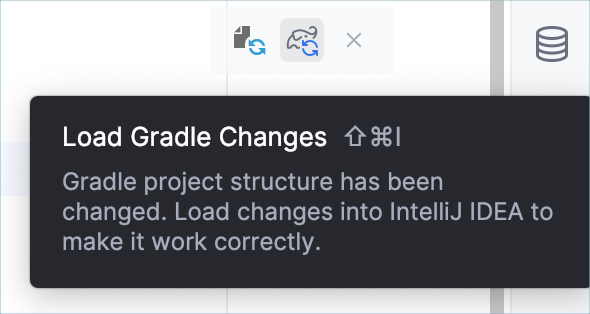
gradle/libs.versions.tomlfile, which is the version catalog for project dependencies. To create Kotlin/Native applications, you need the Kotlin Multiplatform Gradle plugin, which has the same version as Kotlin. Ensure that you use the latest Kotlin version:[versions] kotlin = "2.3.0"Follow the suggestion to reload Gradle files:
For more information about these settings, see the Multiplatform Gradle DSL reference.
Build and run the application
Open the Main.kt file in the src/nativeMain/kotlin/ directory:
The
srcdirectory contains Kotlin source files.The
Main.ktfile includes code that prints "Hello, Kotlin/Native!" using theprintln()function.
Press the green icon in the gutter to run the code:
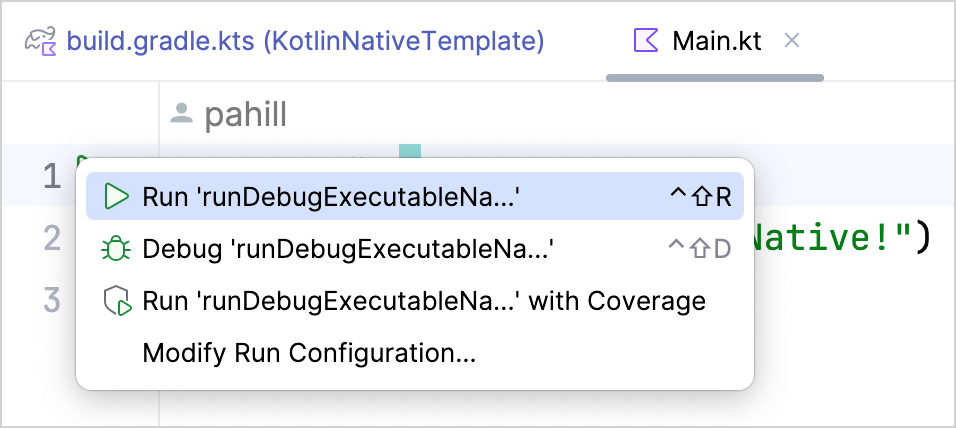
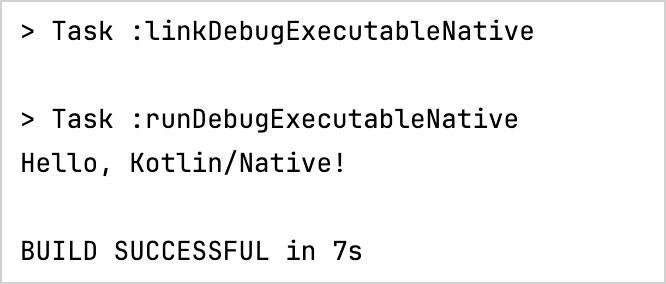
IntelliJ IDEA runs the code using the Gradle task and outputs the result in the Run tab:
After the first run, the IDE creates the corresponding run configuration at the top:

You can configure IntelliJ IDEA to build your project automatically:
Go to Settings | Build, Execution, Deployment | Compiler.
On the Compiler page, select Build project automatically.
Apply the changes.
Now, when you make changes in the class files or save the file (Ctrl + S/Cmd + S), IntelliJ IDEA automatically performs an incremental build of the project.
Update the application
Let's add a feature to your application so it can count the number of letters in your name:
In the
Main.ktfile, add code to read the input. Use thereadln()function to read the input value and assign it to thenamevariable:fun main() { // Read the input value. println("Hello, enter your name:") val name = readln() }To run this app using Gradle, specify
System.inas the input to use in thebuild.gradle.ktsfile and load the Gradle changes:kotlin { //... nativeTarget.apply { binaries { executable { entryPoint = "main" runTaskProvider?.configure { standardInput = System.`in` } } } } //... }Eliminate the whitespaces and count the letters:
Use the
replace()function to remove the empty spaces in the name.Use the scope function
letto run the function within the object context.Use a string template to insert your name length into the string by adding a dollar sign
$and enclosing it in curly braces –${it.length}.itis the default name of a lambda parameter.
fun main() { // Read the input value. println("Hello, enter your name:") val name = readln() // Count the letters in the name. name.replace(" ", "").let { println("Your name contains ${it.length} letters") } }Run the application.
Enter your name and enjoy the result:
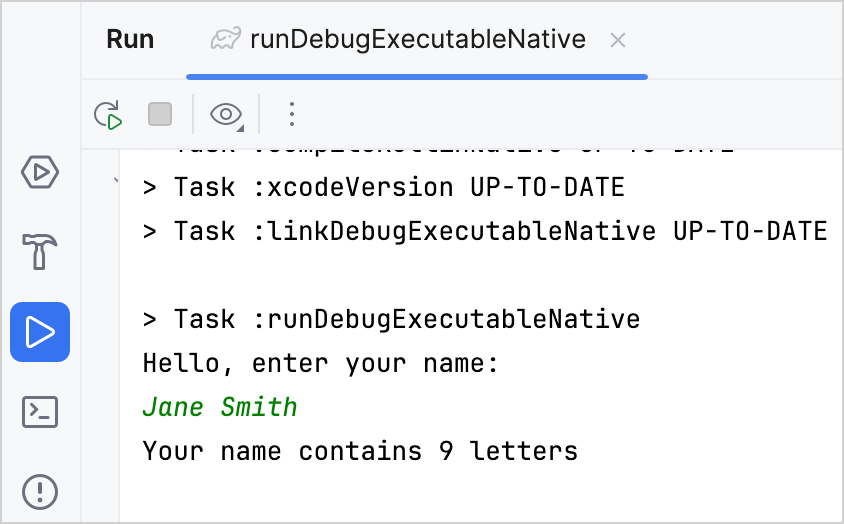
Now let's count only the unique letters in your name:
In the
Main.ktfile, declare the new extension function.countDistinctCharacters()forString:Convert the name to lowercase using the
.lowercase()function.Convert the input string to a list of characters using the
toList()function.Select only the distinct characters in your name using the
distinct()function.Count the distinct characters using the
count()function.
fun String.countDistinctCharacters() = lowercase().toList().distinct().count()Use the
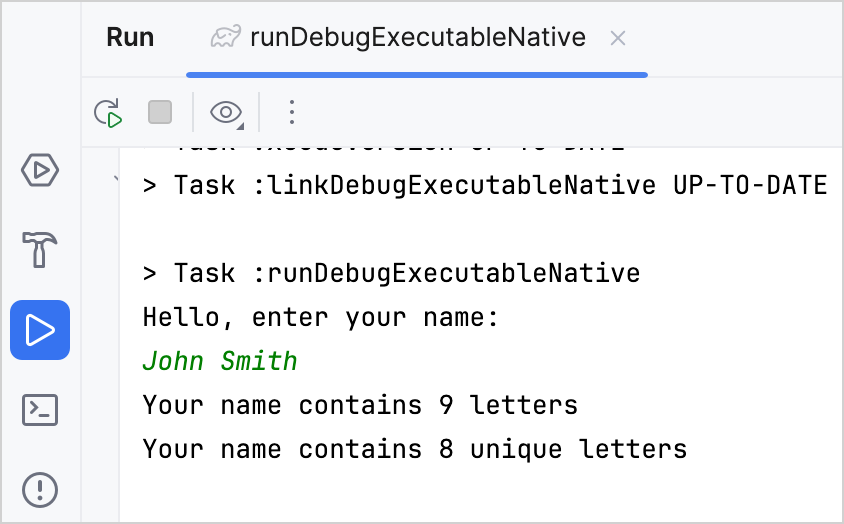
.countDistinctCharacters()function to count the unique letters in your name:fun String.countDistinctCharacters() = lowercase().toList().distinct().count() fun main() { // Read the input value. println("Hello, enter your name:") val name = readln() // Count the letters in the name. name.replace(" ", "").let { println("Your name contains ${it.length} letters") // Print the number of unique letters. println("Your name contains ${it.countDistinctCharacters()} unique letters") } }Run the application.
Enter your name and see the result:
Using Gradle
In this section, you'll learn how to manually create a Kotlin/Native application using Gradle. It's the default build system for Kotlin/Native and Kotlin Multiplatform projects, which is also commonly used in Java, Android, and other ecosystems.
When building Kotlin/Native projects, the Kotlin Gradle plugin downloads the following artifacts:
The main Kotlin/Native bundle, which includes different tools like
konanc,cinterop, andjsinterop. By default, the Kotlin/Native bundle is downloaded from the Maven Central repository as a simple Gradle dependency.Dependencies required for
konancitself, likellvm. They are downloaded from the JetBrains CDN using custom logic.
You can change the source for the main bundle download in the repositories {} block in your Gradle build script.
Create project files
To get started, install a compatible version of Gradle. See the compatibility table to check the Kotlin Gradle plugin (KGP) compatibility with available Gradle versions.
Create an empty project directory. Inside it, create a
build.gradle(.kts)file with the following content:// build.gradle.kts plugins { kotlin("multiplatform") version "2.3.0" } repositories { // Specify the source to download the main bundle // Maven Central is used by default mavenCentral() } kotlin { macosArm64("native") { // on macOS // linuxArm64("native") // on Linux // mingwX64("native") // on Windows binaries { executable() } } } tasks.withType<Wrapper> { gradleVersion = "9.0.0" distributionType = Wrapper.DistributionType.BIN }// build.gradle plugins { id 'org.jetbrains.kotlin.multiplatform' version '2.3.0' } repositories { // Specify the source to download the main bundle // Maven Central is used by default mavenCentral() } kotlin { macosArm64('native') { // on macOS // linuxArm64('native') // on Linux // mingwX64('native') // on Windows binaries { executable() } } } wrapper { gradleVersion = '9.0.0' distributionType = 'BIN' }You can use different target names, such as
macosArm64,iosArm64linuxArm64, andmingwX64to define the targets for which you are compiling your code. These target names can optionally take the platform name as a parameter, which in this case isnative. The platform name is used to generate the source paths and task names in the project.Create an empty
settings.gradle(.kts)file in the project directory.Create a
src/nativeMain/kotlindirectory and place ahello.ktfile inside with the following content:fun main() { println("Hello, Kotlin/Native!") }
By convention, all sources are located in the src/<target name>[Main|Test]/kotlin directories, where Main is for the source code and Test is for tests. <target name> corresponds to the target platform (in this case, native), as specified in the build file.
Build and run the project
From the root project directory, run the build command:
./gradlew nativeBinariesThis command creates the
build/bin/nativedirectory with two directories inside:debugExecutableandreleaseExecutable. They contain the corresponding binary files.By default, the name of the binary file is the same as the project directory.
To run the project, execute the following command:
build/bin/native/debugExecutable/<project_name>.kexe
The terminal prints "Hello, Kotlin/Native!".
Open the project in IDE
Now, you can open your project in any IDE that supports Gradle. If you use IntelliJ IDEA:
Select File | Open.
Select the project directory and click Open. IntelliJ IDEA automatically detects if it's a Kotlin/Native project.
If you encounter a problem with the project, IntelliJ IDEA displays the error message in the Build tab.
Using the command-line compiler
In this section, you'll learn how to create a Kotlin/Native application using the Kotlin compiler in the command line tool.
Download and install the compiler
To install the compiler:
Go to the Kotlin's GitHub releases page and scroll down to the Assets section.
Look for a file with
kotlin-nativein the name and download one that is suitable for your operating system, for examplekotlin-native-prebuilt-linux-x86_64-2.3.0.tar.gz.Unpack the archive to a directory of your choice.
Open your shell profile and add the path to the compiler's
/bindirectory to thePATHenvironment variable:export PATH="/<path to the compiler>/kotlin-native/bin:$PATH"
Create the program
Choose a working directory and create a file named hello.kt. Update it with the following code:
Compile the code from the console
To compile the application, execute the following command with the downloaded compiler:
The value of the -o option specifies the name of the output file, so this call generates the hello.kexe binary file on macOS and Linux (and hello.exe on Windows).
For the full list of available options, see Kotlin compiler options.
Run the program
To run the program, in your command line tool, navigate to the directory containing the binary file and run the following command:
The application prints "Hello, Kotlin/Native" to the standard output.
What's next?
Complete the Create an app using C interop and libcurl tutorial that explains how to create a native HTTP client and interoperate with C libraries.
Learn how to write Gradle build scripts for real-life Kotlin/Native projects.
Read more about the Gradle build system in the documentation.