Classes and interfaces
In the beginner tour, you learned how to use classes and data classes to store data and maintain a collection of characteristics that can be shared in your code. Eventually, you will want to create a hierarchy to efficiently share code within your projects. This chapter explains the options Kotlin provides for sharing code and how they can make your code safer and easier to maintain.
Class inheritance
In a previous chapter, we covered how you can use extension functions to extend classes without modifying the original source code. But what if you are working on something complex where sharing code between classes would be useful? In such cases, you can use class inheritance.
By default, classes in Kotlin can't be inherited. Kotlin is designed this way to prevent unintended inheritance and make your classes easier to maintain.
Kotlin classes only support single inheritance, meaning it is only possible to inherit from one class at a time. This class is called the parent.
The parent of a class inherits from another class (the grandparent), forming a hierarchy. At the top of Kotlin's class hierarchy is the common parent class: Any. All classes ultimately inherit from the Any class:
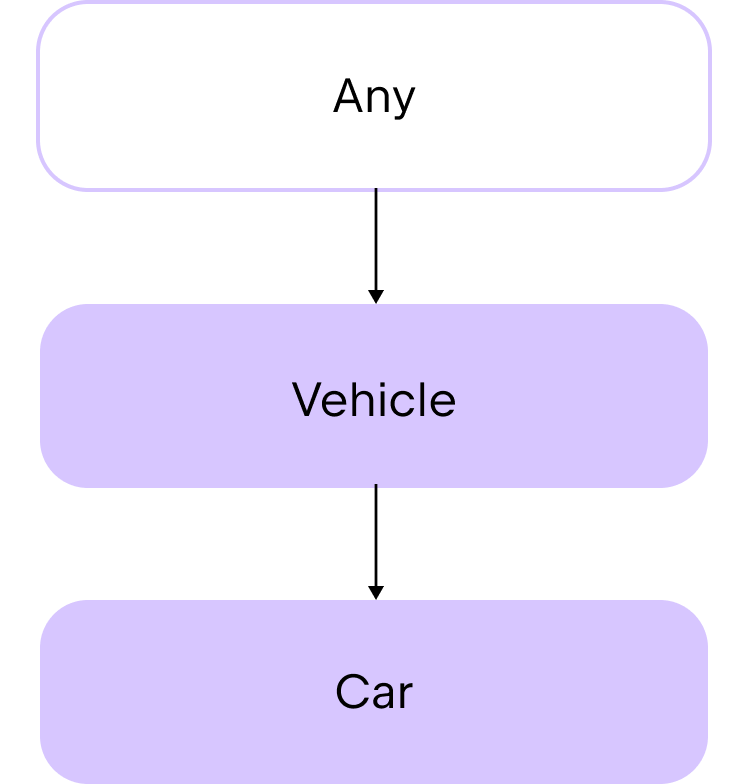
The Any class provides the toString() function as a member function automatically. Therefore, you can use this inherited function in any of your classes. For example:
If you want to use inheritance to share some code between classes, first consider using abstract classes.
Abstract classes
Abstract classes can be inherited by default. The purpose of abstract classes is to provide members that other classes inherit or implement. As a result, they have a constructor, but you can't create instances from them. Within the child class, you define the behavior of the parent's properties and functions with the override keyword. In this way, you can say that the child class "overrides" the members of the parent class.
Abstract classes can contain both functions and properties with implementation as well as functions and properties without implementation, known as abstract functions and properties.
To create an abstract class, use the abstract keyword:
To declare a function or a property without an implementation, you also use the abstract keyword:
For example, let's say that you want to create an abstract class called Product that you can create child classes from to define different product categories:
In the abstract class:
The constructor has two parameters for the product's
nameandprice.There is an abstract property that contains the product category as a string.
There is a function that prints information about the product.
Let's create a child class for electronics. Before you define an implementation for the category property in the child class, you must use the override keyword:
The Electronic class:
Inherits from the
Productabstract class.Has an additional parameter in the constructor:
warranty, which is specific to electronics.Overrides the
categoryproperty to contain the string"Electronic".
Now, you can use these classes like this:
Although abstract classes are great for sharing code in this way, they are restricted because classes in Kotlin only support single inheritance. If you need to inherit from multiple sources, consider using interfaces.
Interfaces
Interfaces are similar to classes, but they have some differences:
You can't create an instance of an interface. They don't have a constructor or header.
Their functions and properties are implicitly inheritable by default. In Kotlin, we say that they are "open."
You don't need to mark their functions as
abstractif you don't give them an implementation.
Similar to abstract classes, you use interfaces to define a set of functions and properties that classes can inherit and implement later. This approach helps you focus on the abstraction described by the interface, rather than the specific implementation details. Using interfaces makes your code:
More modular, as it isolates different parts, allowing them to evolve independently.
Easier to understand by grouping related functions into a cohesive set.
Easier to test, as you can quickly swap an implementation with a mock for testing.
To declare an interface, use the interface keyword:
Interface implementation
Interfaces support multiple inheritance so a class can implement multiple interfaces at once. First, let's consider the scenario where a class implements one interface.
To create a class that implements an interface, add a colon after your class header, followed by the interface name that you want to implement. You don't use parentheses () after the interface name because interfaces don't have a constructor:
For example:
In the example:
PaymentMethodis an interface that has aninitiatePayment()function without an implementation.CreditCardPaymentis a class that implements thePaymentMethodinterface.The
CreditCardPaymentclass overrides the inheritedinitiatePayment()function.paymentMethodis an instance of theCreditCardPaymentclass.The overridden
initiatePayment()function is called on thepaymentMethodinstance with a parameter of100.0.
To create a class that implements multiple interfaces, add a colon after your class header followed by the name of the interfaces that you want to implement separated by a comma:
For example:
In the example:
PaymentMethodis an interface that has theinitiatePayment()function without an implementation.PaymentTypeis an interface that has thepaymentTypeproperty that isn't initialized.CreditCardPaymentis a class that implements thePaymentMethodandPaymentTypeinterfaces.The
CreditCardPaymentclass overrides the inheritedinitiatePayment()function and thepaymentTypeproperty.paymentMethodis an instance of theCreditCardPaymentclass.The overridden
initiatePayment()function is called on thepaymentMethodinstance with a parameter of100.0.The overridden
paymentTypeproperty is accessed on thepaymentMethodinstance.
For more information about interfaces and interface inheritance, see Interfaces.
Delegation
Interfaces are useful, but if your interface contains many functions, its child classes can end up with a lot of boilerplate code. If you only want to override a small part of a class's behavior, you need to repeat yourself a lot.
For example, let's say that you have an interface called DrawingTool that contains a number of functions and one property called color:
You create a class called PenTool which implements the DrawingTool interface and provides implementations for all of its members:
You want to create a class like PenTool with the same behavior but a different color value. One approach is to create a new class that expects an object implementing the DrawingTool interface as a parameter, like a PenTool class instance. Then, inside the class, you can override the color property.
But in this scenario, you need to add implementations for each member of the DrawingTool interface:
You can see that if you have a large number of member functions in the DrawingTool interface, the amount of boilerplate code in the CanvasSession class can be large. However, there is an alternative.
In Kotlin, you can delegate the interface implementation to a class instance using the by keyword. For example:
Here, tool is the name of the PenTool class instance where the implementations of member functions are delegated to.
Now you don't have to add implementations for the member functions in the CanvasSession class. The compiler does this for you automatically from the PenTool class. This saves you from having to write a lot of boilerplate code. Instead, you add code only for the behavior you want to change for your child class.
For example, if you want to change the value of the color property:
If you want to, you can also override the behavior of an inherited member function in the CanvasSession class, but now you don't have to add new lines of code for every inherited member function.
For more information, see Delegation.
Practice
- Implement smart devices with an abstract class
Imagine you're working on a smart home system. A smart home typically has different types of devices that all have some basic features but also unique behaviors. In the code sample below, complete the
abstractclass calledSmartDeviceso that the child classSmartLightcan compile successfully.Then, create another child class called
SmartThermostatthat inherits from theSmartDeviceclass and implementsturnOn()andturnOff()functions that return print statements describing which thermostat is heating or turned off. Finally, add another function calledadjustTemperature()that accepts a temperature measurement as an input and prints:$name thermostat set to $temperature°C.- Hint
In the
SmartDeviceclass, add theturnOn()andturnOff()functions so that you can override their behavior later in theSmartThermostatclass.
abstract class // Write your code here class SmartLight(name: String) : SmartDevice(name) { override fun turnOn() { println("$name is now ON.") } override fun turnOff() { println("$name is now OFF.") } fun adjustBrightness(level: Int) { println("Adjusting $name brightness to $level%.") } } class SmartThermostat // Write your code here fun main() { val livingRoomLight = SmartLight("Living Room Light") val bedroomThermostat = SmartThermostat("Bedroom Thermostat") livingRoomLight.turnOn() // Living Room Light is now ON. livingRoomLight.adjustBrightness(10) // Adjusting Living Room Light brightness to 10%. livingRoomLight.turnOff() // Living Room Light is now OFF. bedroomThermostat.turnOn() // Bedroom Thermostat thermostat is now heating. bedroomThermostat.adjustTemperature(5) // Bedroom Thermostat thermostat set to 5°C. bedroomThermostat.turnOff() // Bedroom Thermostat thermostat is now off. }abstract class SmartDevice(val name: String) { abstract fun turnOn() abstract fun turnOff() } class SmartLight(name: String) : SmartDevice(name) { override fun turnOn() { println("$name is now ON.") } override fun turnOff() { println("$name is now OFF.") } fun adjustBrightness(level: Int) { println("Adjusting $name brightness to $level%.") } } class SmartThermostat(name: String) : SmartDevice(name) { override fun turnOn() { println("$name thermostat is now heating.") } override fun turnOff() { println("$name thermostat is now off.") } fun adjustTemperature(temperature: Int) { println("$name thermostat set to $temperature°C.") } } fun main() { val livingRoomLight = SmartLight("Living Room Light") val bedroomThermostat = SmartThermostat("Bedroom Thermostat") livingRoomLight.turnOn() // Living Room Light is now ON. livingRoomLight.adjustBrightness(10) // Adjusting Living Room Light brightness to 10%. livingRoomLight.turnOff() // Living Room Light is now OFF. bedroomThermostat.turnOn() // Bedroom Thermostat thermostat is now heating. bedroomThermostat.adjustTemperature(5) // Bedroom Thermostat thermostat set to 5°C. bedroomThermostat.turnOff() // Bedroom Thermostat thermostat is now off. }- Implement a media interface
Create an interface called
Mediathat you can use to implement specific media classes likeAudio,Video, orPodcast. Your interface must include:A property called
titleto represent the title of the media.A function called
play()to play the media.
Then, create a class called
Audiothat implements theMediainterface. TheAudioclass must use thetitleproperty in its constructor as well as have an additional property calledcomposerthat hasStringtype. In the class, implement theplay()function to print the following:"Playing audio: $title, composed by $composer".- Hint
You can use the
overridekeyword in class headers to implement a property from an interface in the constructor.
interface // Write your code here class // Write your code here fun main() { val audio = Audio("Symphony No. 5", "Beethoven") audio.play() // Playing audio: Symphony No. 5, composed by Beethoven }interface Media { val title: String fun play() } class Audio(override val title: String, val composer: String) : Media { override fun play() { println("Playing audio: $title, composed by $composer") } } fun main() { val audio = Audio("Symphony No. 5", "Beethoven") audio.play() // Playing audio: Symphony No. 5, composed by Beethoven }- Combine an interface and an abstract class
You're building a payment processing system for an e-commerce application. Each payment method needs to be able to authorize a payment and process a transaction. Some payments also need to be able to process refunds.
In the
Refundableinterface, add a function calledrefund()to process refunds.In the
PaymentMethodabstract class:Add a function called
authorize()that takes an amount and prints a message containing the amount.Add an abstract function called
processPayment()that also takes an amount.
Create a class called
CreditCardthat implements theRefundableinterface andPaymentMethodabstract class. In this class, add implementations for therefund()andprocessPayment()functions so that they print the following statements:"Refunding $amount to the credit card.""Processing credit card payment of $amount."
interface Refundable { // Write your code here } abstract class PaymentMethod(val name: String) { // Write your code here } class CreditCard // Write your code here fun main() { val visa = CreditCard("Visa") visa.authorize(100.0) // Authorizing payment of $100.0. visa.processPayment(100.0) // Processing credit card payment of $100.0. visa.refund(50.0) // Refunding $50.0 to the credit card. }interface Refundable { fun refund(amount: Double) } abstract class PaymentMethod(val name: String) { fun authorize(amount: Double) { println("Authorizing payment of $$amount.") } abstract fun processPayment(amount: Double) } class CreditCard(name: String) : PaymentMethod(name), Refundable { override fun processPayment(amount: Double) { println("Processing credit card payment of $$amount.") } override fun refund(amount: Double) { println("Refunding $$amount to the credit card.") } } fun main() { val visa = CreditCard("Visa") visa.authorize(100.0) // Authorizing payment of $100.0. visa.processPayment(100.0) // Processing credit card payment of $100.0. visa.refund(50.0) // Refunding $50.0 to the credit card. }- Customize behavior with interface delegation
You have a simple messaging app that has some basic functionality, but you want to add some functionality for smart messages without significantly duplicating your code.
In the code below, define a class called
SmartMessengerthat inherits from theMessengerinterface but delegates the implementation to an instance of theBasicMessengerclass.In the
SmartMessengerclass, override thesendMessage()function to send smart messages. The function must accept amessageas an input and return a printed statement:"Sending a smart message: $message". In addition, call thesendMessage()function from theBasicMessengerclass and prefix the message with[smart].interface Messenger { fun sendMessage(message: String) fun receiveMessage(): String } class BasicMessenger : Messenger { override fun sendMessage(message: String) { println("Sending message: $message") } override fun receiveMessage(): String { return "You've got a new message!" } } class SmartMessenger // Write your code here fun main() { val basicMessenger = BasicMessenger() val smartMessenger = SmartMessenger(basicMessenger) basicMessenger.sendMessage("Hello!") // Sending message: Hello! println(smartMessenger.receiveMessage()) // You've got a new message! smartMessenger.sendMessage("Hello from SmartMessenger!") // Sending a smart message: Hello from SmartMessenger! // Sending message: [smart] Hello from SmartMessenger! }interface Messenger { fun sendMessage(message: String) fun receiveMessage(): String } class BasicMessenger : Messenger { override fun sendMessage(message: String) { println("Sending message: $message") } override fun receiveMessage(): String { return "You've got a new message!" } } class SmartMessenger(val basicMessenger: BasicMessenger) : Messenger by basicMessenger { override fun sendMessage(message: String) { println("Sending a smart message: $message") basicMessenger.sendMessage("[smart] $message") } } fun main() { val basicMessenger = BasicMessenger() val smartMessenger = SmartMessenger(basicMessenger) basicMessenger.sendMessage("Hello!") // Sending message: Hello! println(smartMessenger.receiveMessage()) // You've got a new message! smartMessenger.sendMessage("Hello from SmartMessenger!") // Sending a smart message: Hello from SmartMessenger! // Sending message: [smart] Hello from SmartMessenger! }