Build a web application with React and Kotlin/JS — tutorial
This tutorial will teach you how to build a browser application with Kotlin/JS and the React framework. You will:
Complete common tasks associated with building a typical React application.
Explore how Kotlin's DSLs can be used to help express concepts concisely and uniformly without sacrificing readability, allowing you to write a full-fledged application completely in Kotlin.
Learn how to use ready-made npm components, use external libraries, and publish the final application.
The output will be a KotlinConf Explorer web app dedicated to the KotlinConf event, with links to conference talks. Users will be able to watch all the talks on one page and mark them as seen or unseen.
The tutorial assumes you have prior knowledge of Kotlin and basic knowledge of HTML and CSS. Understanding the basic concepts behind React may help you understand some sample code, but it is not strictly required.
Before you start
Download and install the latest version of IntelliJ IDEA.
Clone the project template and open it in IntelliJ IDEA. The template includes a basic Kotlin Multiplatform Gradle project with all required configurations and dependencies
Dependencies and tasks in the
build.gradle.ktsfile:
dependencies { // React, React DOM + Wrappers implementation(enforcedPlatform("org.jetbrains.kotlin-wrappers:kotlin-wrappers-bom:1.0.0-pre.430")) implementation("org.jetbrains.kotlin-wrappers:kotlin-react") implementation("org.jetbrains.kotlin-wrappers:kotlin-react-dom") // Kotlin React Emotion (CSS) implementation("org.jetbrains.kotlin-wrappers:kotlin-emotion") // Video Player implementation(npm("react-player", "2.12.0")) // Share Buttons implementation(npm("react-share", "4.4.1")) // Coroutines & serialization implementation("org.jetbrains.kotlinx:kotlinx-coroutines-core:1.6.4") implementation("org.jetbrains.kotlinx:kotlinx-serialization-json:1.5.0") }An HTML template page in
src/jsMain/resources/index.htmlfor inserting JavaScript code that you'll be using in this tutorial:
<!doctype html> <html lang="en"> <head> <meta charset="UTF-8"> <title>Hello, Kotlin/JS!</title> </head> <body> <div id="root"></div> <script src="confexplorer.js"></script> </body> </html>Kotlin/JS projects are automatically bundled with all of your code and its dependencies into a single JavaScript file with the same name as the project,
confexplorer.js, when you build them. As a typical JavaScript convention, the content of the body (including therootdiv) is loaded first to ensure that the browser loads all page elements before the scripts.
A code snippet in
src/jsMain/kotlin/Main.kt:import kotlinx.browser.document fun main() { document.bgColor = "red" }
Run the development server
By default, the Kotlin Multiplatform Gradle plugin comes with support for an embedded webpack-dev-server, allowing you to run the application from the IDE without manually setting up any servers.
To test that the program successfully runs in the browser, start the development server by invoking the run or browserDevelopmentRun task (available in the other or kotlin browser directory) from the Gradle tool window inside IntelliJ IDEA:

To run the program from the Terminal, use ./gradlew run instead.
When the project is compiled and bundled, a blank red page will appear in a browser window:
Enable hot reload / continuous mode
Configure continuous compilation mode so you don't have to manually compile and execute your project every time you make changes. Make sure to stop all running development server instances before proceeding.
Edit the run configuration that IntelliJ IDEA automatically generates after running the Gradle
runtask for the first time:
In the Run/Debug Configurations dialog, add the
--continuousoption to the arguments for the run configuration: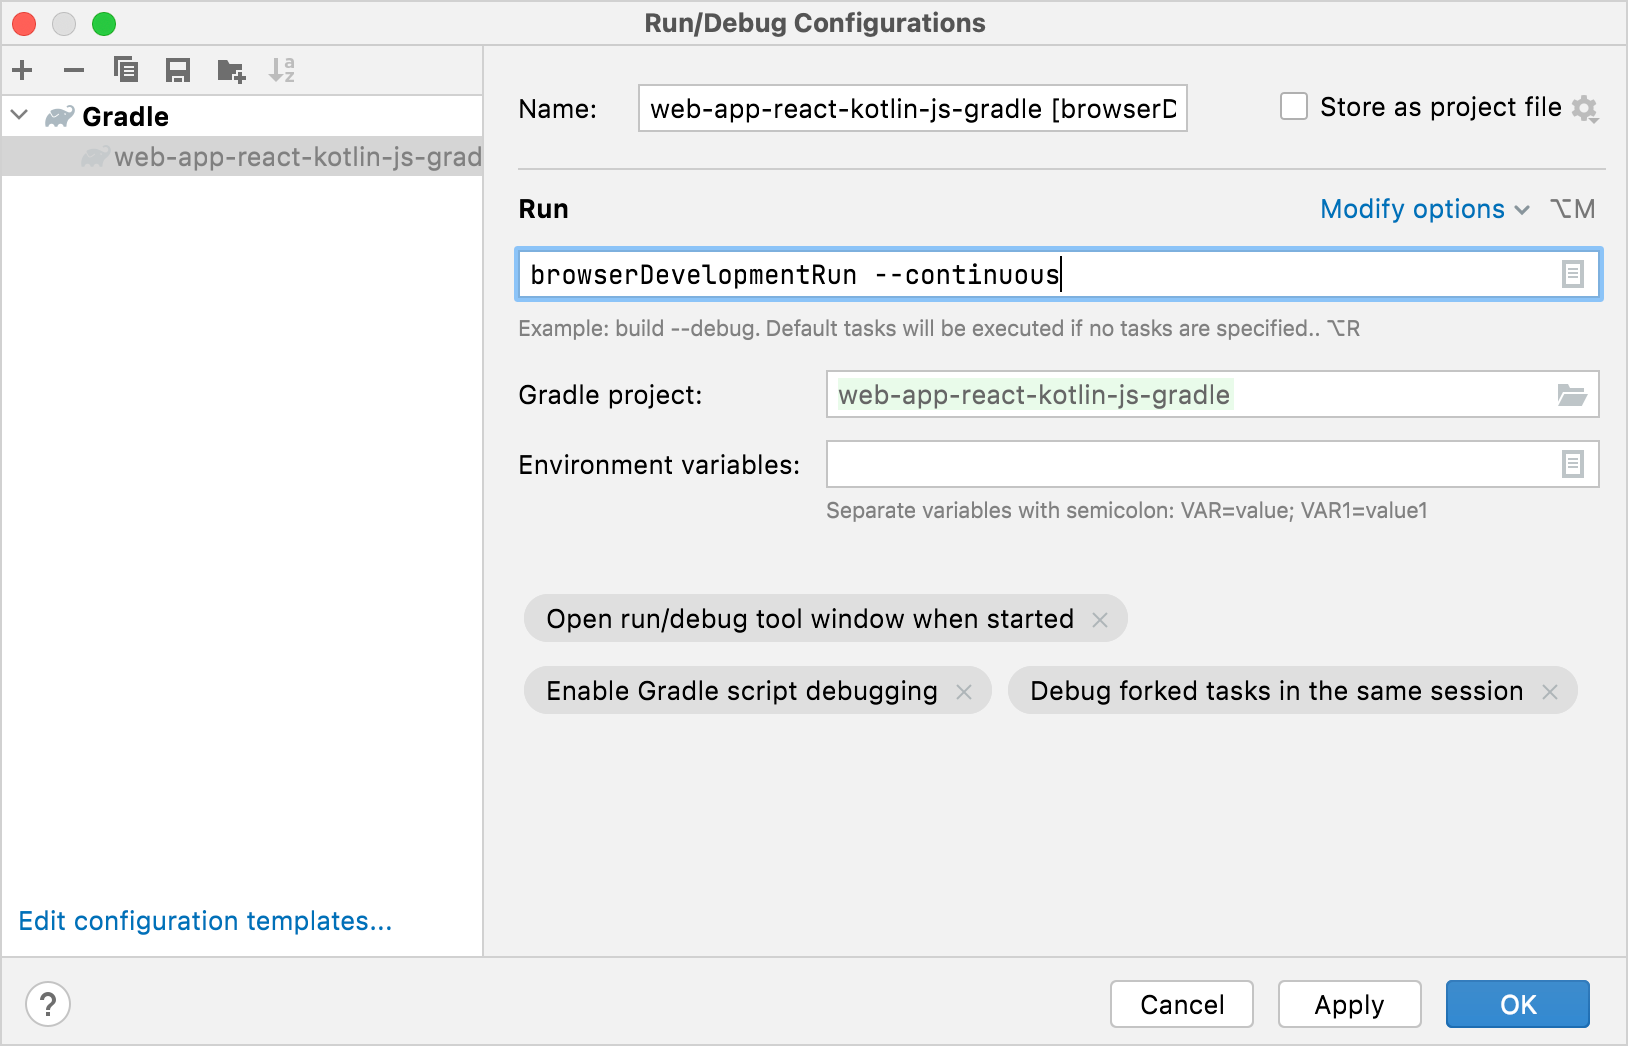
After applying the changes, you can use the Run button inside IntelliJ IDEA to start the development server back up. To run the continuous Gradle builds from the Terminal, use
./gradlew run --continuousinstead.To test this feature, change the color of the page to blue in the
Main.ktfile while the Gradle task is running:document.bgColor = "blue"The project then recompiles, and after a reload the browser page will be the new color.
You can keep the development server running in continuous mode during the development process. It will automatically rebuild and reload the page when you make changes.
Create a web app draft
Add the first static page with React
To make your app display a simple message, replace the code in the Main.kt file with the following:
The
render()function instructs kotlin-react-dom to render the first HTML element inside a fragment to therootelement. This element is a container defined insrc/jsMain/resources/index.html, which was included in the template.The content is an
<h1>header and uses a typesafe DSL to render HTML.h1is a function that takes a lambda parameter. When you add the+sign in front of a string literal, theunaryPlus()function is actually invoked using operator overloading. It appends the string to the enclosed HTML element.
When the project recompiles, the browser displays this HTML page:

Convert HTML to Kotlin's typesafe HTML DSL
The Kotlin wrappers for React come with a domain-specific language (DSL) that makes it possible to write HTML in pure Kotlin code. In this way, it's similar to JSX from JavaScript. However, with this markup being Kotlin, you get all the benefits of a statically typed language, such as autocomplete or type checking.
Compare the classic HTML code for your future web app and its typesafe variant in Kotlin:
Copy the Kotlin code and update the Fragment.create() function call inside the main() function, replacing the previous h1 tag.
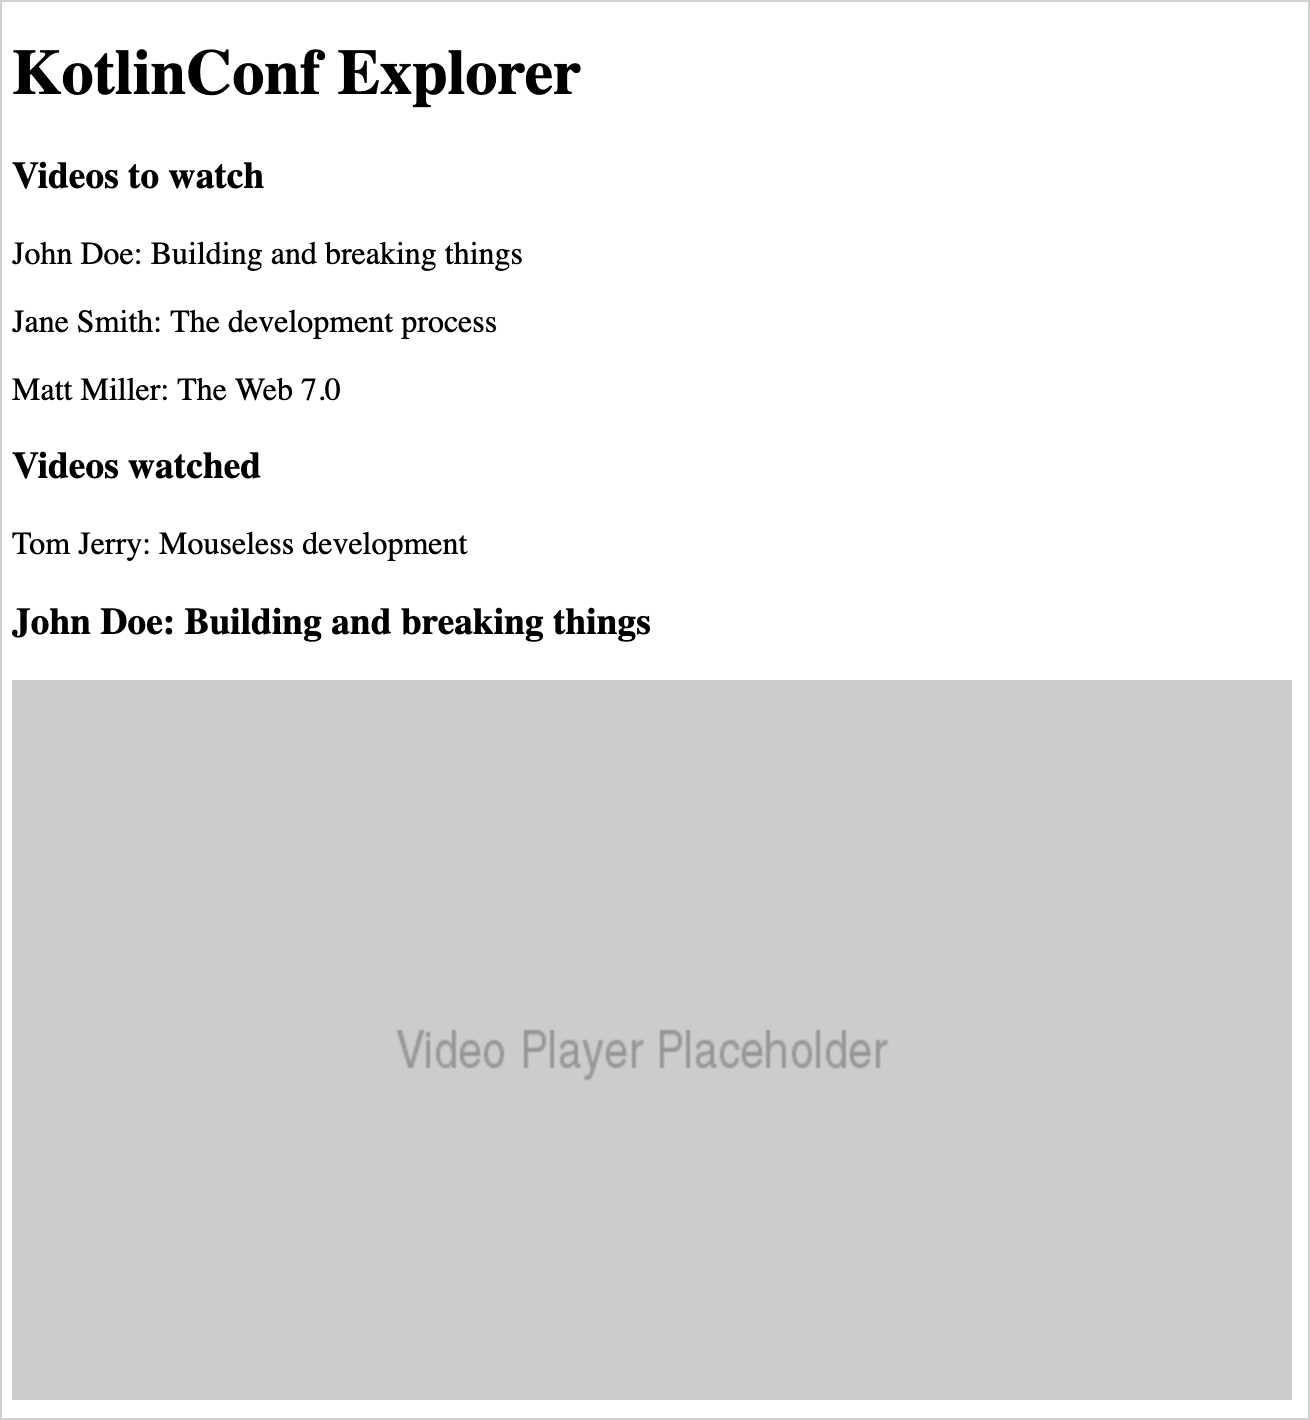
Wait for the browser to reload. The page should now look like this:
Add videos using Kotlin constructs in markup
There are some advantages to writing HTML in Kotlin using this DSL. You can manipulate your app using regular Kotlin constructs, like loops, conditions, collections, and string interpolation.
You can now replace the hardcoded list of videos with a list of Kotlin objects:
In
Main.kt, create aVideodata class to keep all video attributes in one place:data class Video( val id: Int, val title: String, val speaker: String, val videoUrl: String )Fill up the two lists, for unwatched videos and watched videos, respectively. Add these declarations at file-level in
Main.kt:val unwatchedVideos = listOf( Video(1, "Opening Keynote", "Andrey Breslav", "https://youtu.be/PsaFVLr8t4E"), Video(2, "Dissecting the stdlib", "Huyen Tue Dao", "https://youtu.be/Fzt_9I733Yg"), Video(3, "Kotlin and Spring Boot", "Nicolas Frankel", "https://youtu.be/pSiZVAeReeg") ) val watchedVideos = listOf( Video(4, "Creating Internal DSLs in Kotlin", "Venkat Subramaniam", "https://youtu.be/JzTeAM8N1-o") )To use these videos on the page, write a Kotlin
forloop to iterate over the collection of unwatchedVideoobjects. Replace the threeptags under "Videos to watch" with the following snippet:for (video in unwatchedVideos) { p { +"${video.speaker}: ${video.title}" } }Apply the same process to modify the code for the single tag following "Videos watched" as well:
for (video in watchedVideos) { p { +"${video.speaker}: ${video.title}" } }
Wait for the browser to reload. The layout should stay the same as before. You can add some more videos to the list to make sure that the loop is working.
Add styles with typesafe CSS
The kotlin-emotion wrapper for the Emotion library makes it possible to specify CSS attributes – even dynamic ones – right alongside HTML with JavaScript. Conceptually, that makes it similar to CSS-in-JS – but for Kotlin. The benefit of using a DSL is that you can use Kotlin code constructs to express formatting rules.
The template project for this tutorial already includes the dependency needed to use kotlin-emotion:
With kotlin-emotion, you can specify a css block inside HTML elements div and h3, where you can define the styles.
To move the video player to the top right-hand corner of the page, use CSS and adjust the code for the video player (the last div in the snippet):
Feel free to experiment with some other styles. For example, you could change the fontFamily or add some color to your UI.
Design app components
The basic building blocks in React are called components. Components themselves can also be composed of other, smaller components. By combining components, you build your application. If you structure components to be generic and reusable, you'll be able to use them in multiple parts of the app without duplicating code or logic.
The content of the render() function generally describes a basic component. The current layout of your application looks like this:
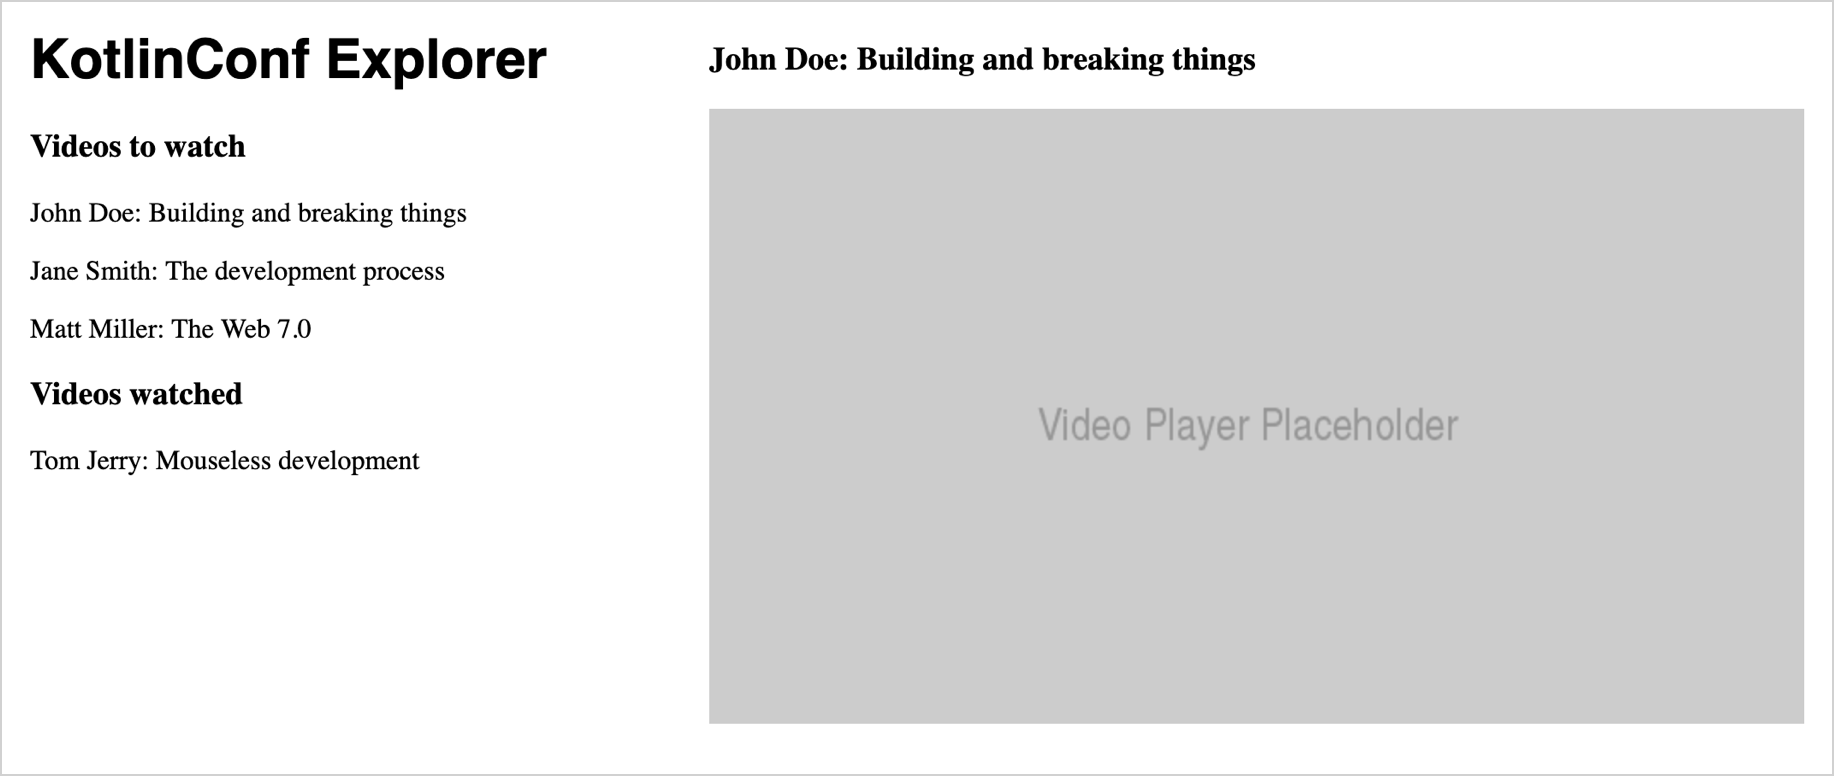
If you decompose your application into individual components, you'll end up with a more structured layout in which each component handles its responsibilities:
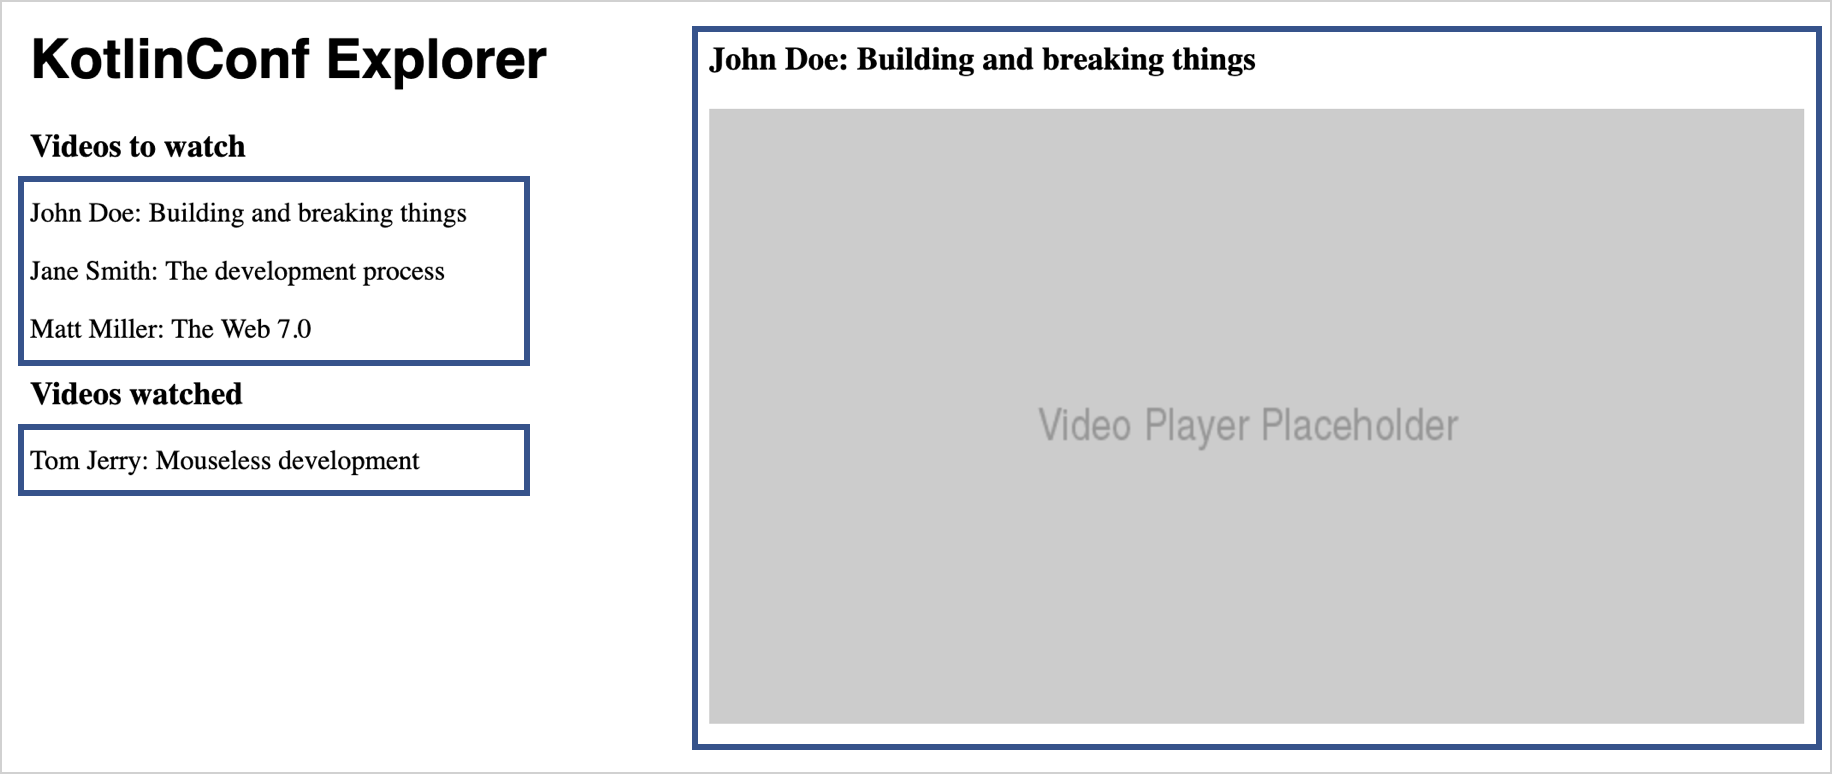
Components encapsulate a particular functionality. Using components shortens source code and makes it easier to read and understand.
Add the main component
To start creating the application's structure, first explicitly specify App, the main component for rendering to the rootelement:
Create a new
App.ktfile in thesrc/jsMain/kotlinfolder.Inside this file, add the following snippet and move the typesafe HTML from
Main.ktinto it:import kotlinx.coroutines.async import react.* import react.dom.* import kotlinx.browser.window import kotlinx.coroutines.* import kotlinx.serialization.decodeFromString import kotlinx.serialization.json.Json import emotion.react.css import csstype.Position import csstype.px import react.dom.html.ReactHTML.h1 import react.dom.html.ReactHTML.h3 import react.dom.html.ReactHTML.div import react.dom.html.ReactHTML.p import react.dom.html.ReactHTML.img val App = FC<Props> { // typesafe HTML goes here, starting with the first h1 tag! }The
FCfunction creates a function component.In the
Main.ktfile, update themain()function as follows:fun main() { val container = document.getElementById("root") ?: error("Couldn't find root container!") createRoot(container).render(App.create()) }Now the program creates an instance of the
Appcomponent and renders it to the specified container.
For more information about React concepts, see the documentation and guides.
Extract a list component
Since the watchedVideos and unwatchedVideos lists each contain a list of videos, it makes sense to create a single reusable component, and only adjust the content displayed in the lists.
The VideoList component follows the same pattern as the App component. It uses the FC builder function, and contains the code from the unwatchedVideos list.
Create a new
VideoList.ktfile in thesrc/jsMain/kotlinfolder and add the following code:import kotlinx.browser.window import react.* import react.dom.* import react.dom.html.ReactHTML.p val VideoList = FC<Props> { for (video in unwatchedVideos) { p { +"${video.speaker}: ${video.title}" } } }In
App.kt, use theVideoListcomponent by invoking it without parameters:// . . . div { h3 { +"Videos to watch" } VideoList() h3 { +"Videos watched" } VideoList() } // . . .For now, the
Appcomponent has no control over the content that is shown by theVideoListcomponent. It's hard-coded, so you see the same list twice.
Add props to pass data between components
Since you're going to reuse the VideoList component, you'll need to be able to fill it with different content. You can add the ability to pass the list of items as an attribute to the component. In React, these attributes are called props. When the props of a component are changed in React, the framework automatically re-renders the component.
For VideoList, you'll need a prop containing the list of videos to be shown. Define an interface that holds all the props which can be passed to a VideoList component:
Add the following definition to the
VideoList.ktfile:external interface VideoListProps : Props { var videos: List<Video> }The external modifier tells the compiler that the interface's implementation is provided externally, so it doesn't try to generate JavaScript code from the declaration.
Adjust the class definition of
VideoListto make use of the props that are passed into theFCblock as a parameter:val VideoList = FC<VideoListProps> { props -> for (video in props.videos) { p { key = video.id.toString() +"${video.speaker}: ${video.title}" } } }The
keyattribute helps the React renderer figure out what to do when the value ofprops.videoschanges. It uses the key to determine which parts of a list need to be refreshed and which ones stay the same. You can find more information about lists and keys in the React guide.In the
Appcomponent, make sure that the child components are instantiated with the proper attributes. InApp.kt, replace the two loops underneath theh3elements with an invocation ofVideoListtogether with the attributes forunwatchedVideosandwatchedVideos. In the Kotlin DSL, you assign them inside a block belonging to theVideoListcomponent:h3 { +"Videos to watch" } VideoList { videos = unwatchedVideos } h3 { +"Videos watched" } VideoList { videos = watchedVideos }
After a reload, the browser will show that the lists now render correctly.
Make the list interactive
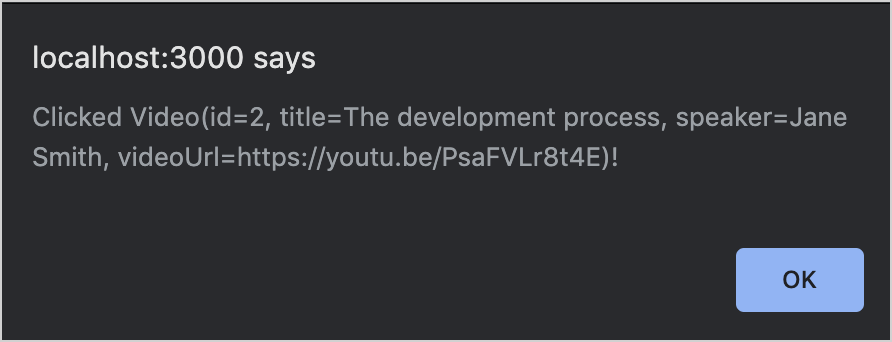
First, add an alert message that pops up when users click on a list entry. In VideoList.kt, add an onClick handler function that triggers an alert with the current video:
If you click on one of the list items in the browser window, you'll get information about the video in an alert window like this:
Add state to keep values
Instead of just alerting the user, you can add some functionality for highlighting the selected video with a ▶ triangle. To do that, introduce some state specific to this component.
State is one of the core concepts in React. In modern React (which uses the so-called Hooks API), state is expressed using the useState hook.
Add the following code to the top of the
VideoListdeclaration:val VideoList = FC<VideoListProps> { props -> var selectedVideo: Video? by useState(null) // . . .The
VideoListfunctional component keeps state (a value that is independent of the current function invocation). State is nullable, and has theVideo?type. Its default value isnull.The
useState()function from React instructs the framework to keep track of state across multiple invocations of the function. For example, even though you specify a default value, React makes sure that the default value is only assigned in the beginning. When state changes, the component will re-render based on the new state.The
bykeyword indicates thatuseState()acts as a delegated property. Like with any other variable, you read and write values. The implementation behinduseState()takes care of the machinery required to make state work.
To learn more about the State Hook, check out the React documentation.
Change the
onClickhandler and the text in theVideoListcomponent to look as follows:val VideoList = FC<VideoListProps> { props -> var selectedVideo: Video? by useState(null) for (video in props.videos) { p { key = video.id.toString() onClick = { selectedVideo = video } if (video == selectedVideo) { +"▶ " } +"${video.speaker}: ${video.title}" } } }When the user clicks a video, its value is assigned to the
selectedVideovariable.When the selected list entry is rendered, the triangle is prepended.
You can find more details about state management in the React FAQ.
Check the browser and click an item in the list to make sure that everything is working correctly.
Compose components
Currently, the two video lists work on their own, meaning that each list keeps track of a selected video. Users can select two videos, one in the unwatched list and one in watched, even though there's only one player:
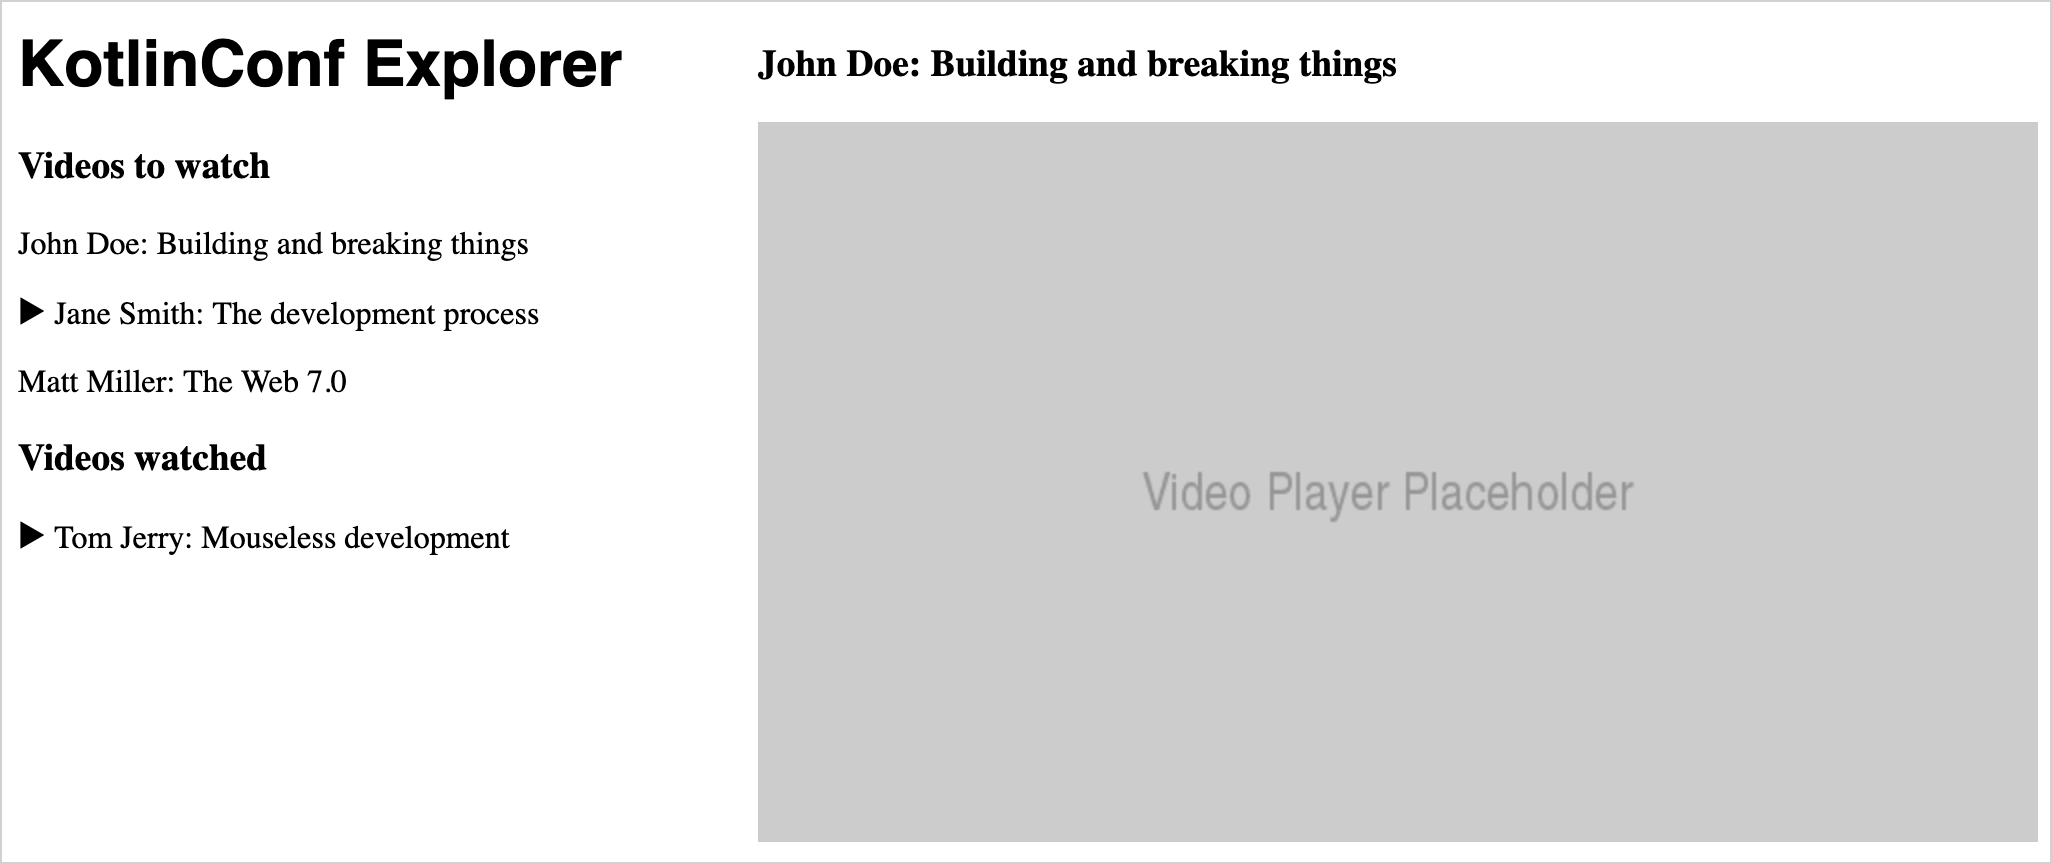
A list can't keep track of which video is selected both inside itself, and inside a sibling list. The reason is that the selected video is part not of the list state, but of the application state. This means you need to lift state out of the individual components.
Lift state
React makes sure that props can only be passed from a parent component to its children. This prevents components from being hard-wired together.
If a component wants to change state of a sibling component, it needs to do so via its parent. At that point, state also no longer belongs to any of the child components but to the overarching parent component.
The process of migrating state from components to their parents is called lifting state. For your app, add currentVideo as state to the App component:
In
App.kt, add the following to the top of the definition of theAppcomponent:val App = FC<Props> { var currentVideo: Video? by useState(null) // . . . }The
VideoListcomponent no longer needs to keep track of state. It will receive the current video as a prop instead.Remove the
useState()call inVideoList.kt.Prepare the
VideoListcomponent to receive the selected video as a prop. To do so, expand theVideoListPropsinterface to contain theselectedVideo:external interface VideoListProps : Props { var videos: List<Video> var selectedVideo: Video? }Change the condition of the triangle so that it uses
propsinstead ofstate:if (video == props.selectedVideo) { +"▶ " }
Pass handlers
At the moment, there's no way to assign a value to a prop, so the onClick function won't work the way it is currently set up. To change state of a parent component, you need to lift state again.
In React, state always flows from parent to child. So, to change the application state from one of the child components, you need to move the logic for handling user interaction to the parent component and then pass the logic in as a prop. Remember that in Kotlin, variables can have the type of a function.
Expand the
VideoListPropsinterface again so that it contains a variableonSelectVideo, which is a function that takes aVideoand returnsUnit:external interface VideoListProps : Props { // ... var onSelectVideo: (Video) -> Unit }In the
VideoListcomponent, use the new prop in theonClickhandler:onClick = { props.onSelectVideo(video) }You can now delete the
selectedVideovariable from theVideoListcomponent.Go back to the
Appcomponent and passselectedVideoand a handler foronSelectVideofor each of the two video lists:VideoList { videos = unwatchedVideos // and watchedVideos respectively selectedVideo = currentVideo onSelectVideo = { video -> currentVideo = video } }Repeat the previous step for the watched videos list.
Switch back to your browser and make sure that when selecting a video the selection jumps between the two lists without duplication.
Add more components
Extract the video player component
You can now create another self-contained component, a video player, which is currently a placeholder image. Your video player needs to know the talk title, the author of the talk, and the link to the video. This information is already contained in each Video object, so you can pass it as a prop and access its attributes.
Create a new
VideoPlayer.ktfile and add the following implementation for theVideoPlayercomponent:import csstype.* import react.* import emotion.react.css import react.dom.html.ReactHTML.button import react.dom.html.ReactHTML.div import react.dom.html.ReactHTML.h3 import react.dom.html.ReactHTML.img external interface VideoPlayerProps : Props { var video: Video } val VideoPlayer = FC<VideoPlayerProps> { props -> div { css { position = Position.absolute top = 10.px right = 10.px } h3 { +"${props.video.speaker}: ${props.video.title}" } img { src = "https://via.placeholder.com/640x360.png?text=Video+Player+Placeholder" } } }Because the
VideoPlayerPropsinterface specifies that theVideoPlayercomponent takes a non-nullableVideo, make sure to handle this in theAppcomponent accordingly.In
App.kt, replace the previousdivsnippet for the video player with the following:currentVideo?.let { curr -> VideoPlayer { video = curr } }The
letscope function ensures that theVideoPlayercomponent is only added whenstate.currentVideois not null.
Now clicking an entry in the list will bring up the video player and populate it with the information from the clicked entry.
Add a button and wire it
To make it possible for users to mark a video as watched or unwatched and to move it between the two lists, add a button to the VideoPlayer component.
Since this button will move videos between two different lists, the logic handling state change needs to be lifted out of the VideoPlayer and passed in from the parent as a prop. The button should look different based on whether the video has been watched or not. This is also information you need to pass as a prop.
Expand the
VideoPlayerPropsinterface inVideoPlayer.ktto include properties for those two cases:external interface VideoPlayerProps : Props { var video: Video var onWatchedButtonPressed: (Video) -> Unit var unwatchedVideo: Boolean }You can now add the button to the actual component. Copy the following snippet into the body of the
VideoPlayercomponent, between theh3andimgtags:button { css { display = Display.block backgroundColor = if (props.unwatchedVideo) NamedColor.lightgreen else NamedColor.red } onClick = { props.onWatchedButtonPressed(props.video) } if (props.unwatchedVideo) { +"Mark as watched" } else { +"Mark as unwatched" } }With the help of Kotlin CSS DSL that make it possible to change styles dynamically, you can change the color of the button using a basic Kotlin
ifexpression.
Move video lists to the application state
Now it's time to adjust the VideoPlayer usage site in the App component. When the button is clicked, a video should be moved from the unwatched list to the watched list or vice versa. Since these lists can now actually change, move them into the application state:
In
App.kt, add the following properties withuseState()calls to the top of theAppcomponent:val App = FC<Props> { var currentVideo: Video? by useState(null) var unwatchedVideos: List<Video> by useState(listOf( Video(1, "Opening Keynote", "Andrey Breslav", "https://youtu.be/PsaFVLr8t4E"), Video(2, "Dissecting the stdlib", "Huyen Tue Dao", "https://youtu.be/Fzt_9I733Yg"), Video(3, "Kotlin and Spring Boot", "Nicolas Frankel", "https://youtu.be/pSiZVAeReeg") )) var watchedVideos: List<Video> by useState(listOf( Video(4, "Creating Internal DSLs in Kotlin", "Venkat Subramaniam", "https://youtu.be/JzTeAM8N1-o") )) // . . . }Since all the demo data is included in the default values for
watchedVideosandunwatchedVideosdirectly, you no longer need the file-level declarations. InMain.kt, delete the declarations forwatchedVideosandunwatchedVideos.Change the call-site for
VideoPlayerin theAppcomponent that belongs to the video player to look like this:VideoPlayer { video = curr unwatchedVideo = curr in unwatchedVideos onWatchedButtonPressed = { if (video in unwatchedVideos) { unwatchedVideos = unwatchedVideos - video watchedVideos = watchedVideos + video } else { watchedVideos = watchedVideos - video unwatchedVideos = unwatchedVideos + video } } }
Go back to the browser, select a video, and press the button a few times. The video will jump between the two lists.
Use packages from npm
To make the app usable, you still need a video player that actually plays videos and some buttons to help people share the content.
React has a rich ecosystem with a lot of pre-made components you can use instead of building this functionality yourself.
Add the video player component
To replace the placeholder video component with an actual YouTube player, use the react-player package from npm. It can play videos and allows you to control the appearance of the player.
For the component documentation and the API description, see its README in GitHub.
Check the
build.gradle.ktsfile. Thereact-playerpackage should be already included:dependencies { // ... // Video Player implementation(npm("react-player", "2.12.0")) // ... }As you can see, npm dependencies can be added to a Kotlin/JS project by using the
npm()function in thedependenciesblock of the build file. The Gradle plugin then takes care of downloading and installing these dependencies for you. To do so, it uses its own bundled installation of the Yarn package manager.To use the JavaScript package from inside the React application, it's necessary to tell the Kotlin compiler what to expect by providing it with external declarations.
Create a new
ReactYouTube.ktfile and add the following content:@file:JsModule("react-player") @file:JsNonModule import react.* @JsName("default") external val ReactPlayer: ComponentClass<dynamic>When the compiler sees an external declaration like
ReactPlayer, it assumes that the implementation for the corresponding class is provided by the dependency and doesn't generate code for it.The last two lines are equivalent to a JavaScript import like
require("react-player").default;. They tell the compiler that it's certain that a component will conform toComponentClass<dynamic>at runtime.
However, in this configuration, the generic type for the props accepted by ReactPlayer is set to dynamic. That means the compiler will accept any code, at the risk of breaking things at runtime.
A better alternative is to create an external interface that specifies what kind of properties belong to the props for this external component. You can learn about the props' interface in the README for the component. In this case, use the url and controls props:
Adjust the content of
ReactYouTube.ktby replacingdynamicwith an external interface:@file:JsModule("react-player") @file:JsNonModule import react.* @JsName("default") external val ReactPlayer: ComponentClass<ReactPlayerProps> external interface ReactPlayerProps : Props { var url: String var controls: Boolean }You can now use the new
ReactPlayerto replace the gray placeholder rectangle in theVideoPlayercomponent. InVideoPlayer.kt, replace theimgtag with the following snippet:ReactPlayer { url = props.video.videoUrl controls = true }
Add social share buttons
An easy way to share the application's content is to have social share buttons for messengers and email. You can use an off-the-shelf React component for this as well, for example, react-share:
Check the
build.gradle.ktsfile. This npm library should already be included:dependencies { // ... // Share Buttons implementation(npm("react-share", "4.4.1")) // ... }To use
react-sharefrom Kotlin, you'll need to write more basic external declarations. The examples on GitHub show that a share button consists of two React components:EmailShareButtonandEmailIcon, for example. Different types of share buttons and icons all have the same kind of interface. You'll create the external declarations for each component the same way you already did for the video player.Add the following code to a new
ReactShare.ktfile:@file:JsModule("react-share") @file:JsNonModule import react.ComponentClass import react.Props @JsName("EmailIcon") external val EmailIcon: ComponentClass<IconProps> @JsName("EmailShareButton") external val EmailShareButton: ComponentClass<ShareButtonProps> @JsName("TelegramIcon") external val TelegramIcon: ComponentClass<IconProps> @JsName("TelegramShareButton") external val TelegramShareButton: ComponentClass<ShareButtonProps> external interface ShareButtonProps : Props { var url: String } external interface IconProps : Props { var size: Int var round: Boolean }Add new components into the user interface of the application. In
VideoPlayer.kt, add two share buttons in adivright above the usage ofReactPlayer:// . . . div { css { position = Position.absolute top = 10.px right = 10.px } EmailShareButton { url = props.video.videoUrl EmailIcon { size = 32 round = true } } TelegramShareButton { url = props.video.videoUrl TelegramIcon { size = 32 round = true } } } // . . .
You can now check your browser and see whether the buttons actually work. When clicking on the button, a share window should appear with the URL of the video. If the buttons don't show up or work, you may need to disable your ad and social media blocker.
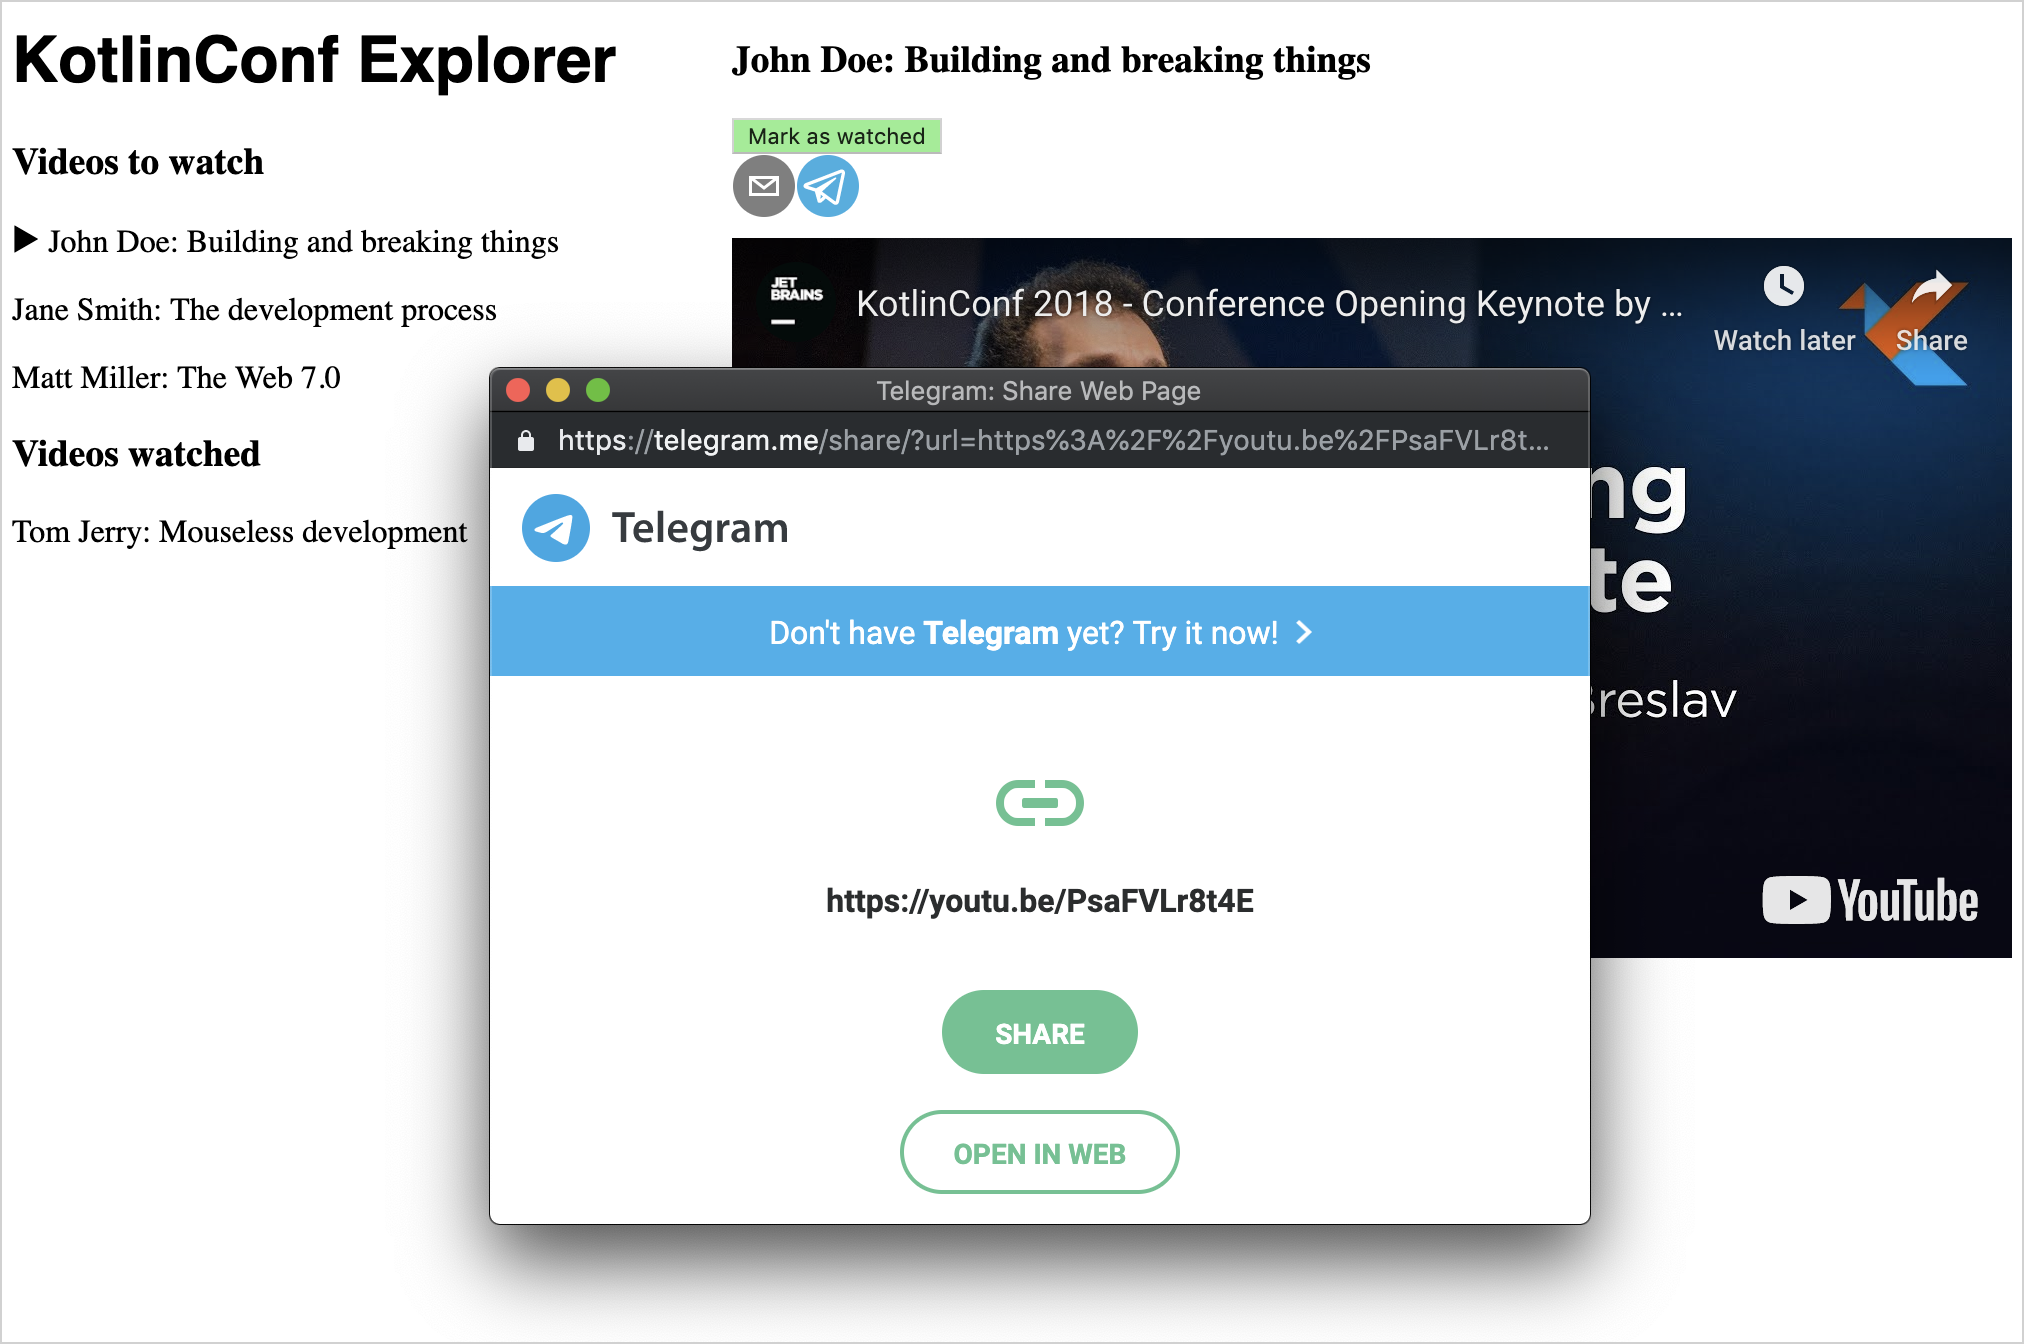
Feel free to repeat this step with share buttons for other social networks available in react-share.
Use an external REST API
You can now replace the hard-coded demo data with some real data from a REST API in the app.
For this tutorial, there's a small API. It offers only a single endpoint, videos, and takes a numeric parameter to access an element from the list. If you visit the API with your browser, you will see that the objects returned from the API have the same structure as Video objects.
Use JS functionality from Kotlin
Browsers already come with a large variety of Web APIs. You can also use them from Kotlin/JS, since it includes wrappers for these APIs out of the box. One example is the fetch API, which is used for making HTTP requests.
The first potential issue is that browser APIs like fetch() use callbacks to perform non-blocking operations. When multiple callbacks are supposed to run one after the other, they need to be nested. Naturally, the code gets heavily indented, with more and more pieces of functionality stacked inside each other, which makes it harder to read.
To overcome this, you can use Kotlin's coroutines, a better approach for such functionality.
The second issue arises from the dynamically typed nature of JavaScript. There are no guarantees about the type of data returned from the external API. To solve this, you can use the kotlinx.serialization library.
Check the build.gradle.kts file. The relevant snippet should already exist:
Add serialization
When you call an external API, you get back JSON-formatted text that still needs to be turned into a Kotlin object that can be worked with.
kotlinx.serialization is a library that makes it possible to write these types of conversions from JSON strings to Kotlin objects.
Check the
build.gradle.ktsfile. The corresponding snippet should already exist:plugins { // . . . kotlin("plugin.serialization") version "2.3.10" } dependencies { // . . . // Serialization implementation("org.jetbrains.kotlinx:kotlinx-serialization-json:1.5.0") }As preparation for fetching the first video, it's necessary to tell the serialization library about the
Videoclass. InMain.kt, add the@Serializableannotation to its definition:@Serializable data class Video( val id: Int, val title: String, val speaker: String, val videoUrl: String )
Fetch videos
To fetch a video from the API, add the following function in App.kt (or a new file):
Suspending function
fetch()fetches a video with a givenidfrom the API. This response may take a while, so youawait()the result. Next,text(), which uses a callback, reads the body from the response. Then youawait()its completion.Before returning the value of the function, you pass it to
Json.decodeFromString, a function fromkotlinx.coroutines. It converts the JSON text you received from the request into a Kotlin object with the appropriate fields.The
window.fetchfunction call returns aPromiseobject. You normally would have to define a callback handler that gets invoked once thePromiseis resolved and a result is available. However, with coroutines, you canawait()those promises. Whenever a function likeawait()is called, the method stops (suspends) its execution. Its execution continues once thePromisecan be resolved.
To give users a selection of videos, define the fetchVideos() function, which will fetch 25 videos from the same API as above. To run all the requests concurrently, use the async functionality provided by Kotlin's coroutines:
Add the following implementation to your
App.kt:suspend fun fetchVideos(): List<Video> = coroutineScope { (1..25).map { id -> async { fetchVideo(id) } }.awaitAll() }Following the principle of structured concurrency, the implementation is wrapped in a
coroutineScope. You can then start 25 asynchronous tasks (one per request) and wait for all of them to complete.You can now add data to your application. Add the definition for a
mainScope, and change yourAppcomponent so it starts with the following snippet. Don't forget to replace demo values withemptyListsinstances as well:val mainScope = MainScope() val App = FC<Props> { var currentVideo: Video? by useState(null) var unwatchedVideos: List<Video> by useState(emptyList()) var watchedVideos: List<Video> by useState(emptyList()) useEffectOnce { mainScope.launch { unwatchedVideos = fetchVideos() } } // . . .The
MainScope()is a part of Kotlin's structured concurrency model and creates the scope for asynchronous tasks to run in.useEffectOnceis another React hook (specifically, a simplified version of the useEffect hook). It indicates that the component performs a side effect. It doesn't just render itself but also communicates over the network.
Check your browser. The application should show actual data:
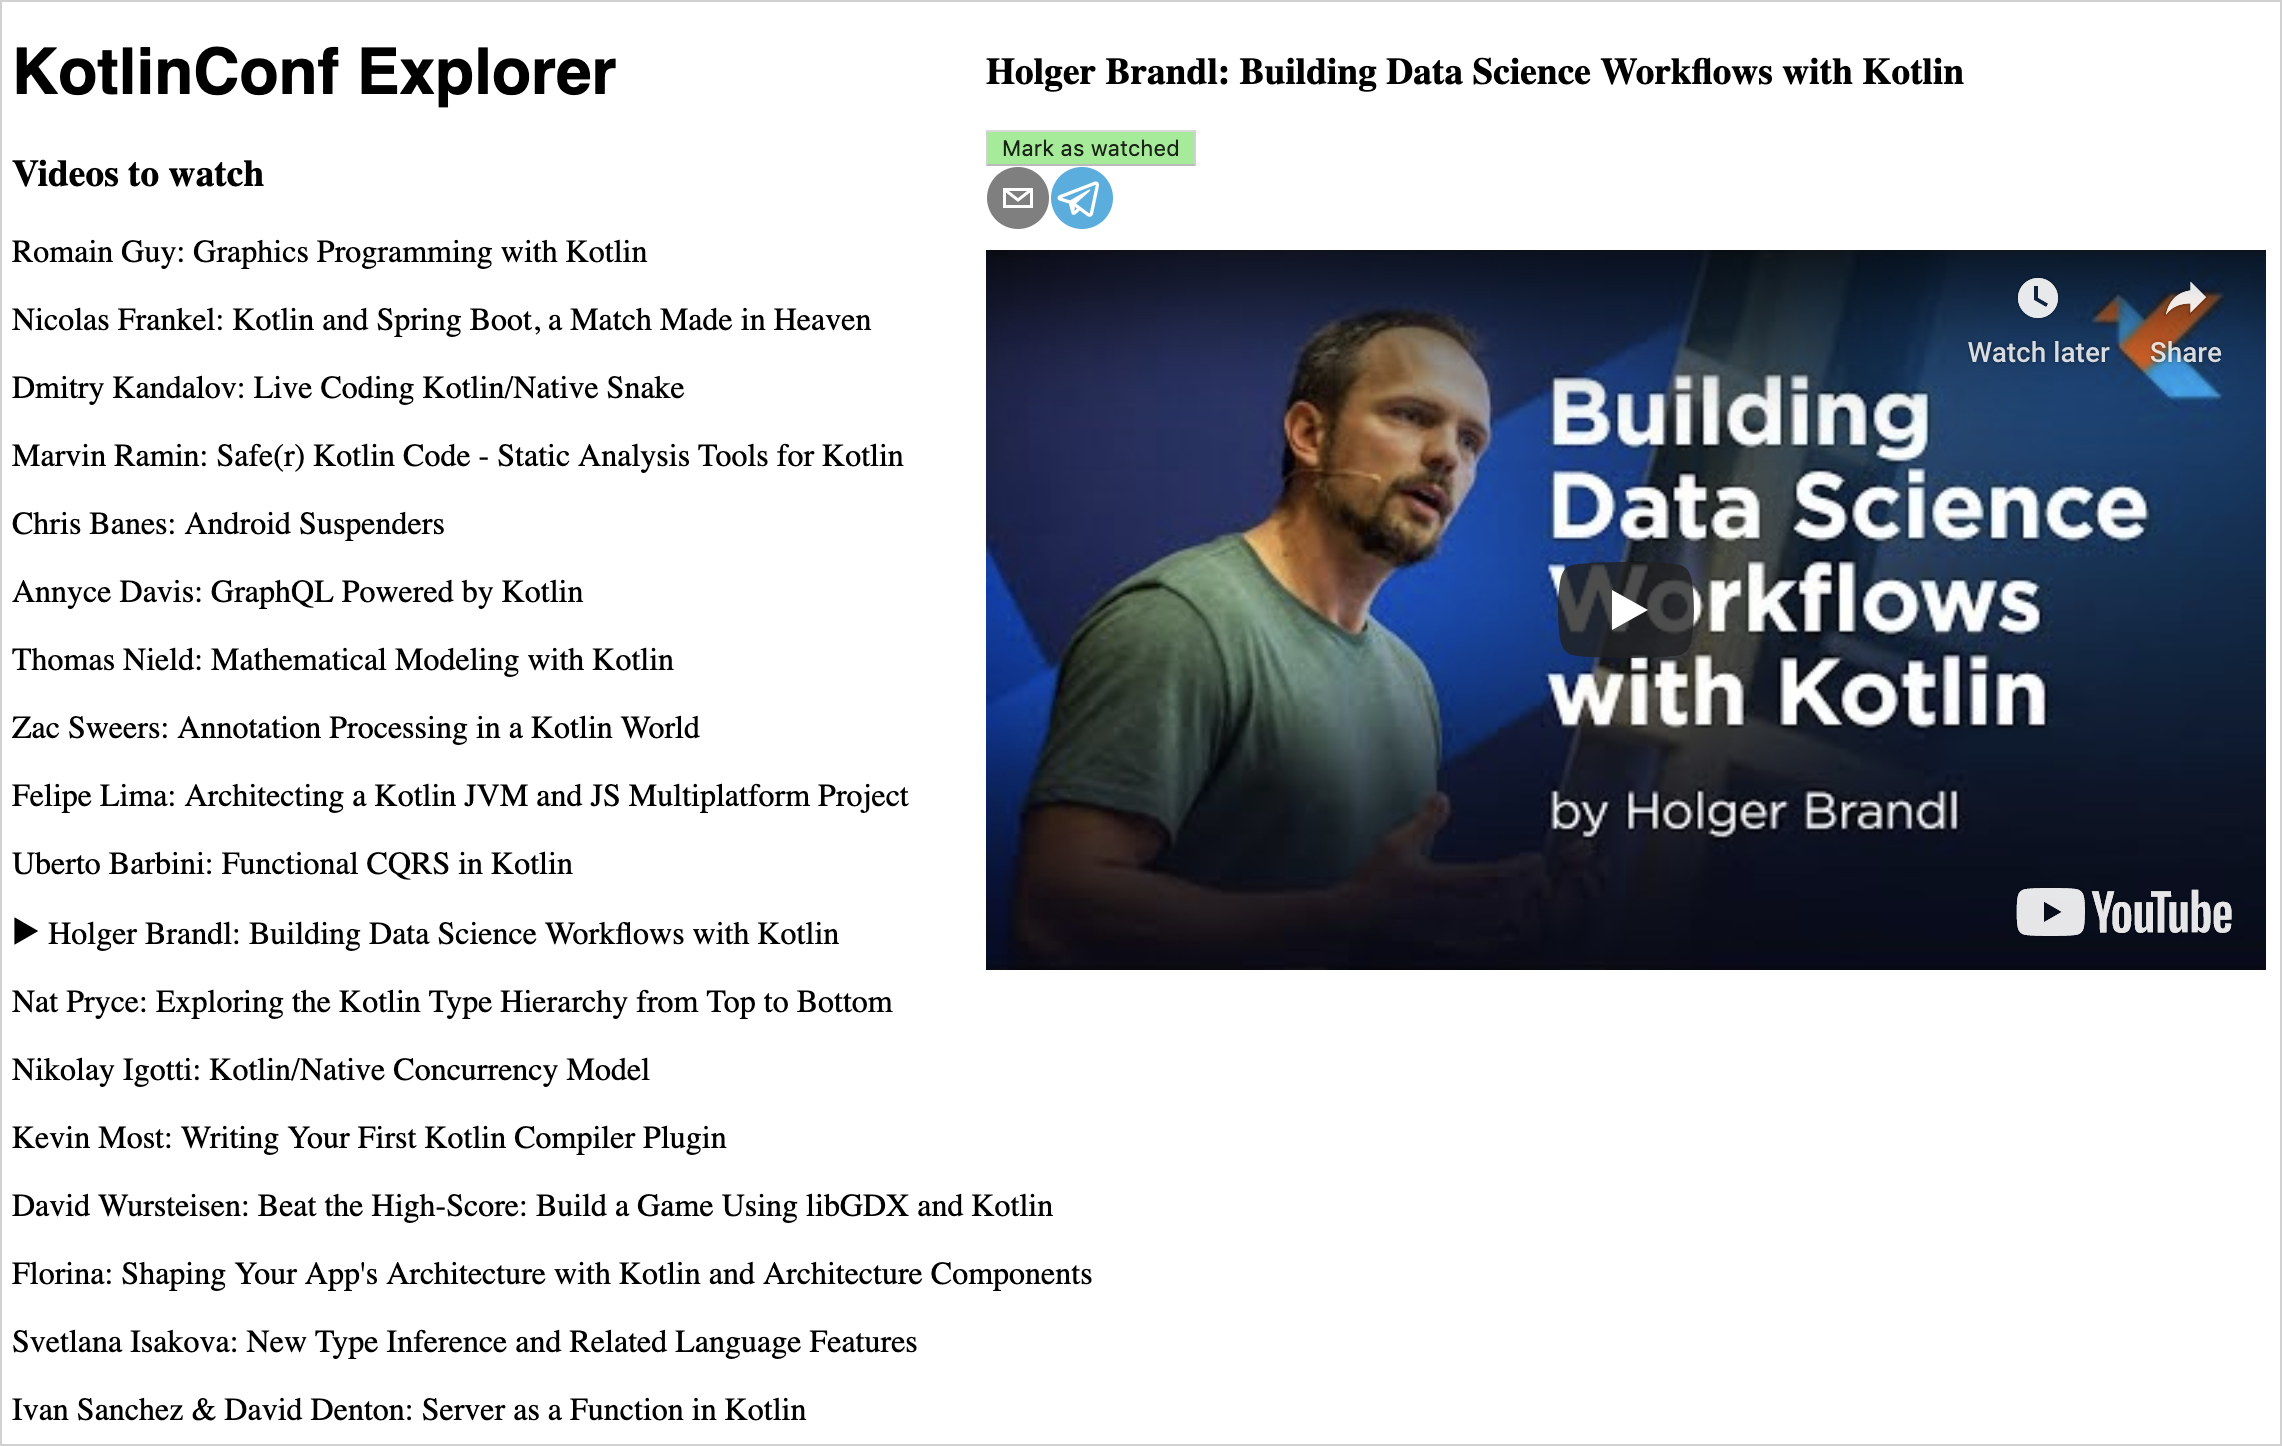
When you load the page:
The code of the
Appcomponent will be invoked. This starts the code in theuseEffectOnceblock.The
Appcomponent is rendered with empty lists for the watched and unwatched videos.When the API requests finish, the
useEffectOnceblock assigns it to theAppcomponent's state. This triggers a re-render.The code of the
Appcomponent will be invoked again, but theuseEffectOnceblock will not run for a second time.
If you want to get an in-depth understanding of how coroutines work, check out this tutorial on coroutines.
Deploy to production and the cloud
It's time to get the application published to the cloud and make it accessible to other people.
Package a production build
To package all assets in production mode, run the build task in Gradle via the tool window in IntelliJ IDEA or by running ./gradlew build. This generates an optimized project build, applying various improvements such as DCE (dead code elimination).
Once the build has finished, you can find all the files needed for deployment in /build/dist. They include the JavaScript files, HTML files, and other resources required to run the application. You can put them on a static HTTP server, serve them using GitHub Pages, or host them on a cloud provider of your choice.
Deploy to Heroku
Heroku makes it quite simple to spin up an application that is reachable under its own domain. Their free tier should be sufficient for development purposes.
Create a Git repository and attach a Heroku app by running the following commands in the Terminal while in the project root:
git init heroku create git add . git commit -m "initial commit"Unlike a regular JVM application that would run on Heroku (one written with Ktor or Spring Boot, for example), your app generates static HTML pages and JavaScript files that need to be served accordingly. You can adjust the required buildpacks to serve the program properly:
heroku buildpacks:set heroku/gradle heroku buildpacks:add https://github.com/heroku/heroku-buildpack-static.gitTo allow the
heroku/gradlebuildpack to run properly, astagetask needs to be in thebuild.gradle.ktsfile. This task is equivalent to thebuildtask, and the corresponding alias is already included at the bottom of the file:// Heroku Deployment tasks.register("stage") { dependsOn("build") }Add a new
static.jsonfile to the project root to configure thebuildpack-static.Add the
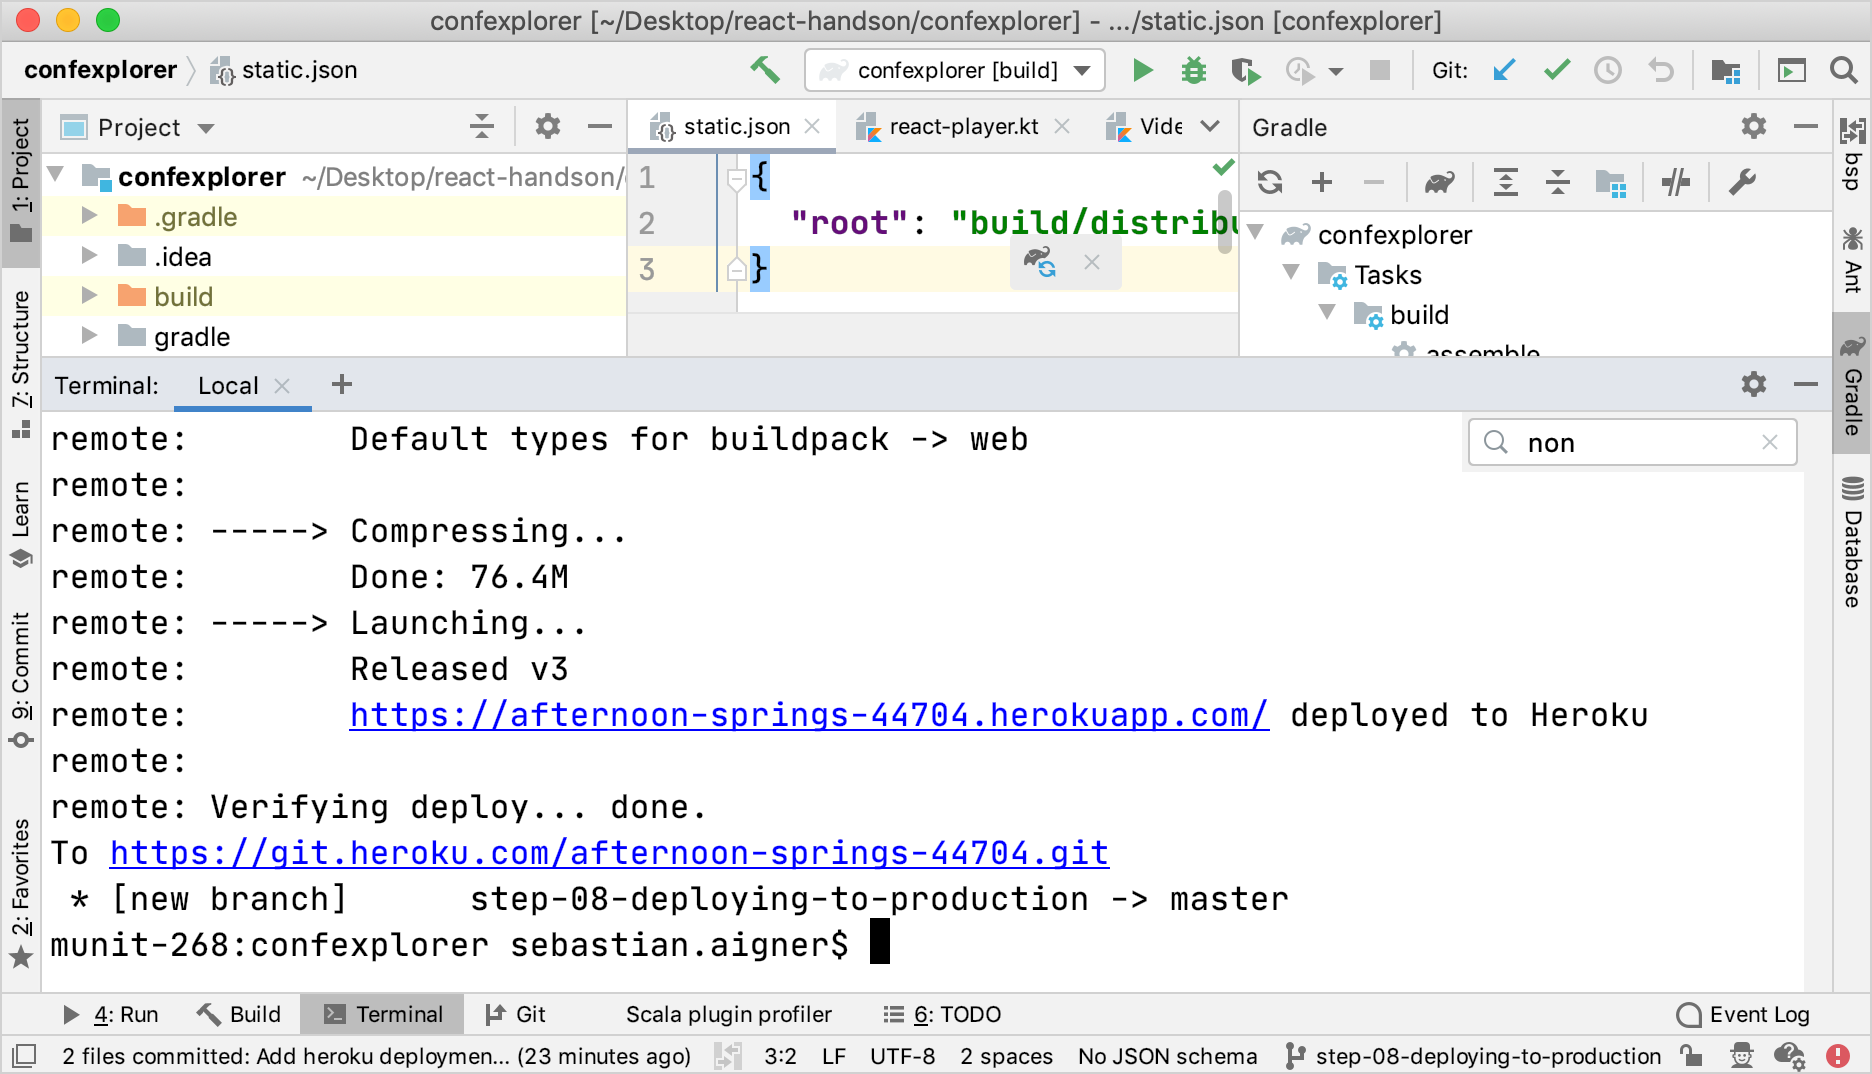
rootproperty inside the file:{ "root": "build/distributions" }You can now trigger a deployment, for example, by running the following command:
git add -A git commit -m "add stage task and static content root configuration" git push heroku master
If the deployment is successful, you will see the URL people can use to reach the application on the internet.
What's next
Add more features
You can use the resulting app as a jumping-off point to explore more advanced topics in the realm of React, Kotlin/JS, and more.
Search. You can add a search field to filter the list of talks – by title or by author, for example. Learn about how HTML form elements work in React.
Persistence. Currently, the application loses track of the viewer's watch list every time the page gets reloaded. Consider building your own backend, using one of the web frameworks available for Kotlin (such as Ktor). Alternatively, look into ways to store information on the client.
Complex APIs. Lots of datasets and APIs are available. You can pull all sorts of data into your application. For example, you can build a visualizer for cat photos or a royalty-free stock photo API.
Improve the style: responsiveness and grids
The application design is still very simple and won't look great on mobile devices or in narrow windows. Explore more of the CSS DSL to make the app more accessible.
Join the community and get help
The best way to report problems and get help is the kotlin-wrappers issue tracker. If you can't find a ticket for your issue, feel free to file a new one. You can also join the official Kotlin Slack. There are channels for #javascript and #react.
Learn more about coroutines
If you're interested in finding out more about how you can write concurrent code, check out the tutorial on coroutines.
Learn more about React
Now that you know the basic React concepts and how they translate to Kotlin, you can convert some other concepts outlined in React's documentation into Kotlin.